

First, we begin with what a time lapse video is.
This is a video of a span of time which is compressed to a few seconds or minutes to observe a slow change in the setting. The best examples of time lapse videos (commonly called as simply timelapse) are the ones which show the making of huge structures or those of a day transitioning to night and vice versa.
Next, how do we make one.
Timelapse are basically made of multiple photos, taken over a long period of time, and then stitched back together to make a video. The speed of the video is set in such a manner so that the video appears to be fluid and the resultant time of the video becomes a few seconds.
For this to be done, we need a device which is capable of taking photos at a fixed interval. So, either a camera with built in option for interval shooting, or an intervalometer which can be coupled with the camera. Below are some photos and their explanation. The camera being used here is a Nikon D7200.

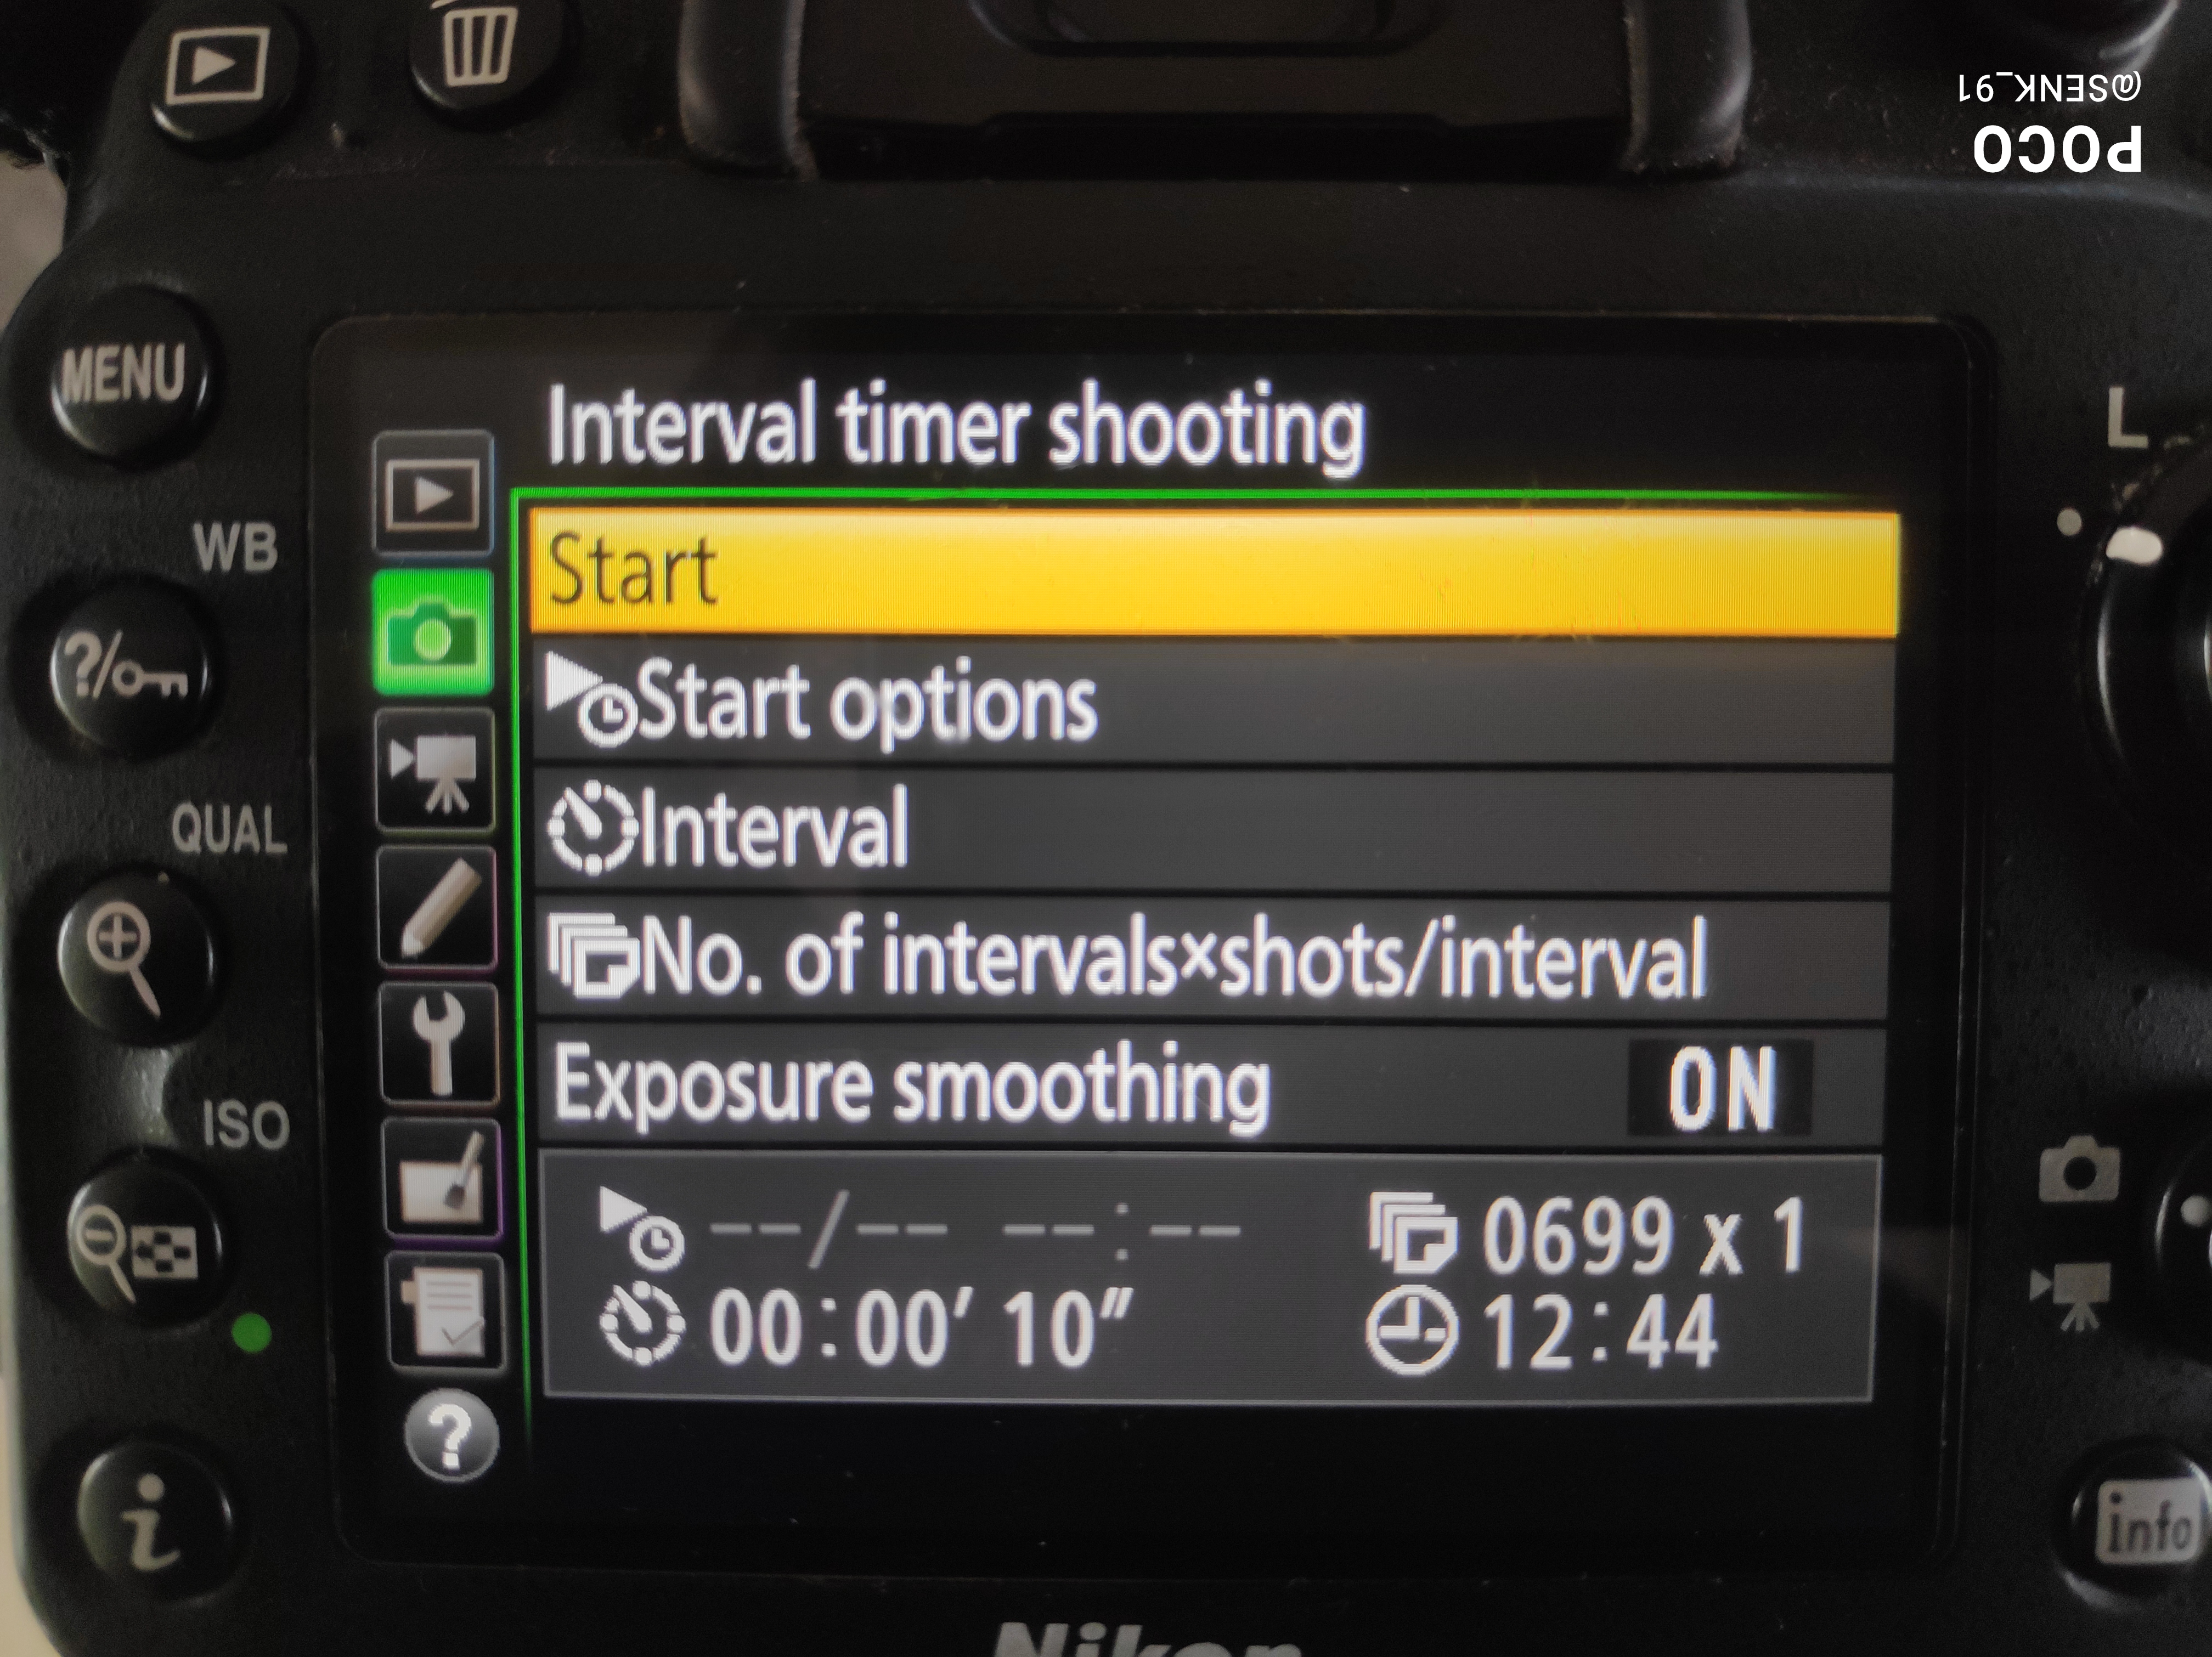
The photo above shows a setting where 699 photos shall be taken, with a 10 second interval between them. So, total exposure time is 6990 seconds. The setting can be done as shown in the below photos.

Interval timer shooting submenu 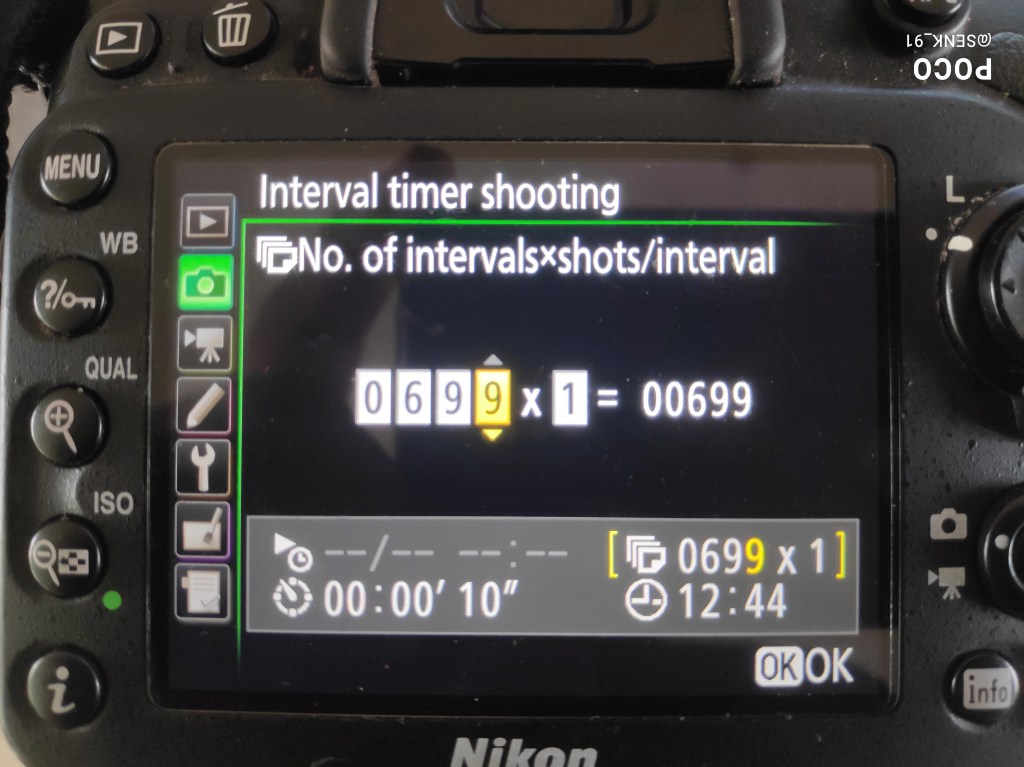
Interval timer shooting submenu 2
One should pay attention to the fact that using these settings you can change only the number of photos being taken, not the photo’s settings. So, the ISO, Aperture, Shutter Speed and Focus has to be set by the user first.
Once the number of photos are taken, they must be processed to produce a timelapse video. There are multiple options to achieve this. Quick google searches lead to many paid and free options easily and the instructions are quite straightforward.
A calculation must be understood here. The relation between the number of frames and resultant video.
In the case we have here, we have a total of 699 frames, over a span of 6990 seconds. For a smooth video, it must be played back at about 30 fps (frames per seconds). So, my resultant video is going to be approximately, 699/30 = 23.3 seconds long. So, I shall be representing 6990 seconds, i.e almost 2 hours worth of exposure in about 24 seconds.
Add a music to the video which is fitting to it, and Voila! You have your timelapse! Check out the one I made using the settings explained above.
Offcourse there are apps available now in which all you must do is set the phone at a particular location, dial in the time you want the resultant video to be, or the exposure time, and once the exposure is done, the app returns you a expertly made video. In fact, some DSLRs also come with this option of inbuilt timelapse. Mine comes with the interval timer option only. Anyway, I hope the post is useful to anyone who wants to know about the wonderful thing a timelapse is.
Feel free to let me know of your thoughts in the comments below.
Till the next post,
Cheers!!
