It had been planned by the group that we must go on a trip. So, a group of about 40 photographers, varying from novices to professionals, we made our way towards Tamhini Ghat. About 60 kms out of Pune, this place is known for the lush greenery and the numerous waterfalls.
It is here, thanks to one of the members, that I got to use the Tamron 90mm macro lens for the first time, and I simply loved it. The lens is not a speedster at acquiring focus, true, but once you manage to focus it right, you are in for a treat. The following images ought to convince anyone who would be doubting whether or not to get a macro lens towards the lens.
Now, this lens can also be used for shooting the perfect frame too. Its all about how you choose to use it.
A huge thanks to the Pune Photography Lovers group for the trip. Special thanks to Medha for lending me the macro lens and to Rutuja for being my model 🙂
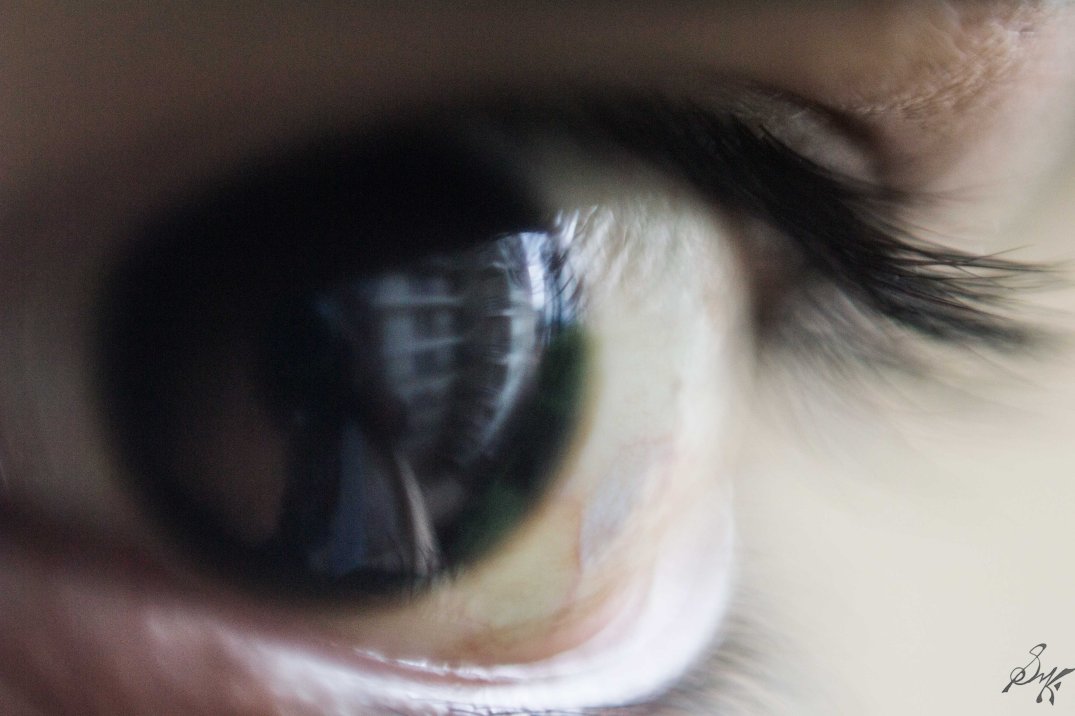
Eyes, are one of the most amazing of the many god gifted instruments to the mortals. And since we human beings are the curious and innovative kind, its just too much for us to not try making our own mechanical copies of it.
The original one
The mechanical one
The copy may not ever be better than the real one, but it sure as hell comes close to it 🙂
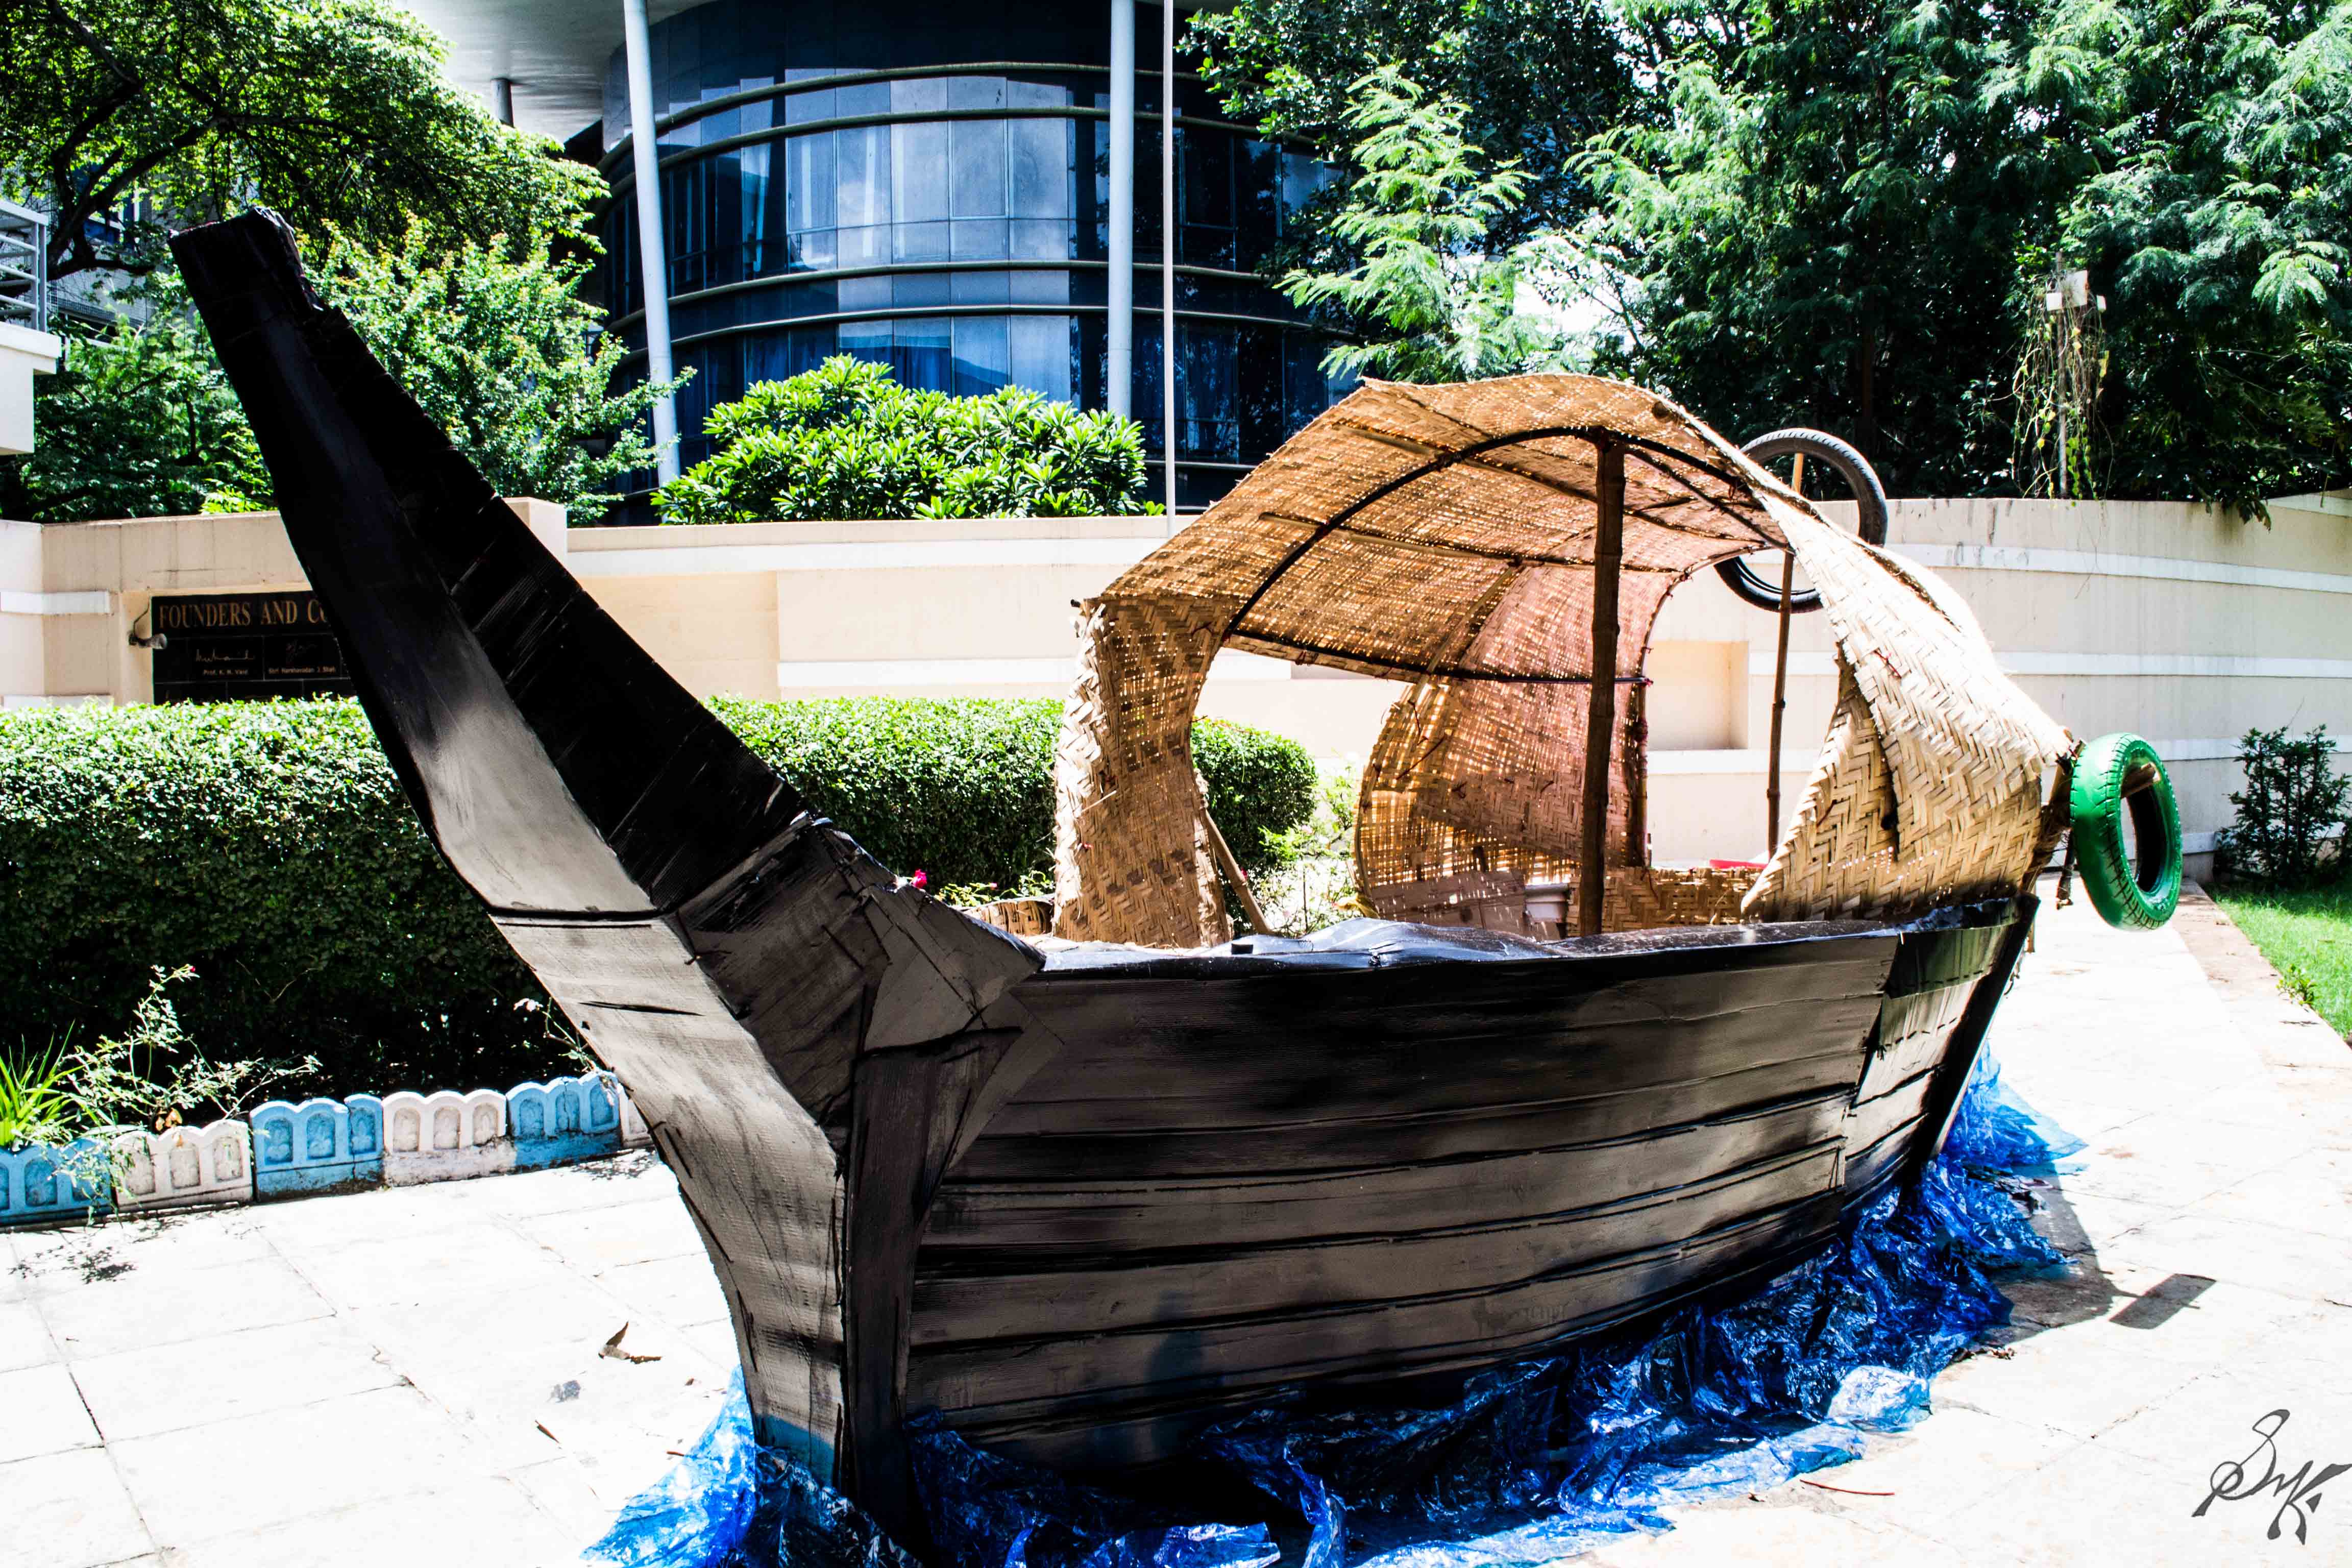
It is indeed true that with change in perspective, the feel of the object under inspection changes dramatically. True for all animate and inanimate objects. Here, my subject was the boat created by my fellow college mates for the Onam festival which was celebrated just a few days back. The change in angles, made quite some difference.
In terms of day to day photography, it reminds us to look from a perspective, that is not normal to us. Climb up high, get down low, or maybe, try the immensely used and re used, tilted shots. They come as a welcome refreshment to the photo styles we generally follow.
The normal, eye level shot
The one from below.The portrait shot
A plan for a trek to a nearby hill is on the chart. Hope it materializes soon. Till then..
Cheers!!
Photographs are generally classified on terms of locations, themes, stories they depict, subjects they focus on, so on and so forth. As the multitude of classifications exist, so are the personal favourites. My favourite is portrait.
The main objective of the portrait from my point of view is to portray certain emotion, or a certain feeling through the photo. My model should be the point of focus, and the emotions felt, the expressions emitted should be captured in the best of possibilities. If I manage to show to my audience, what my subject felt while the shot was taken, I feel, its a good portrait.
Today, I shall put down certain points which I feel are important while taking portraits. I keep these points in my mind while shooting and so far, they have served me well.
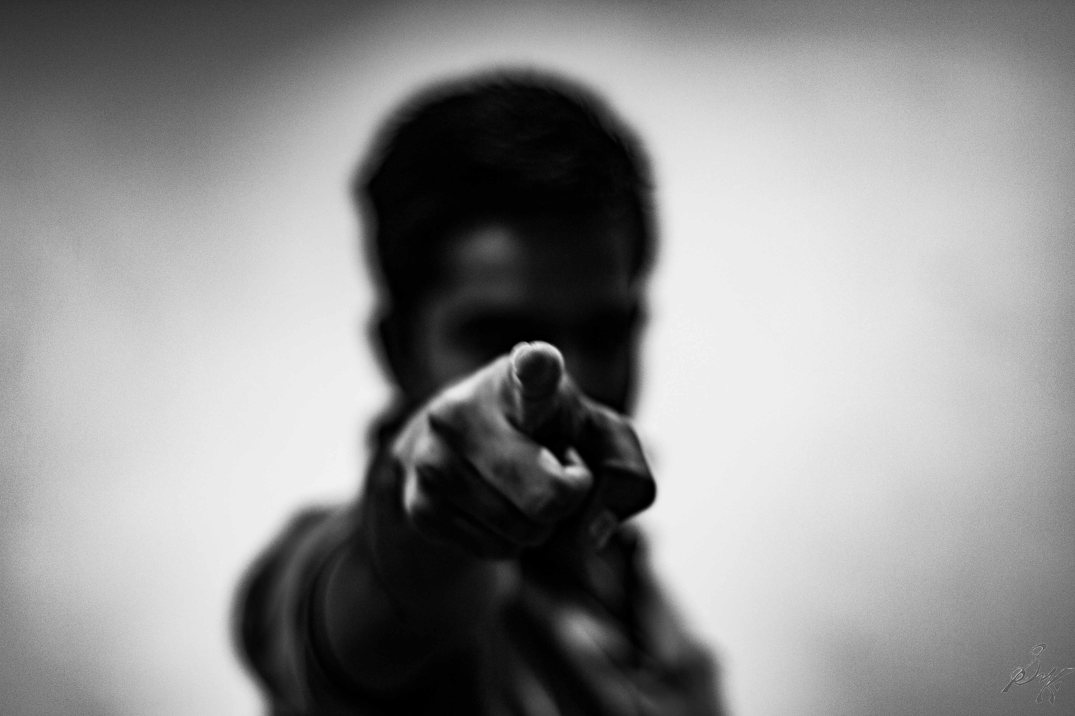
1. Focus on the eyes: The first rule, by me, is the focus should be on the eyes. Not on the nose, not on the lips, the EYES. Why? Because consciously or not, that’s the first thing that catches our eye in the photo. So, a sharply focused eye of the model, makes the photo likable immediately.
Sharp focus is on the eyes
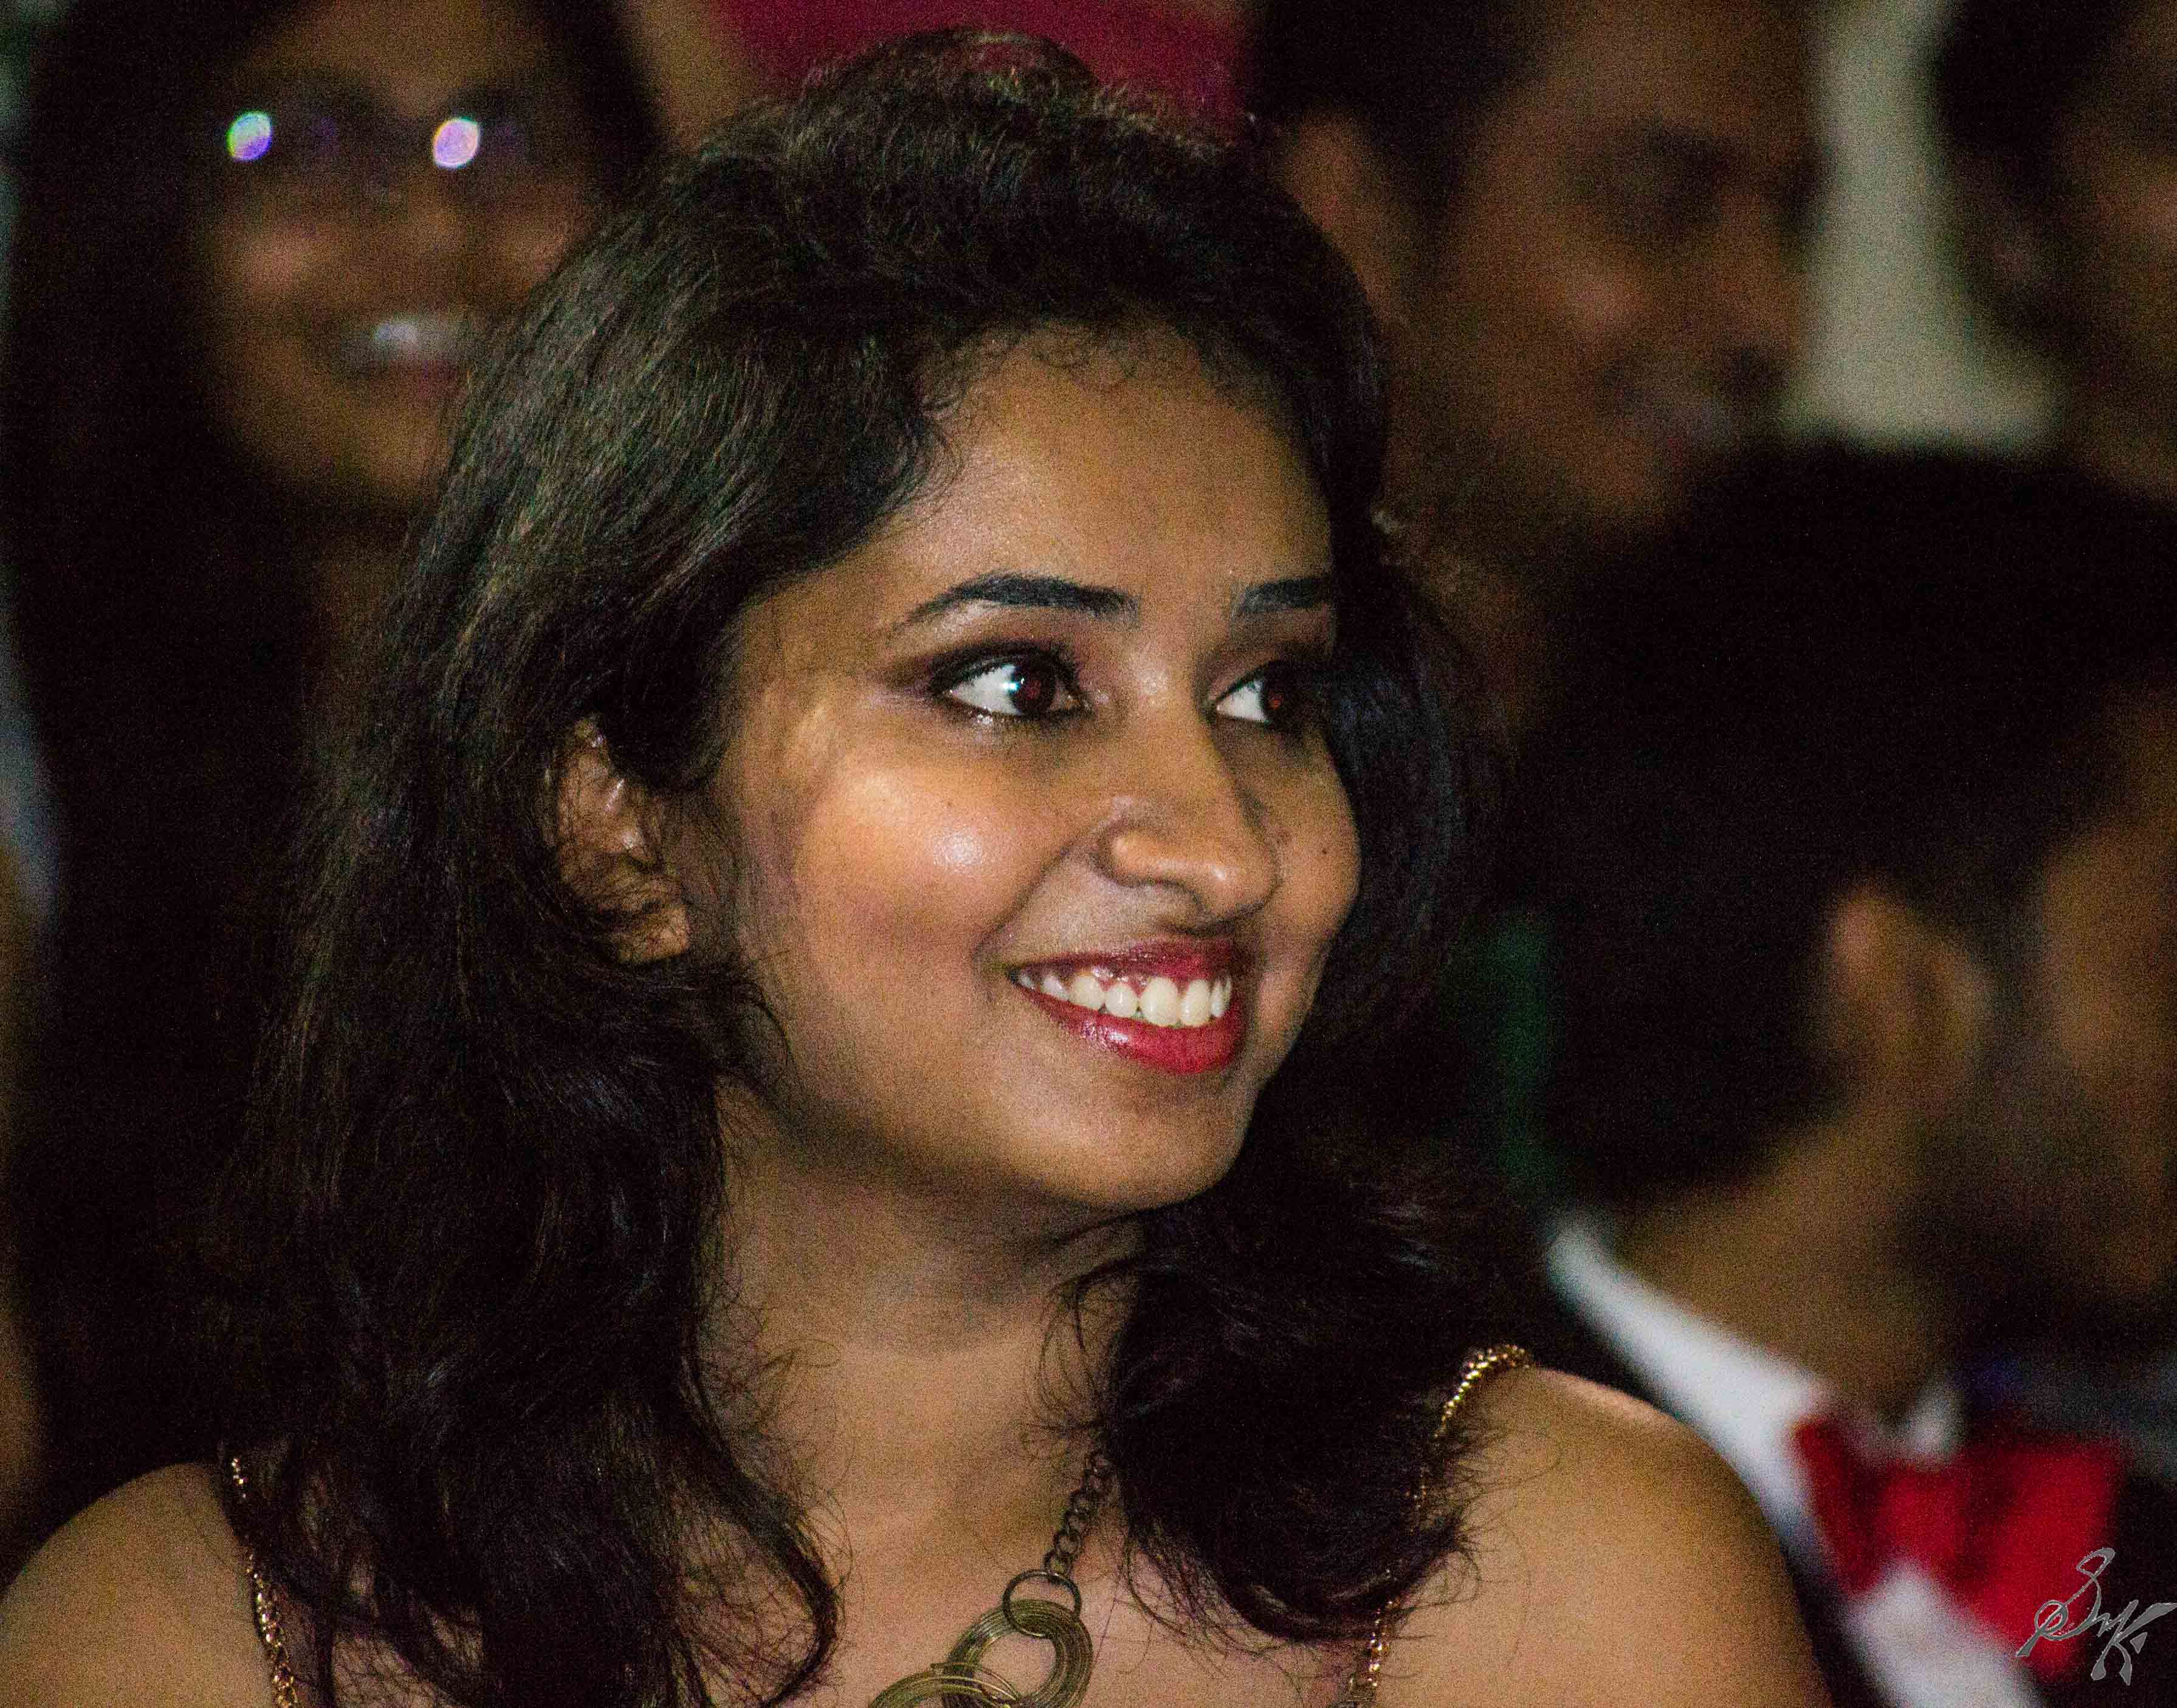
2. Let the eyes see: I ll explain this, in simpler terms. I mean, let the photo be such that the model has some place to look to, that the viewer also looks towards the way the model is watching. Let the curiosity be there. If the model is looking towards left, leave some space in the left, and vice versa.
She looks to her left, so thats where the space should be
3. Change the angles and point of views: All shots need not be taken right from the eye level. Go up, go down or maybe, just take a step back. They all work wonderfully.
Take a step back, and let her beauty fill the frameMake her look up to youIf needed, get down on the ground too
4. Anticipate Movements: While shooting at an event, you shall come across conditions where your model is in motion. Observe the patterns and anticipate the movements, be ready and press the shutter at the right moment. With a bit of practice, sharp shots of moving people will not be difficult.
Anticipate the patternPrefocus, be ready and shoot!
5. Go Candid: Here, you just need to be on the prowl. Keep your eyes peeled for subjects to be shot. Sometimes they notice you and the expression changes, the objective is to shoot before the expression changes. But be advised, the shots may not be as you would have wanted them to be, but then, sometimes, gems emerge too.
6. Bokeh to the rescue: If you have a background which has distractions, or maybe you just dont want the background, open the aperture wide and let the background fade.
The tip of the finger is all I am interested in, rest all should fadeTo isolate the model from the distracting background, use a wide aperture
7. Use Flash: When shooting in the dark, or poorly lit conditions, use the flash as a last resort. With a few test shots, gauge what strength and what shutter speed you need to do justice to your model. Once found, fire away.
The flash gives the adequate light and also helps freeze the motionCombination of Flash and wide aperture helps isolate the model and also provide proper lighting
8. Get close: Often to capture the expression, you must get very close to your model. But be advised, do not disturb the natural surroundings in the process.
Concentration….captured
9. Ask the model to smile: This trick, never gets old. Ask your model to relax and take a seat. Bring out your gear and show them how to take a shot, and when they have relaxed, ask them to smile….voila! You have a genuine and happy smile,
Effortlessly beautiful
10. Try Monochrome: For a lot of shots, the monochrome version appears to be of more depth. Try it out, but dont overdo it.
Beauty as I know best
So, there you go. 10 simple tips to get you going on your next portrait shooting trip. Go on, have fun and shoot some wonderful portraits.
Thanks a lot to the wonderful models here: Nikhila, Gowri, Rishika, Shruti, Soma, Mayukh, Shweta, Parthivi, Aakash, Anushree, Yogi and my muse, Tuhina. You all are simply wonderful 🙂
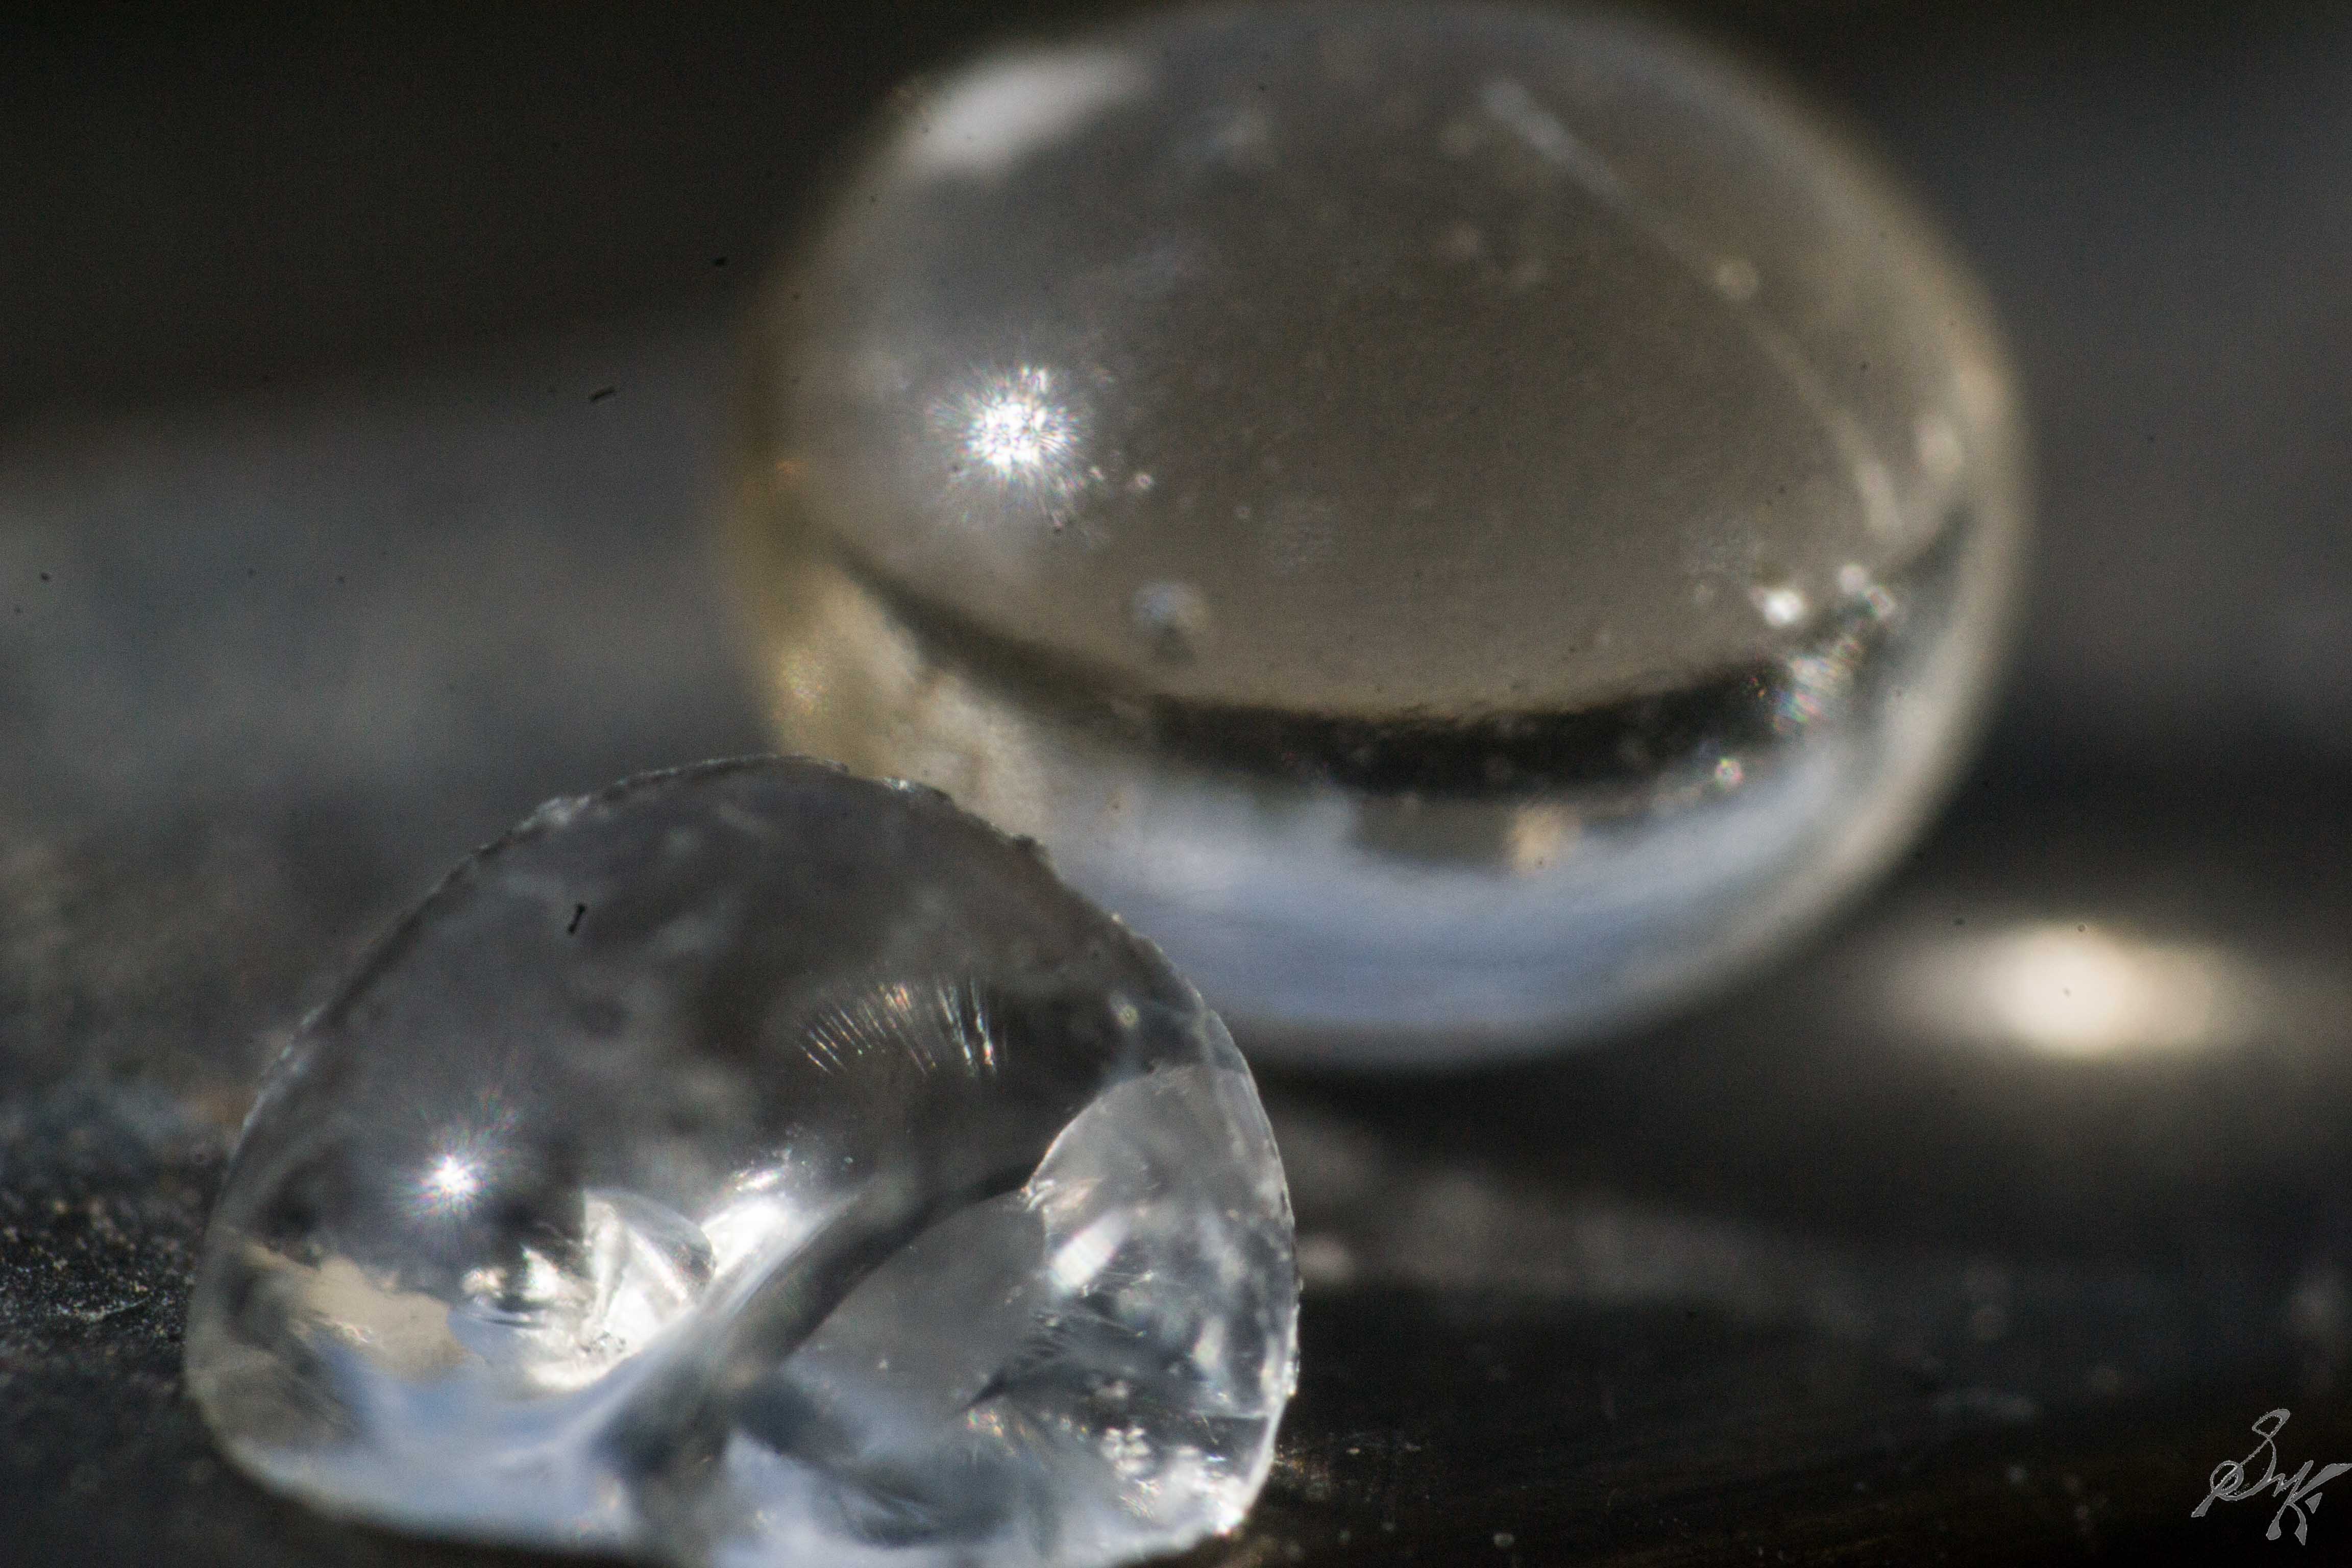
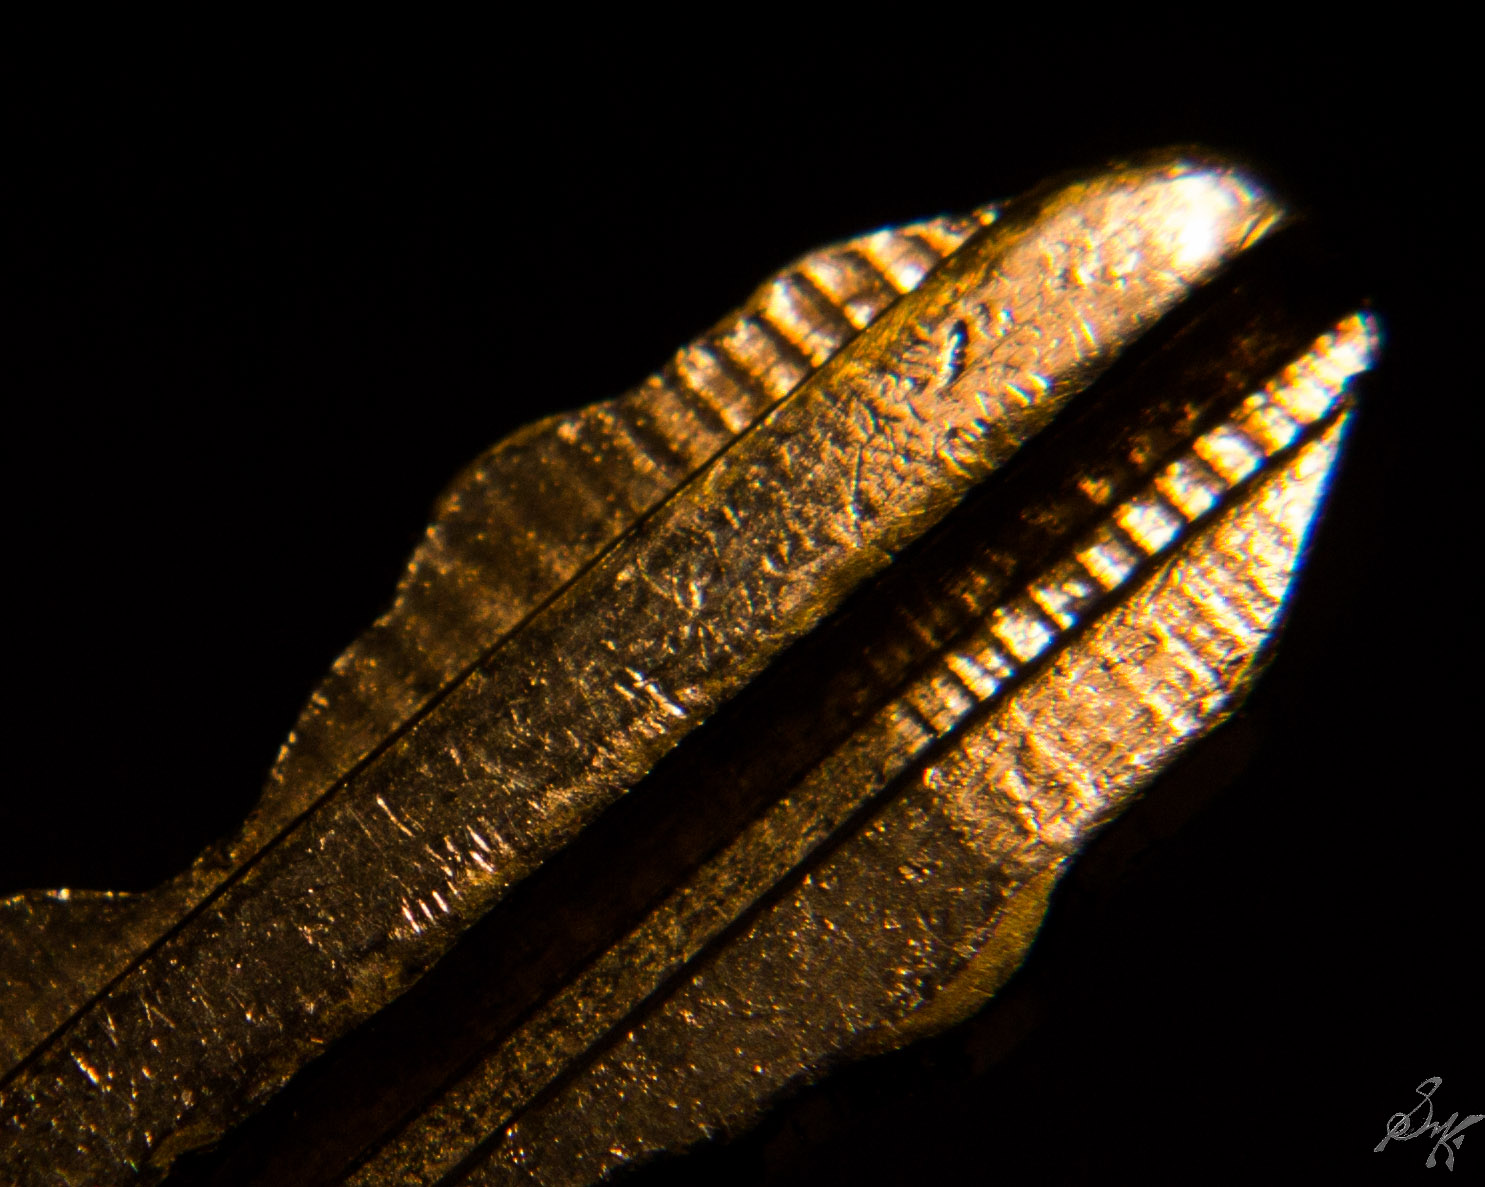
I have tried out with close up filters and more recently with free lensing. The best close up, macro shots are by the dedicated macro lens, but these techniques get you pretty close too. Check the earlier works here.
Here are some of the reverse lensing shots which have got me close, less than 10 cms close to my subject.
Silica Gel crystalsReflections on water dropletsCigarette!
Have a look at the other entries on macro shots here!
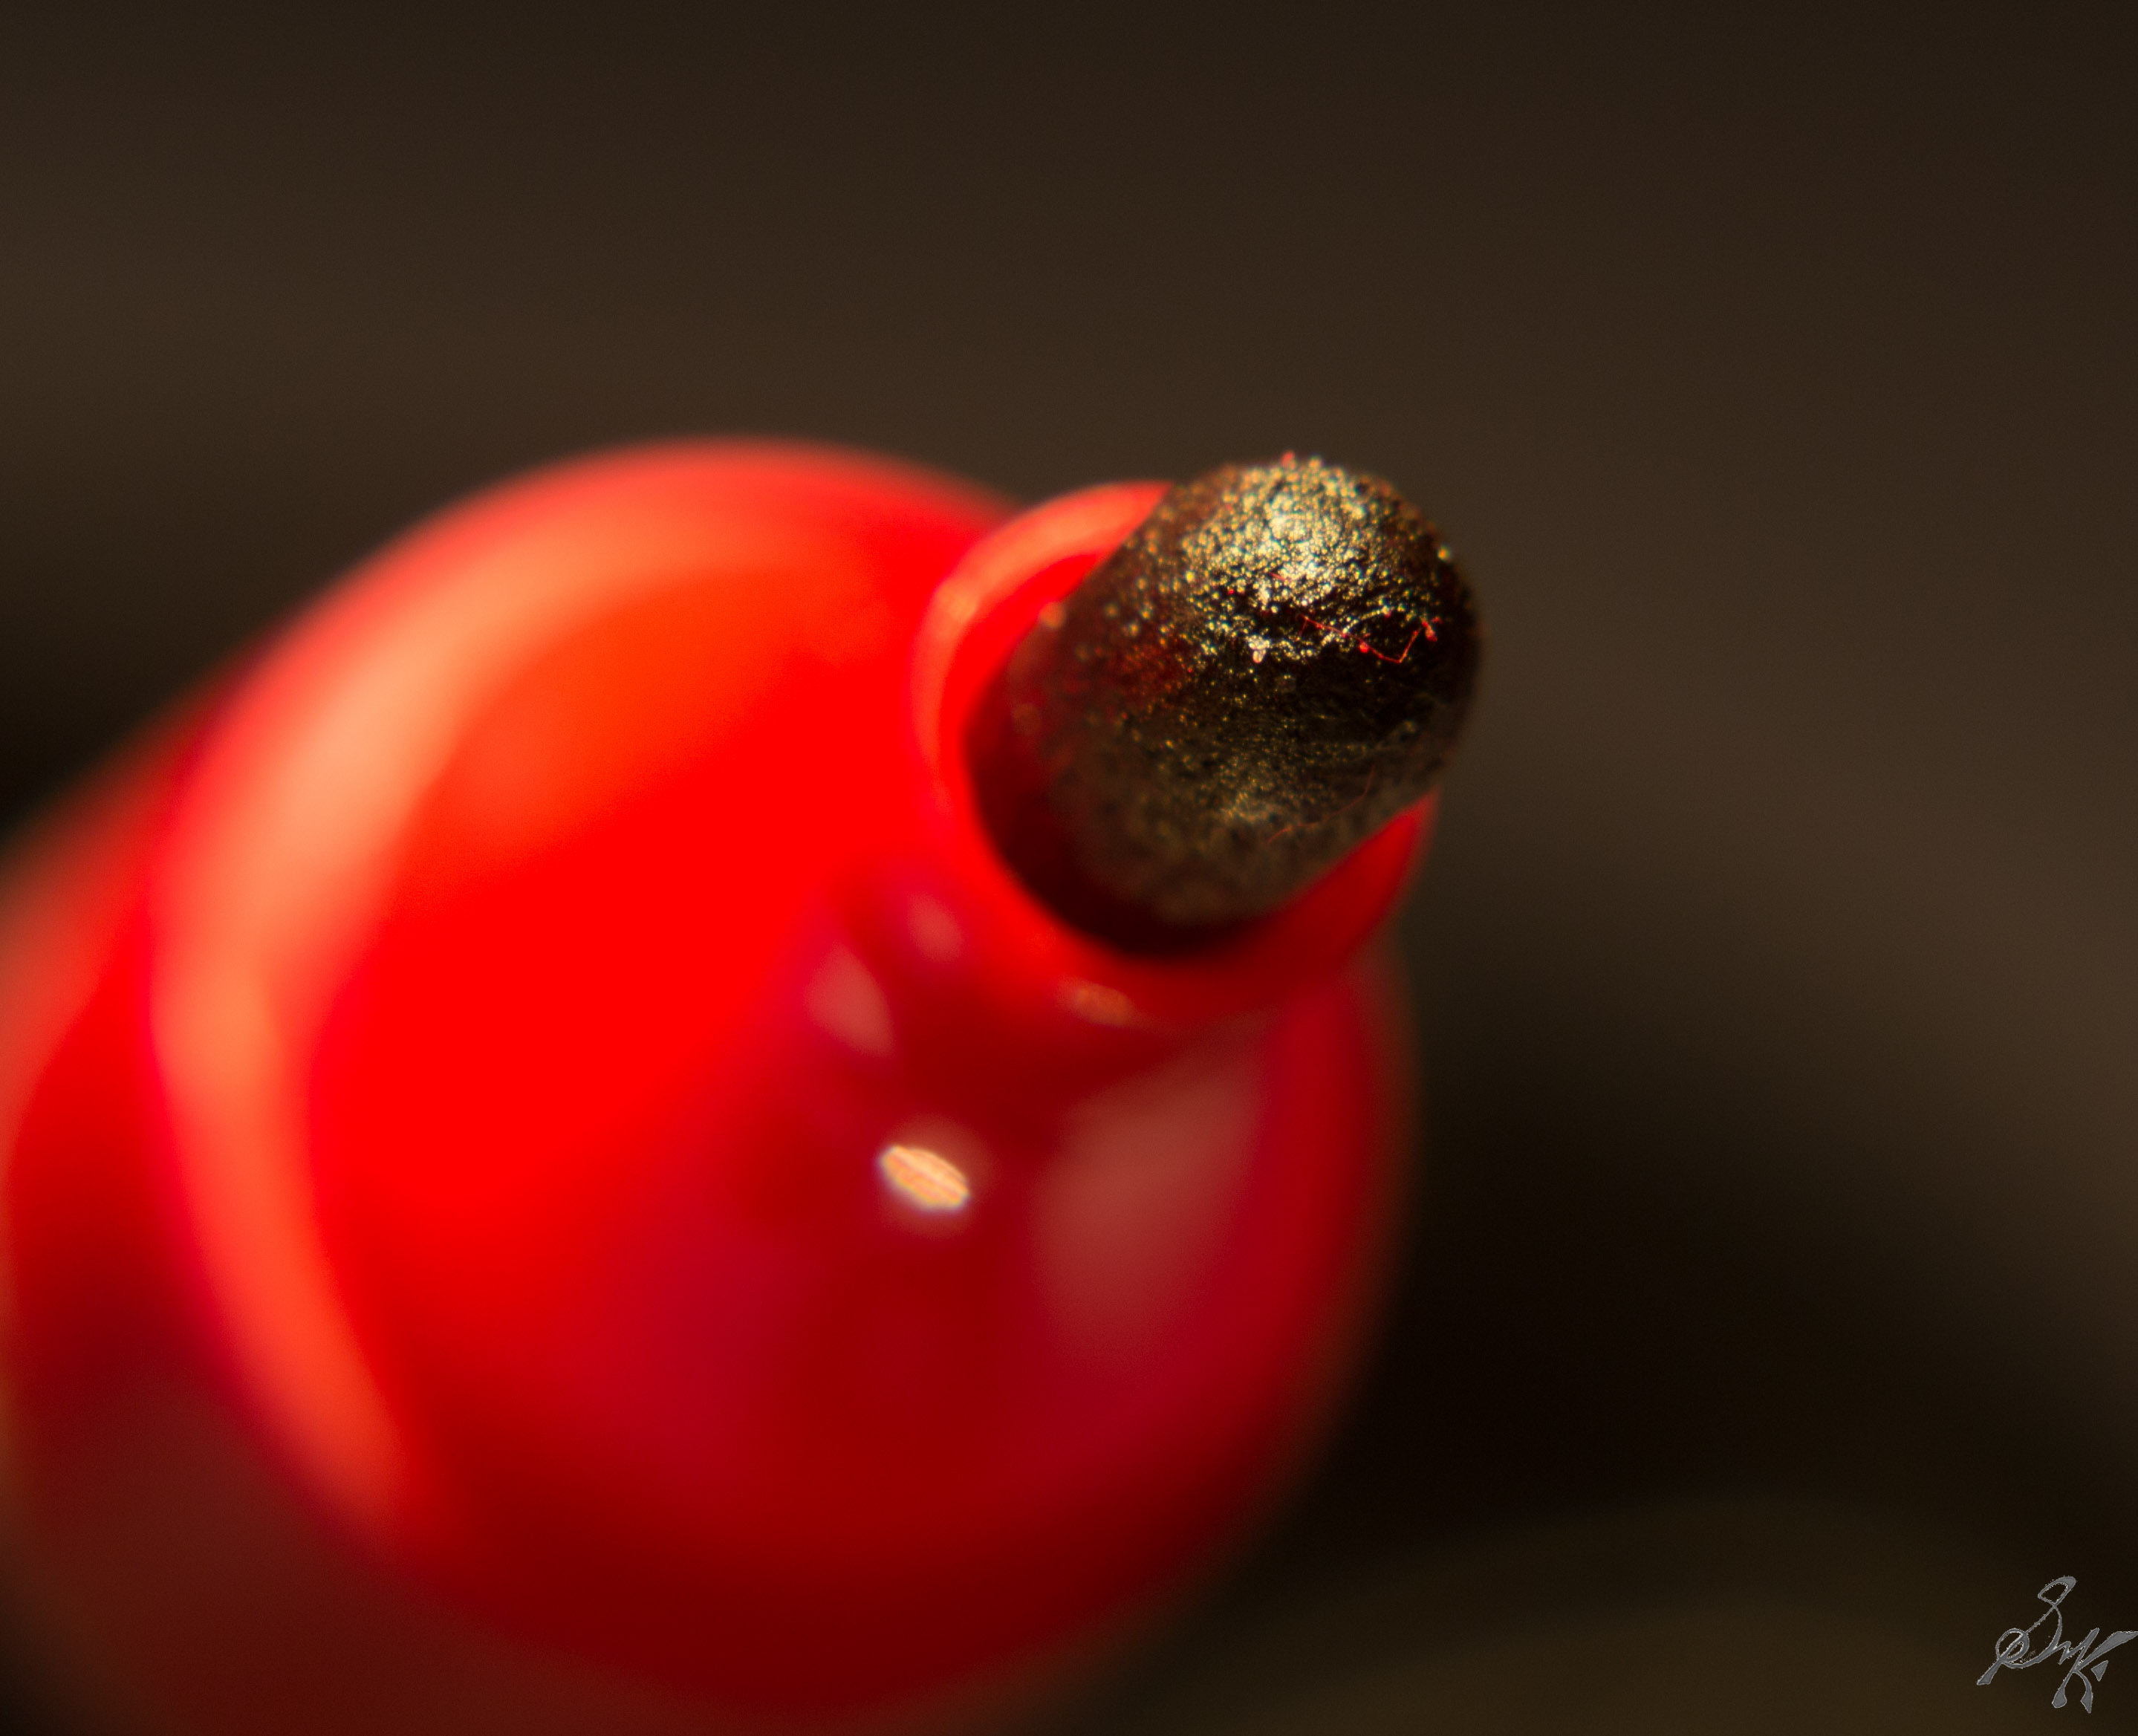
This is a pretty common term in the photography circuit. A photograph, where we take photos of small subjects, and the photos come out to be bigger than the subjects and in sharp details, that is a macro photograph. For achieving this, there are special lens available. Close up filters, extension tubes and lens reversal are also put to use. Each have their own pros and cons. Do note, while in Macro, the DOF offered is extremely shallow.
Check out a refreshing take on macro, here.
I had been planning to do a close up photo collection of everyday items for quite sometime now and then yesterday I was, enough planning, lets just do it. But hey, neither do I own a macro lens needed for these insane close ups, nor can I acquire one anytime soon (too costly to buy,yet). Should I let it stop me, hell no!
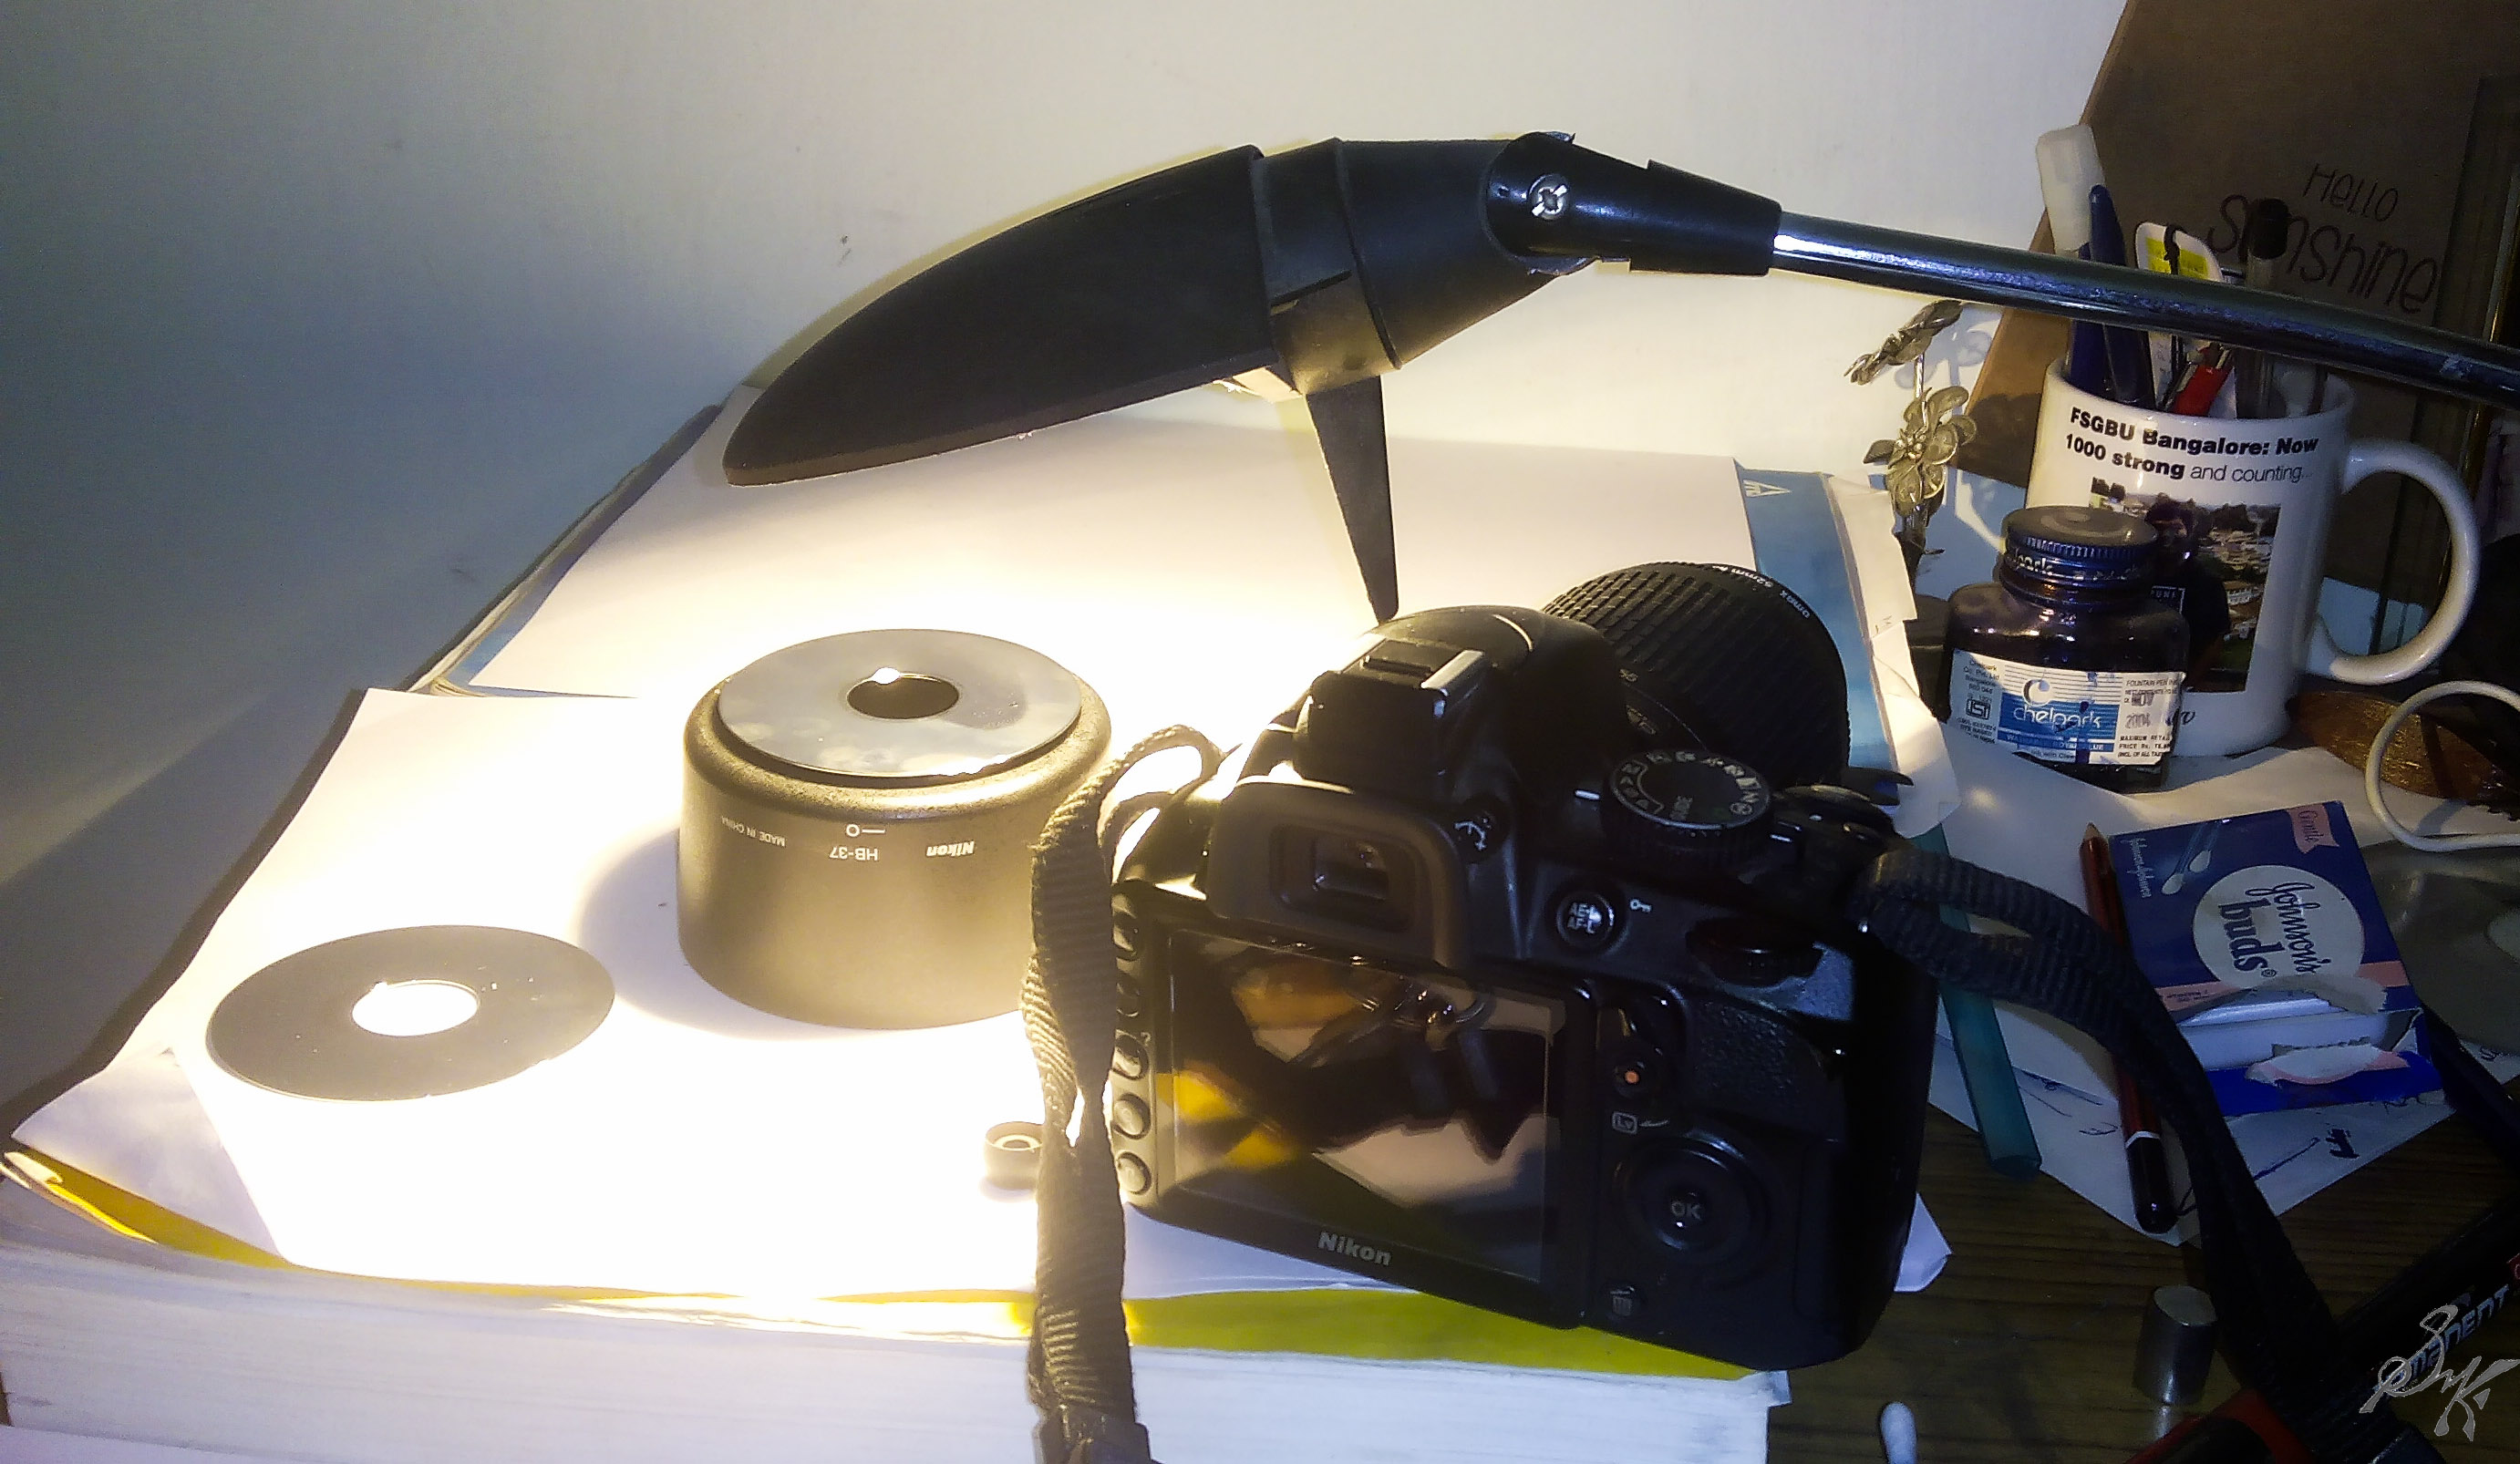
These are what I shot. Recognition should not be an issue and I hope you do like the photos. My set up, the last photo in the group 🙂
My set up consists of a table lamp, a lens hood, old hard disks and the lens I used was the 55-200mm zoom with a close up filter attached.
The photos taken using a close up filter are not as sharp as we would love them to be, but then the filters cost almost 1/10th the price of a good macro lens. For an occasional close up shoot, I dont think investing in a macro lens is very fruitful, but if you want extreme close up and clarity, the close up filter is not your way out.
We love the insanely close up photos of insects, showing their eyes, or a tiny ant holding a tinier grain and truly, we are amazed by these shots. These photos are termed as macro photos. Actual definition is a big complicated thing that simply means, photos where small objects look way bigger, magnified, thats all.
All lens have some bit of magnification factor in them, but the macro lens, they are dedicated ones which have very little focusing distance, extremely high sharpness and they are very very pricey. Well, they deserve to be too.
Anyway, since my blog is all about the way I have met up to these challenges, I have opted for the easier way out…screw on close up filters. These filters are simple magnifying glass lens adapted to be mounted as a filter on the lens. They reduce the focusing distance and magnify the image. Available normally in packs of 3 or 4, these filters come in strengths of +1, +2, +4 and a macro lens (+10).
+4 lensMacro
Now, you might wonder, if these screw on lens, whole set costing within 2k INR are available, why should I go for a 20k macro lens? The reason is a single word, quality! The quality of the dedicated lens are incomparably and invariably better than the screw on filters. These filters cause light loss on the edges, distortions and also vignetting. Plus, these are not the sharpest of lens at all. So, if you plan to go pro about the macro shots, or have very deep pockets, buy the dedicated ones. The screw on ones are fine for occasional close up shots!