Long Exposure : Demystified

Time and again, I have had requests and queries on how to take the amazing “trails” photos, today, I shall try to demystify them.

Long Exposure, Trails, Diwali Night, Marine Drive
The technique is called Long Exposure. As the name suggests, we make the photo’s exposure long. In doing so, any light source, or lit up object, that is incident on the sensor, shall be registered by it. In technical terms, we extend the time the shutter stays open, by decreasing the shutter speed. This causes the exposure to be “long”.

Here’s an example:

Long Exposure, Queens Necklace, Marine Drive, Mumbai

Now, to achieve this, we need to have a shutter speed that is low enough to form the light trails, while the aperture has to be such that the photo does not wash out, all the while maintaining the ISO at a level where there is not a lot of noise.
We can get to this unique combination by fiddling in the Manual mode:

Nikon D7200, Manual Mode setting

Or, by setting the camera in the Aperture Priority mode (AV mode in Canon).

Nikon D7200, Aperture Priority Mode setting

The objective should be to have an optimal exposure, despite the slow shutter speed.

Nikon D7200, Aperture Priority Mode setting

With enough practice, taking stunning photos shall not be difficult at all.
Long Exposure is amazing for smoothening out ripples in water, or giving the water a milky flowy look. Do try them out.

Long Exposure, Smootheing of Lake, Bangla Sahib, New Delhi

Slowing down water flow, Elephant Falls, Meghalaya

It is also useful to take photos in low light environments such as this dimly lit monument at the Lodhi Gardens, New Delhi.

Long Exposure, Lodhi Gardens, New Delhi

I shall conclude by stating that unless you practice, you shall not be perfect. Go out there, and explore the amazing world of long exposure.

Cheers!!

TTL: Tamhini Ghat

It had been planned by the group that we must go on a trip. So, a group of about 40 photographers, varying from novices to professionals, we made our way towards Tamhini Ghat. About 60 kms out of Pune, this place is known for the lush greenery and the numerous waterfalls.

DSC_7153-18

DSC_7110-15

DSC_7049-5

DSC_7062-7

It is here, thanks to one of the members, that I got to use the Tamron 90mm macro lens for the first time, and I simply loved it. The lens is not a speedster at acquiring focus, true, but once you manage to focus it right, you are in for a treat. The following images ought to convince anyone who would be doubting whether or not to get a macro lens towards the lens.

DSC_7161-19

DSC_7176-22

DSC_7191-24

DSC_7204-26

DSC_7210-28

DSC_7221-29

Now, this lens can also be used for shooting the perfect frame too. Its all about how you choose to use it.

DSC_7233-32

DSC_7263-1

A huge thanks to the Pune Photography Lovers group for the trip. Special thanks to Medha for lending me the macro lens and to Rutuja for being my model 🙂

Till the next trip, cheers!

Light Trails

Photography is all about how you play with light. Whatever be the kind of photography you do, light is the essential common denominator, be it portrait, landscape, macro, or any other thing you can think of.

Light trails are a mix of use of depth of field, controlled shutter speed and ISO. Along with the basic trinity, you also bring in creativity, and different props. The understanding of how a shot is being taken, or how it should be taken, is paramount while doing light trails, light paintings and such.

DSC_2735-5

DSC_2747-7

DSC_2749-8

DSC_2754-9

Its not always that a slow shutter is all you need. Sometimes, varying the light source also helps.

DSC_2758-11

DSC_2756-10

In the end, all that matters is, that you must have a lot of fun.

DSC_2761-12

DSC_2762-Edit-14

Have fun experimenting with different light sources. Understand this, when your shutter is open during an exposure, any and every movement of the light source pointing towards the camera, shall be captured by it. Use this to make shapes, letters, drawings .. the possibilities are limitless.

Good luck.

Cheers!!

Dance Away

Dance, by me, is one of the best and ultimate forms of self expression and it keeps you active and healthy too, besides keeping you happy. I dont dance, and with the kind of figure I have, in the interest of the public,  I should stay away from the dance floor too. But, what I can do, is capture wonderful dancers mid pose and pay a tribute to them.

This post, this photo goes out to some of the best dancers I have met till date. Guys, you are amazing.

DSC_9879
DSC_0916-65

Cheers to Shaggy, Karan, Fayaadh and all the wonderful dancers 🙂 You guys rock!!

10. Filters – ND

Hey there all, its been quite sometime for me since I posted in something new, so here goes!

A filter, in definition is something, some device or contraption, which will restrict or modify transmission. In terms of a camera, optical filters, are used to selectively transmit light depending on the need. There are various types of
filters in use, special effects, close up, Neutral Density(ND), gradient, etc.
I ll talk about some of them here.
The most commonly used one is a UV filter. Expected to cut down the incident UV rays, but at times, is responsible for unwanted reflections and lens flares. I use it mainly as a lens cap.
The special effects ones, provide a variety of different effects to the photos. They can shapes, words, starbursts etc
that are the results of the special effects one. Few examples

 DSC_5465 DSC_5585

and a DIY here…http://wp.me/P4EGyN-1l

The close up filters are basically magnifying glass. Check the post here…http://wp.me/p4EGyN-2y

The other type, the ND filter is a particularly useful too if and when used during the day time where you want to both depict or soothe out motion. I know it sounded confusing, how do i depict motion and also soothe it out. Well, we dont do both in a single photo. Suppose you take a photo of a fountain and there are people moving in front of it. Use the filter, decrease the shutter speed and there you have it, the moving people are hardly visible. On the flipside, as the people are soothed out, the water too, will become smooth and flowy. You wont get the sharp droplets anymore, it ll become more of a dreamy smooth and flowy substance.

So, what the ND filter basically does is, it cuts out the incoming light without changing the color balance of the scene, a sunglass to your lens.
Gradient filter is a type of ND filter where half of the glass is darkened, this is commonly used while shooting
landscapes to darken out the sky, helps in proper exposure of the complete scene. Another costlier filter variation of the ND filter is the circular polariser filter. Here the strength can be varied by rotating the polarised glass discs.

In the following photos, observe the difference in shutter speed before and after using the filter.

  IMG_20141110_113600   IMG_20141110_113734


These photos should explain how the end result is. In the first one, the outline of the car is visible.

DSC_5994

In the second set, water ripples are visibly reduced  in the second shot.

DSC_6254DSC_6269

I hope you, my dear reader will take amazing shots using this type of filter. Do share.

The ND filters are not cheap things to come by…but you can always make one for yourself! How?? Check it out on the DIY page, Innovation Corner (https://senkaustav.wordpress.com/iinnovate/)
Cheers!!


4. Shutter Speed and the Holy Trinity of photogrpahy

Hi there all…today the final part of the basics, shutter speed…
Shutter speed, as the name suggests is how fast or how slow the shutter will open up and close down. Lower the shutter speed, slower is the shutter movement and hence more time for the sensor to gather light.
The speed is denoted by notations like 1/250, 1/500 ranging upto 1/4000 commonly, upto 1/16000 are also found in very high end models. And on the slower side, speeds go 1/10, 1/2, 1′, 10′ generally up to 30′ and then there is a “bulb” mode. In the bulb mode, the shutter will remain open as long as the shutter button is pressed, no time limit to it.
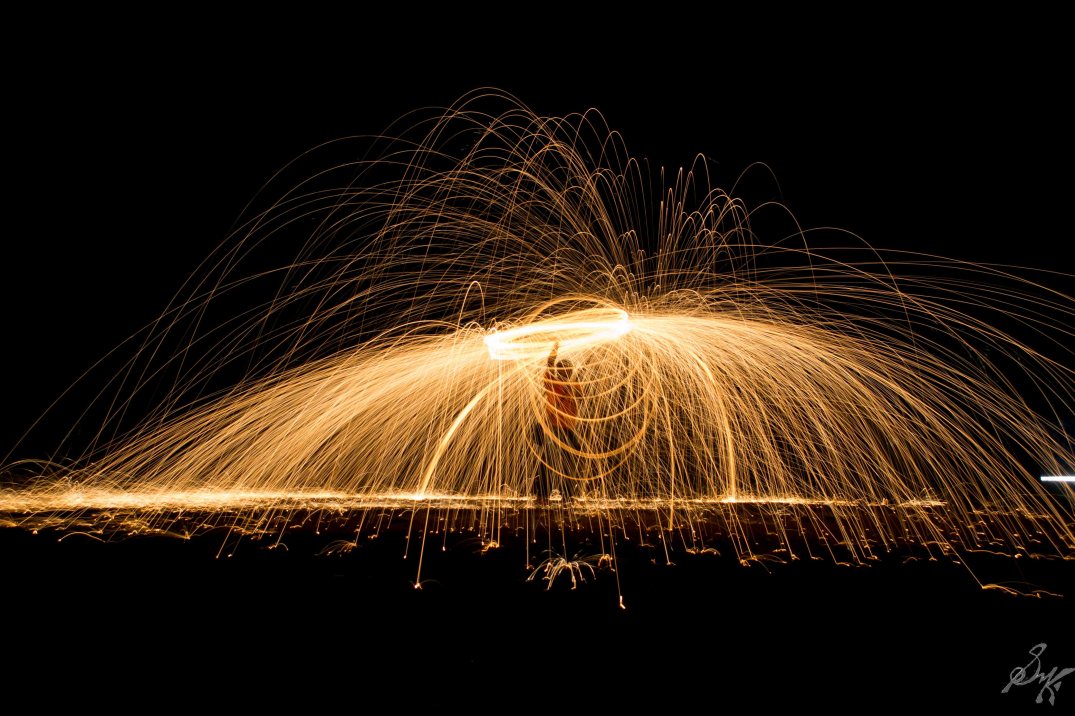
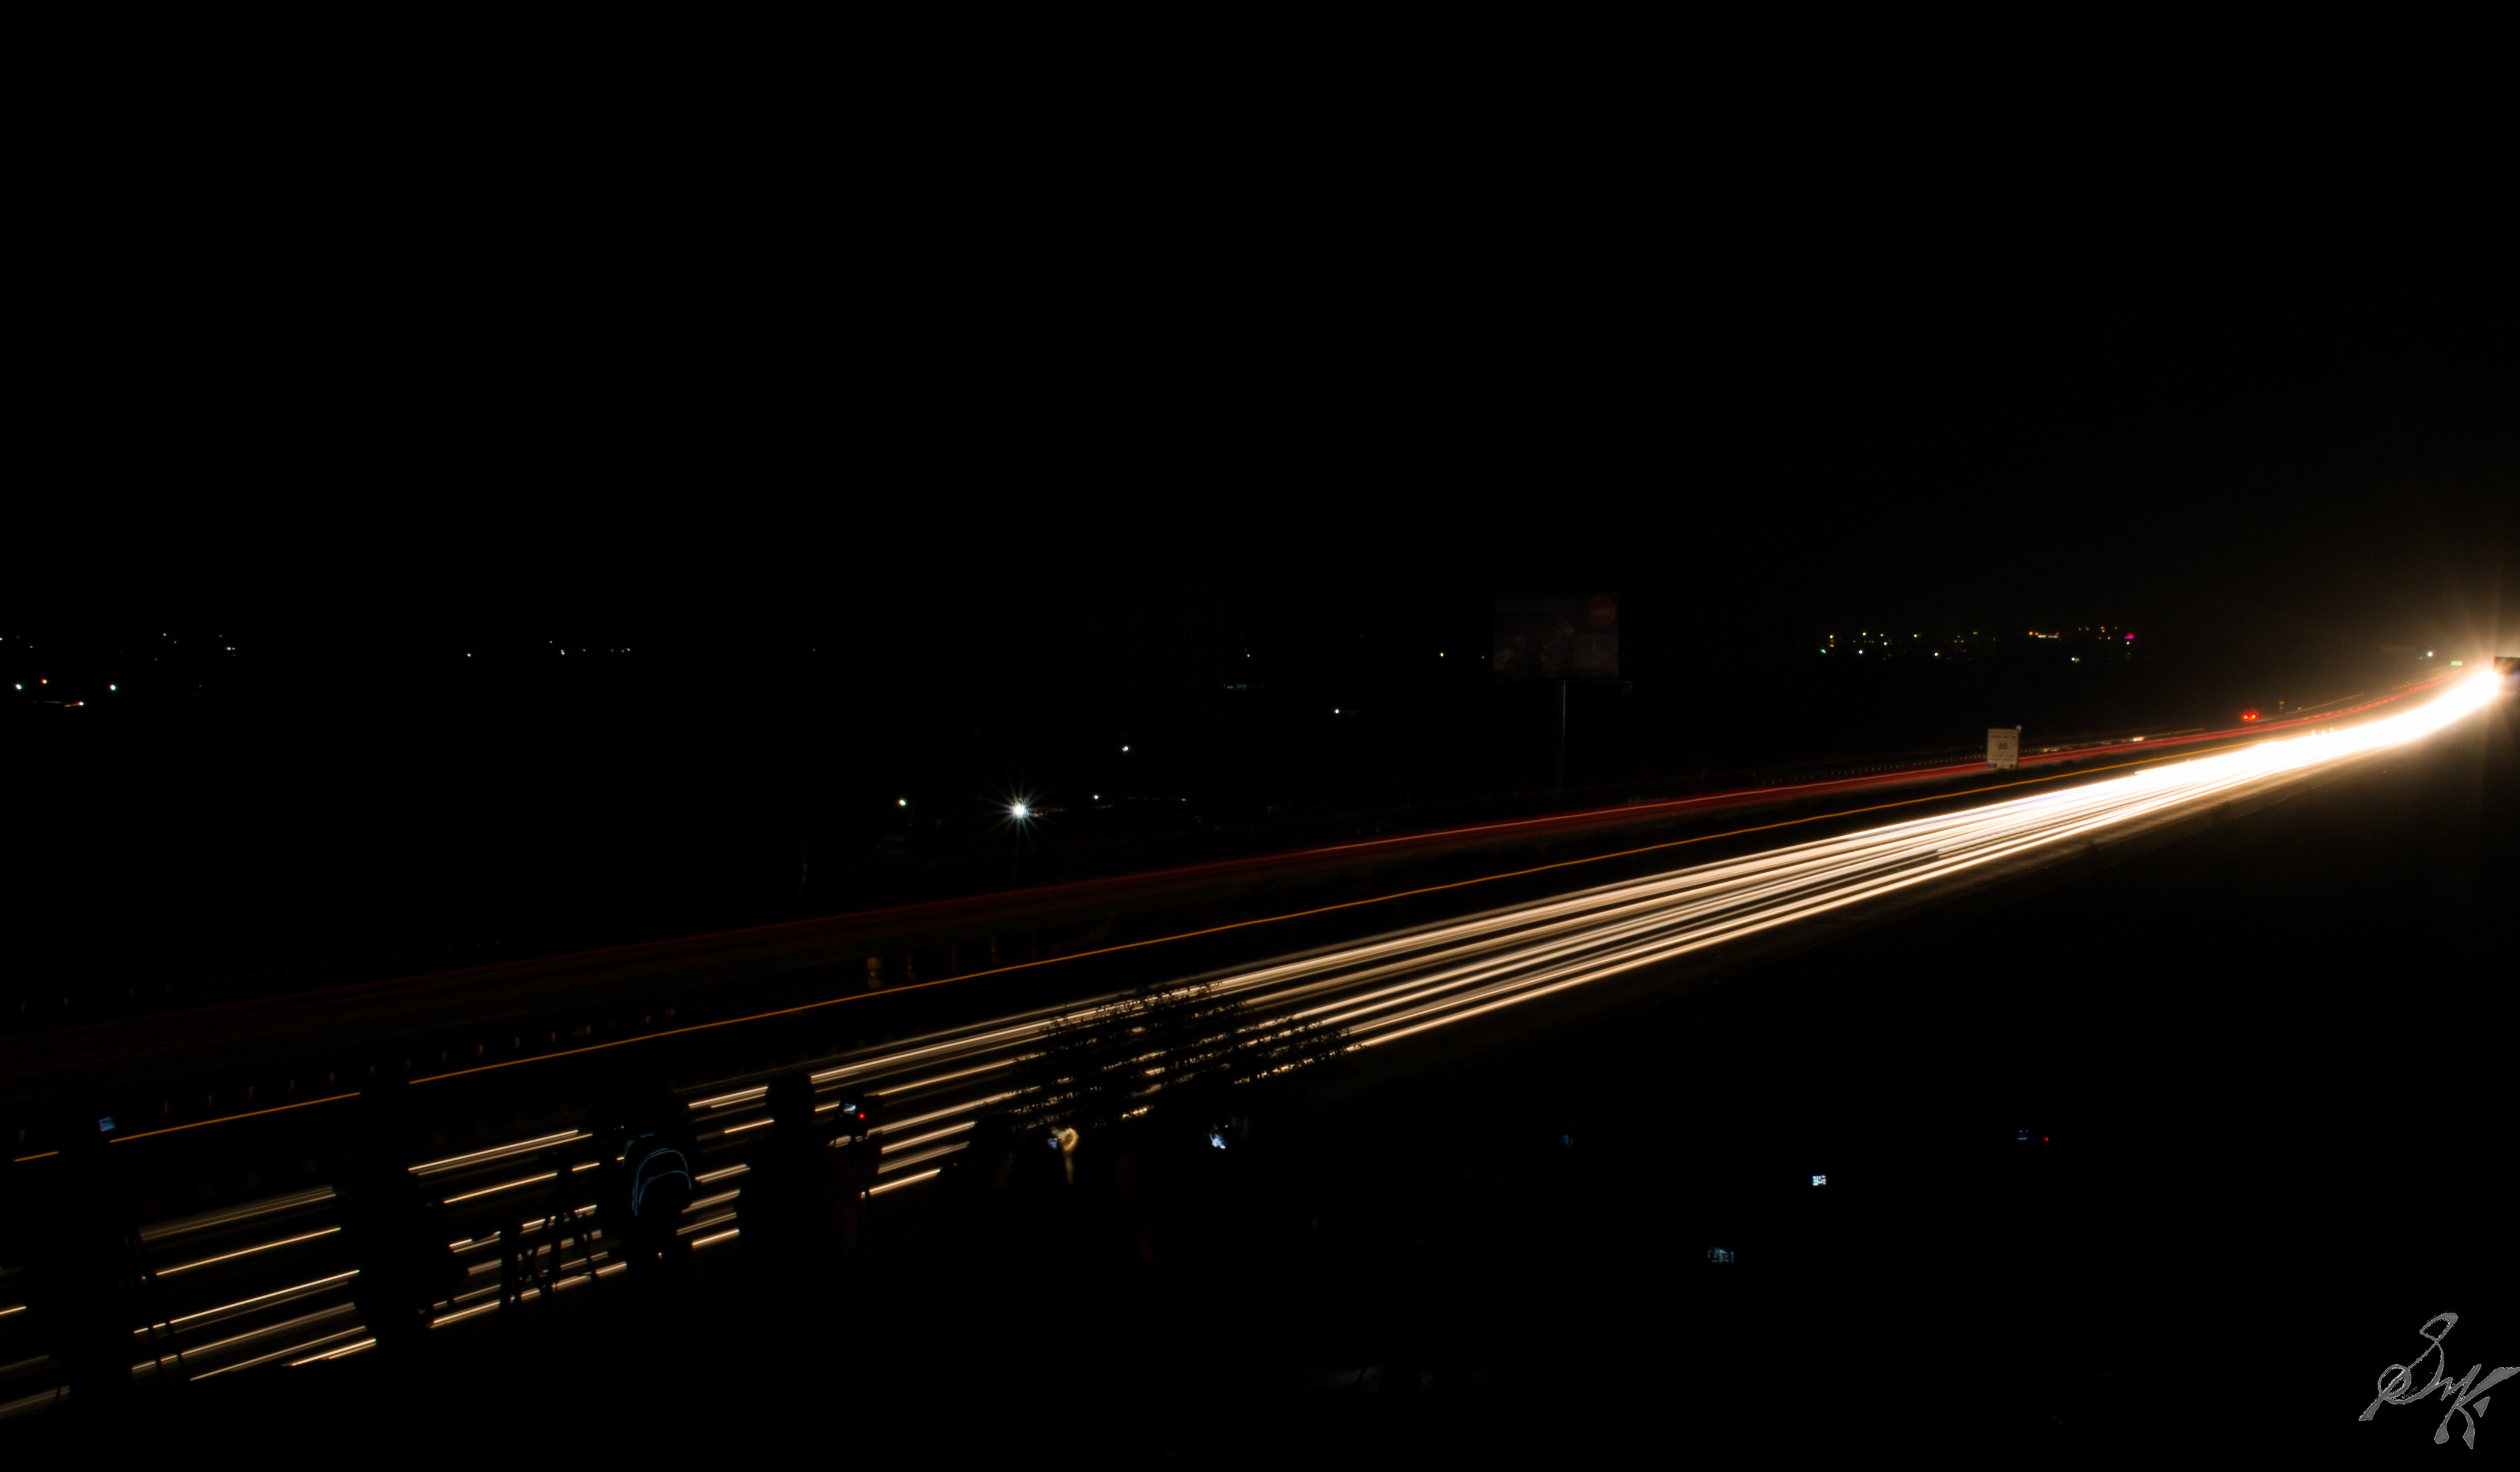
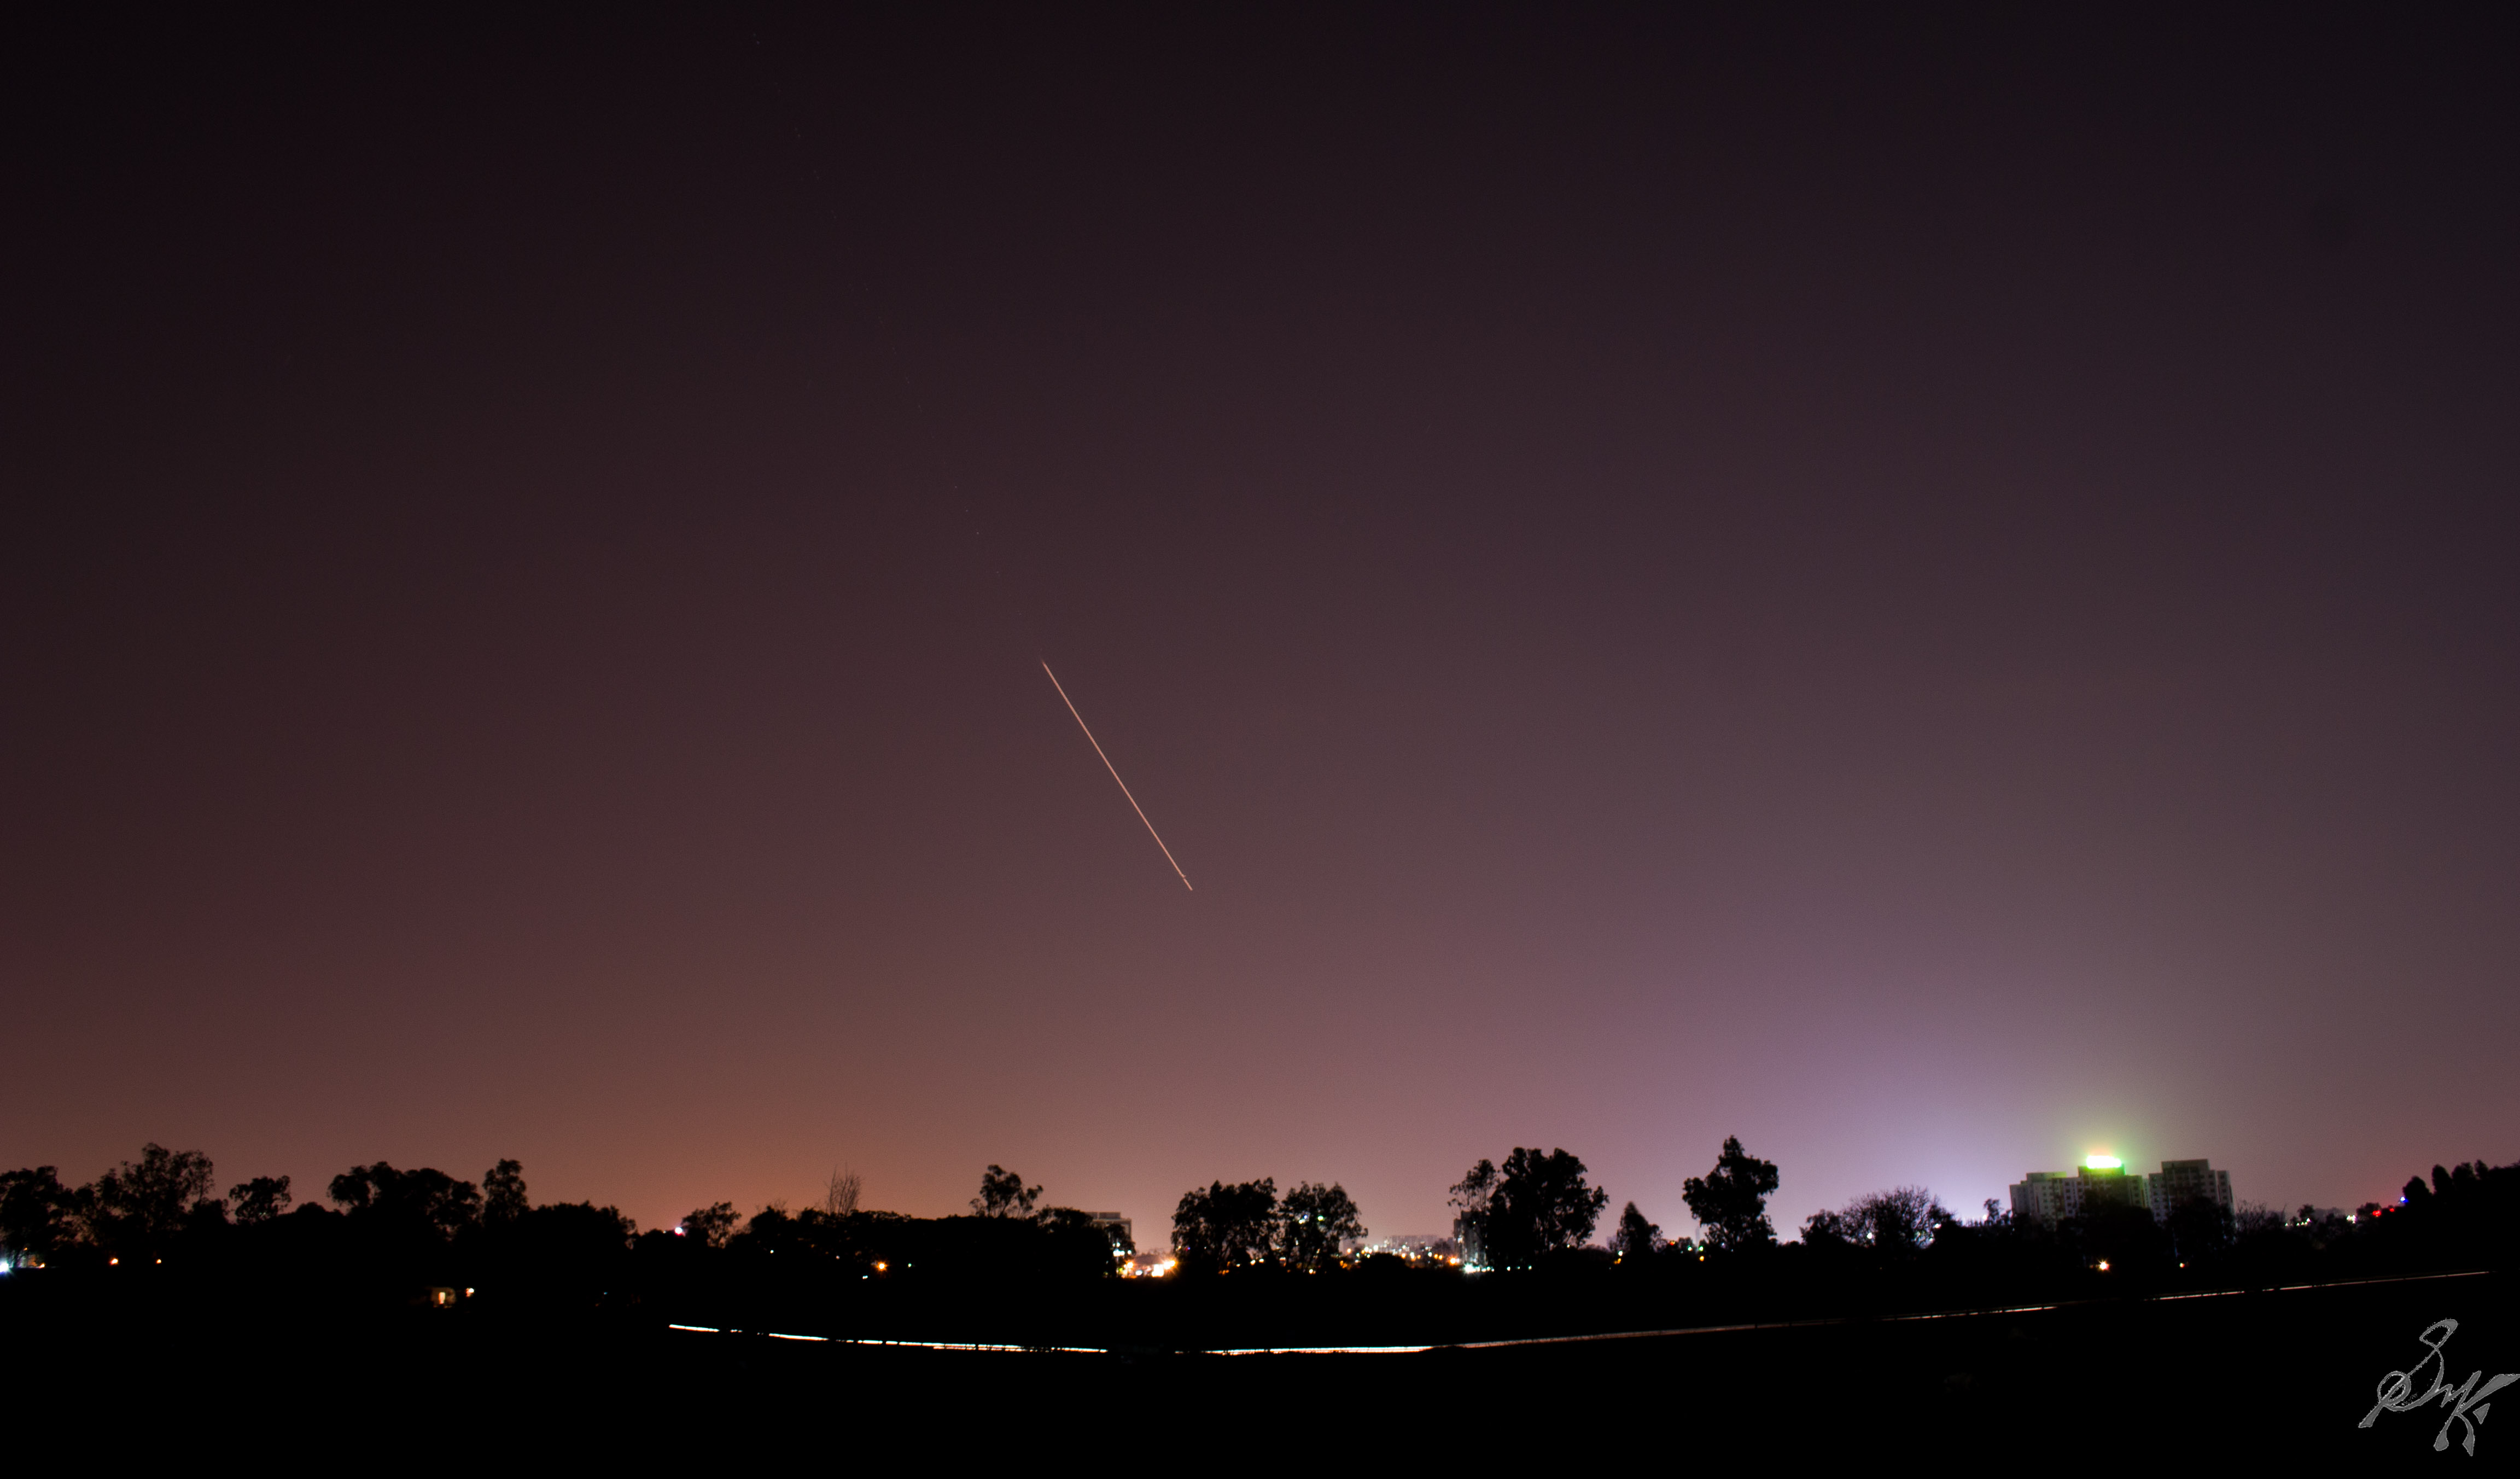
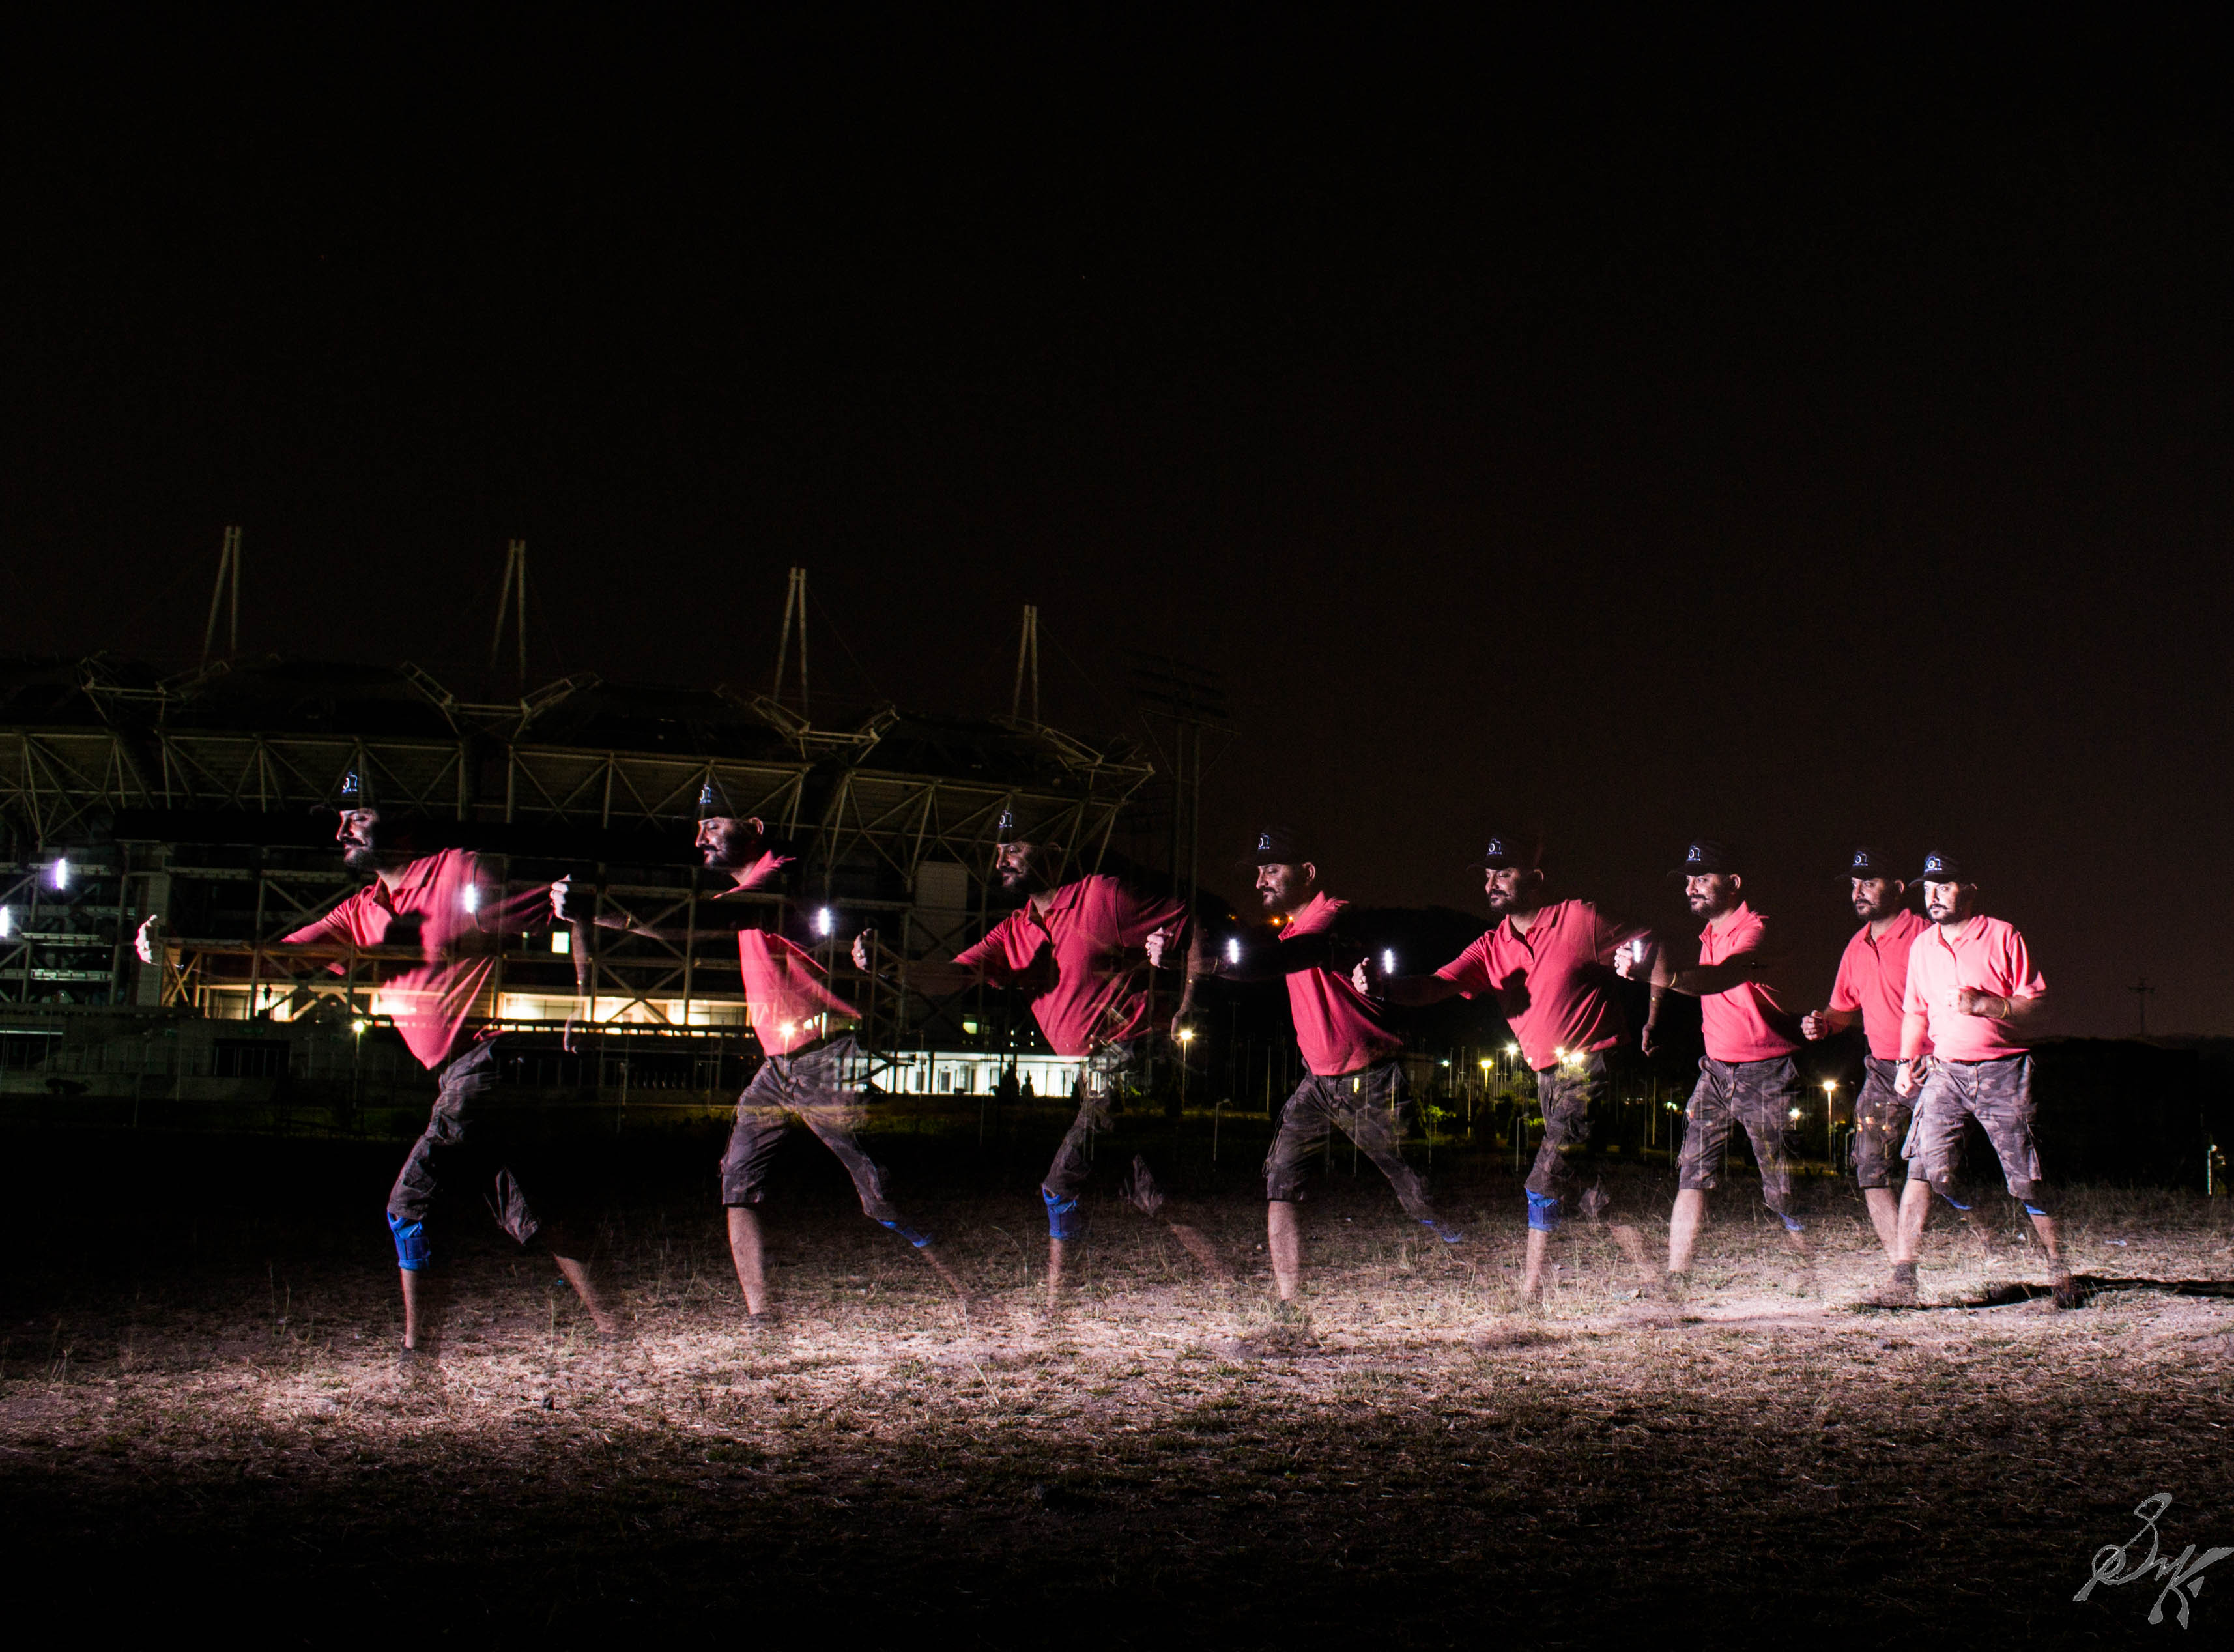
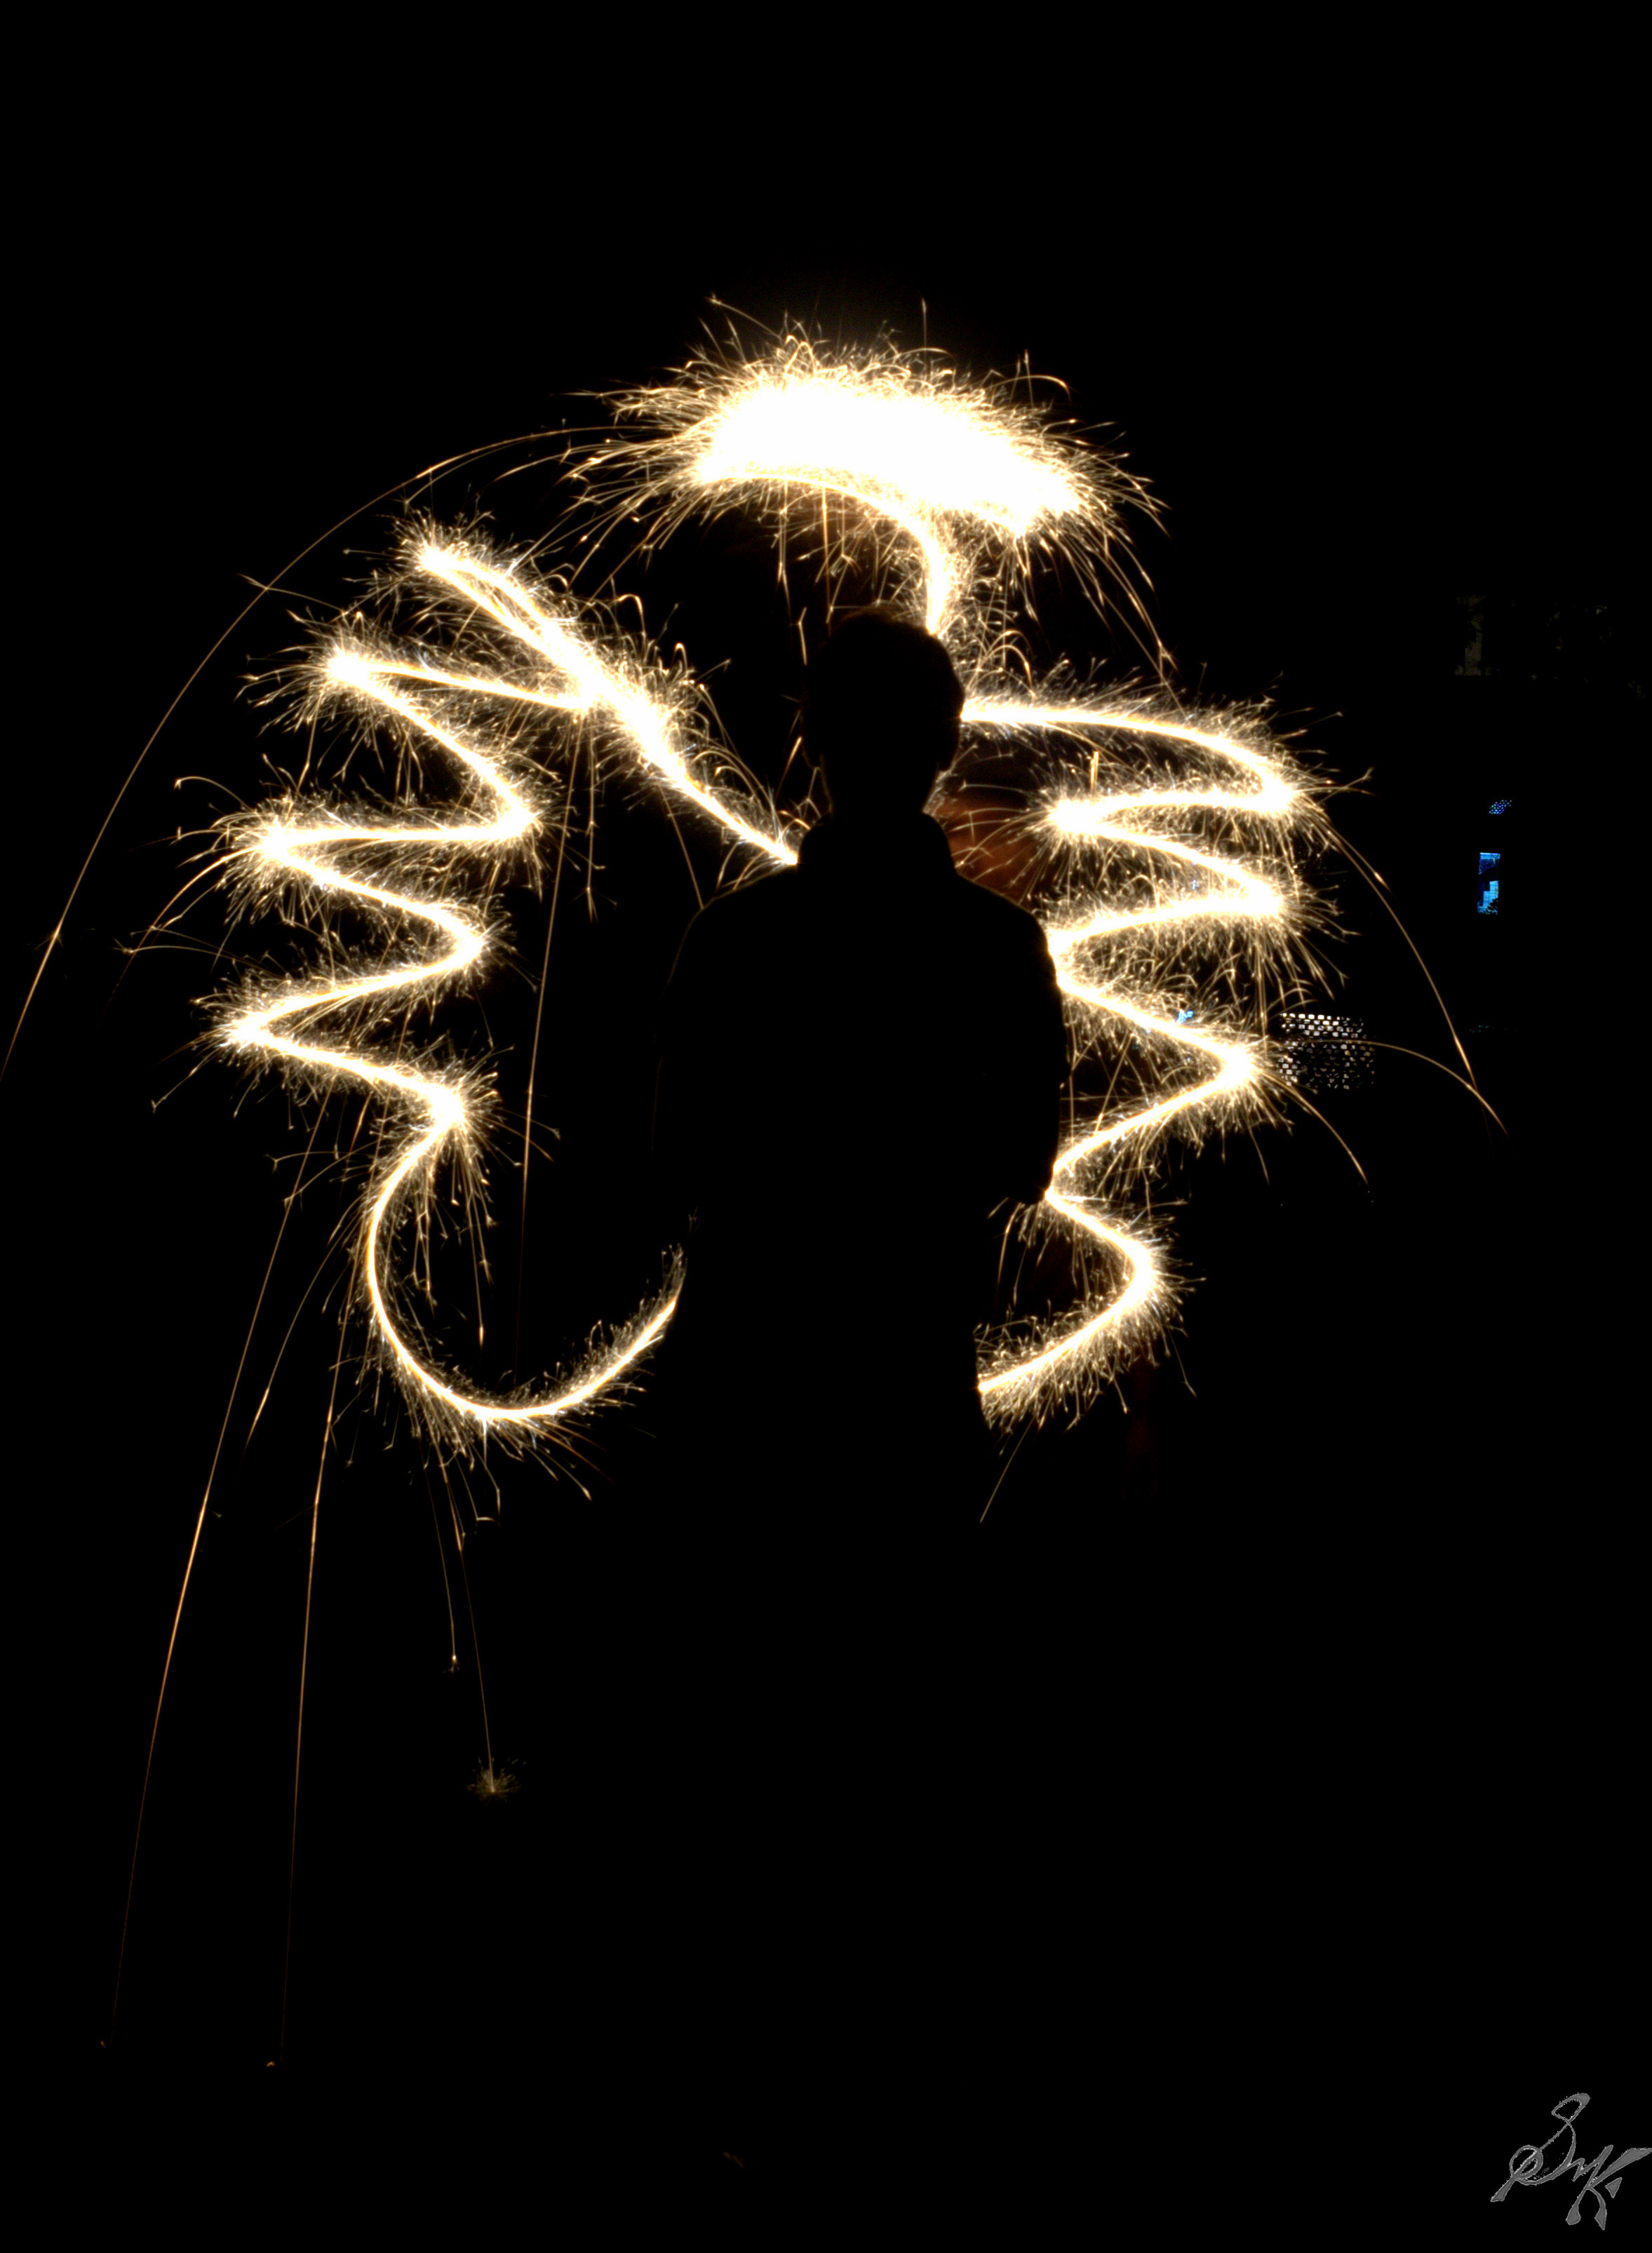
Please note, 1/250 means, shutter will remain open for 1/250th of a second. Similarly, with a shutter speed of 2′, the shutter will remain open for 2 seconds. A faster shutter speed will allow you to freeze motion, make your photos less susceptible to camera shake and other disturbances while a slower one will allow you to show motion in form of trails, or ghost images.

     1/20     1/125     1/320

Now that we know the 3 basic pillars of making of a photo, namely, ISO-Aperture-Shutter Speed, we must now understand how these three are related. Let me explain below.

Assumption: we want a properly exposed, unblurred and negligibly noisy photo

1. With increase in shutter speed, chances of blurry image is less, and also the amount of light available decreases. So, for a properly exposed photo, we need to either slow down the shutter speed, or open up the aperture or increase the ISO.
We try opening up the aperture to the maximum to let in more light and also, we increase the ISO setting to make the sensor sensitive…then, the limiting factors become, how much DOF do you want, and how much noise can your camera handle.
For settings where you control the shutter speed and let the camera handle the rest, switch to the Shutter Priority mode, denoted by the “S” button on the dial in Nikon Cameras.

2. With a wide aperture, you get ample light to work with, but a very shallow DOF. Suppose you want a deeper depth, you ll need to stop down the aperture a few stops. This, in turn causes the light available to decrease, and hence, the need arises to lower the shutter speed or increase the ISO. As stated earlier, lower shutter speed will cause blurriness due to camera shake and higher ISO will cause noise. Hence, the limiting factor basically becomes, how slow shutter speed can the lens accommodate with the Vibration Reduction (VR) systems and/or how steady your hand is.
For settings, where you control only the aperture, switch to the “A” (Aperture Priority) mode in Nikon Cameras.

3. There will be conditions, where the aperture value is maxed out, and the shutter speed is as slow as feasible and still not enough light, that is when we need to increase the ISO out of compulsion, in my opinion that is. The sensor becomes more sensitive and we get better exposure, but the chance of a grainy pic is always there.
For this mode, where you get to change only the ISO, dial in to the “P” (Program Auto) mode in Nikon Cameras.

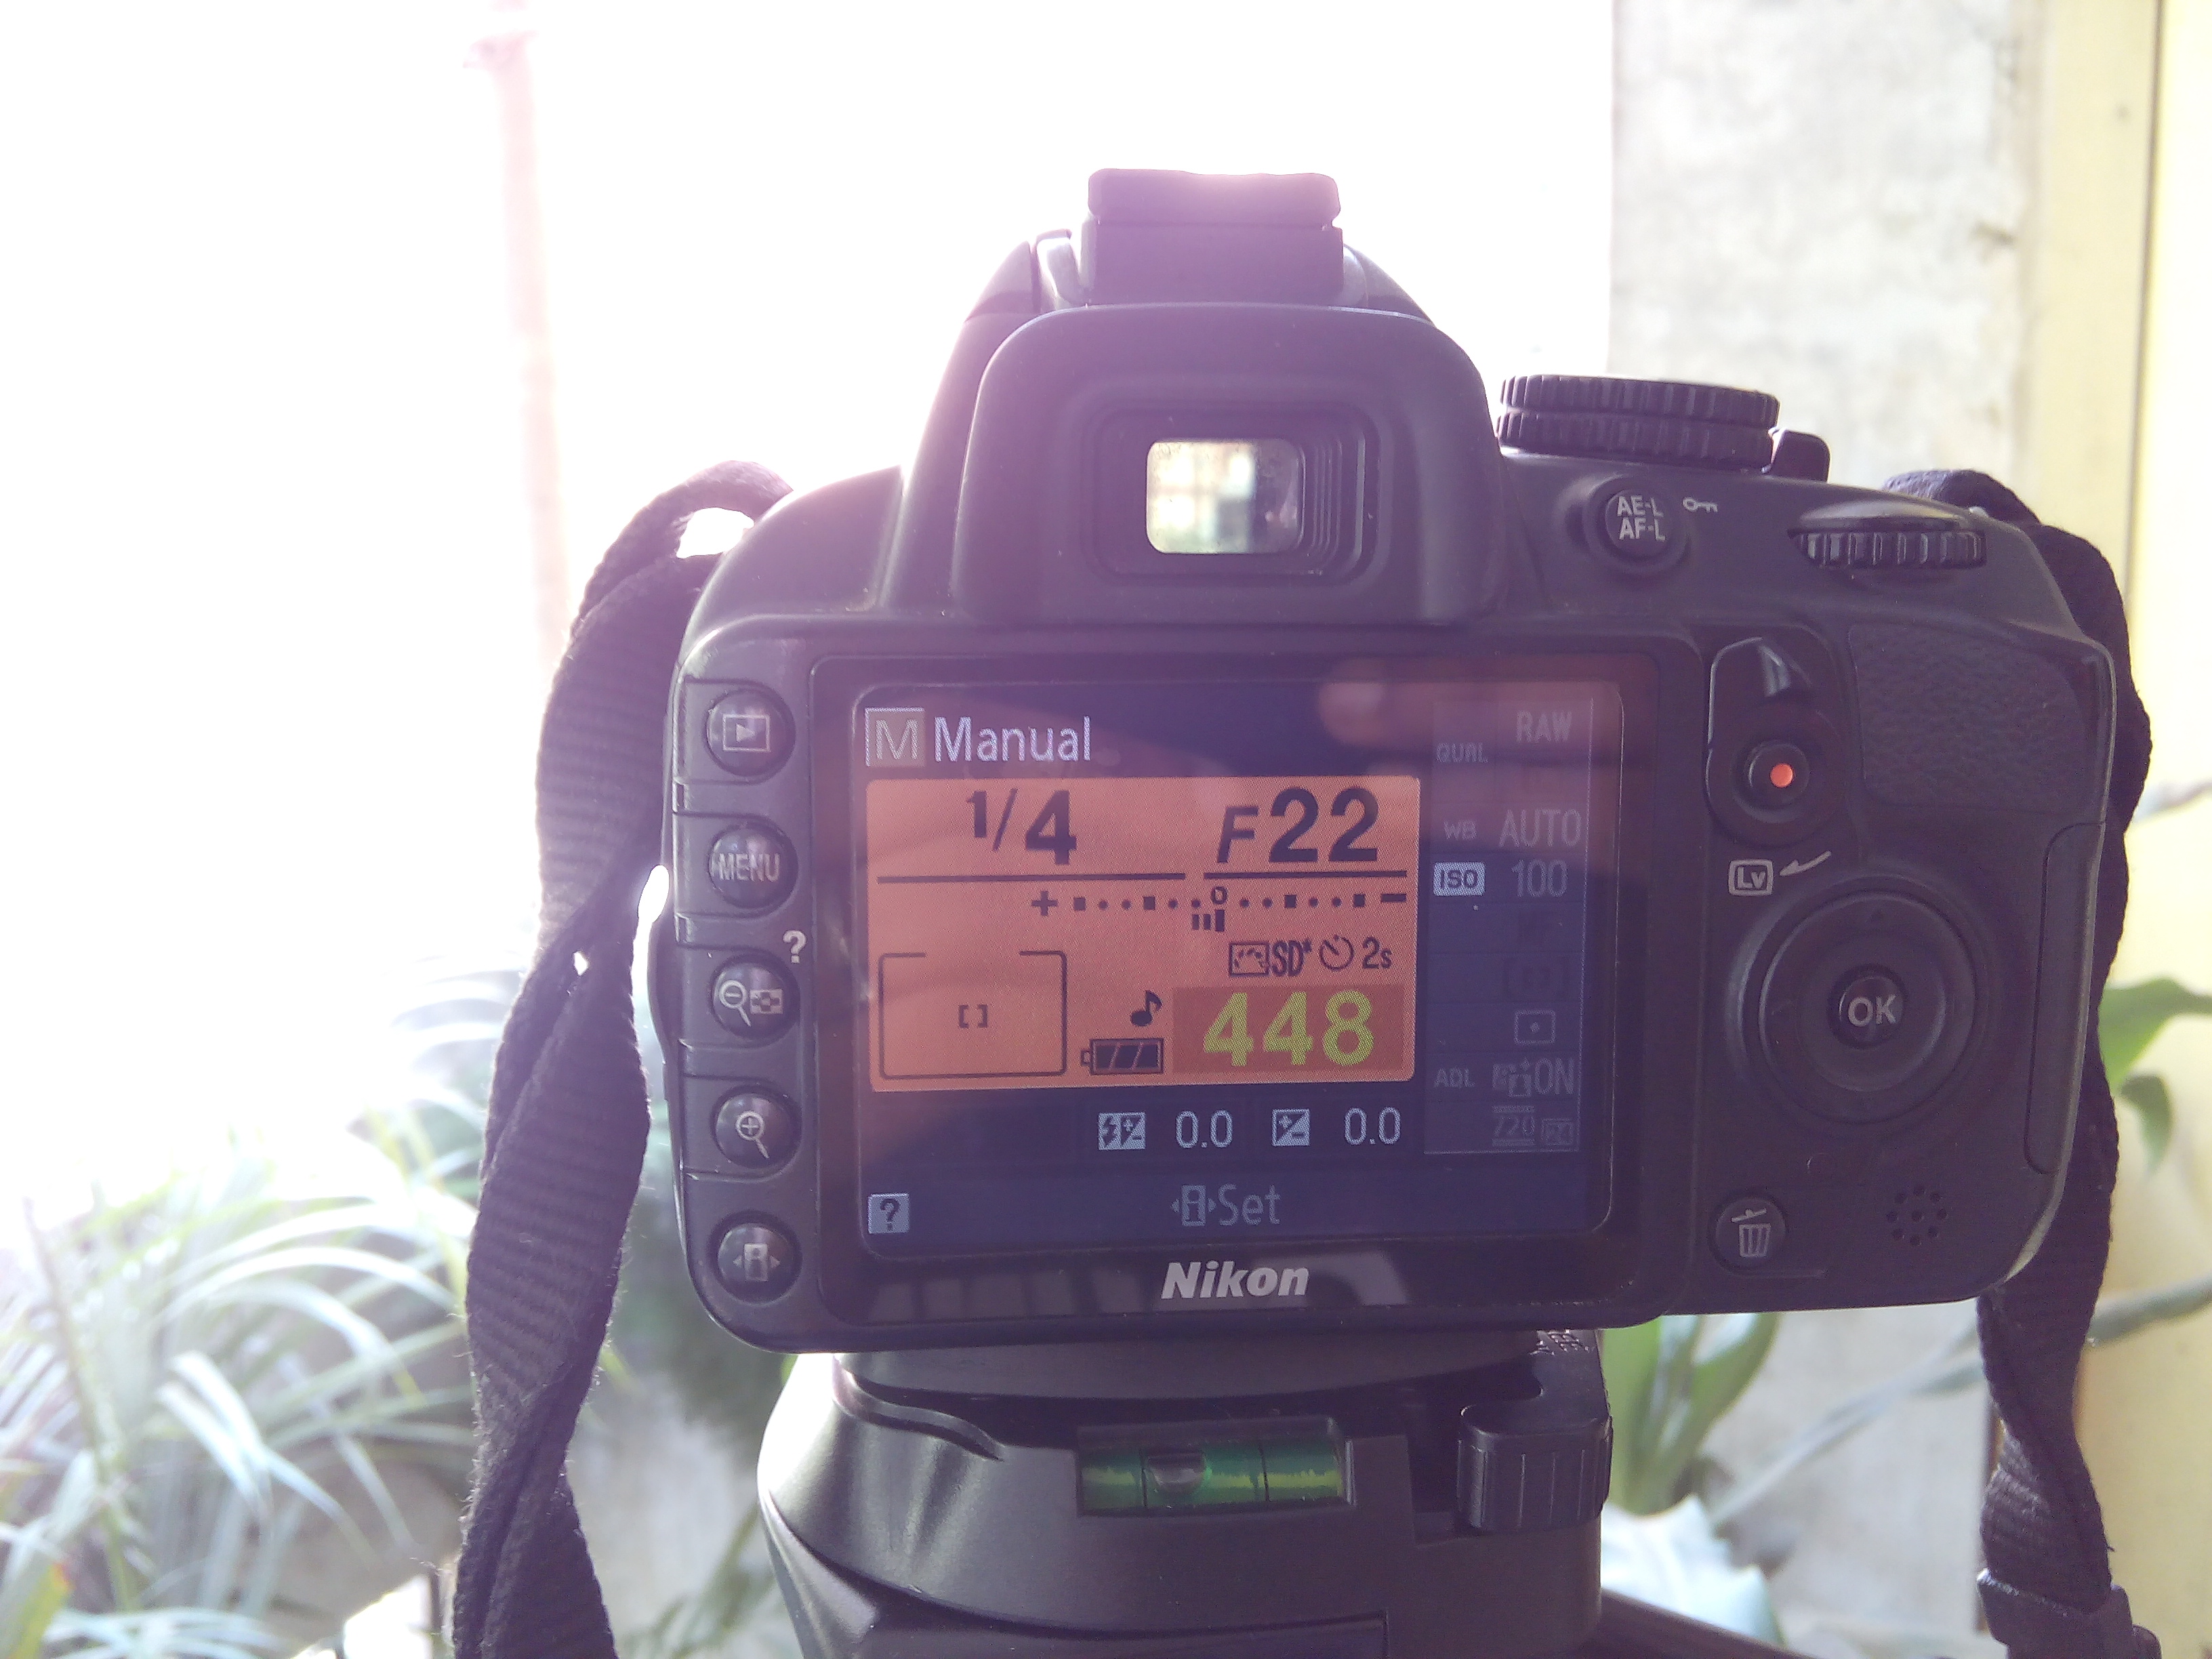
These modes are tried and tested over the years of SLR history and they deliver impeccable results with an appreciative hit rate, its a huge advantage to know how they work. But then, there are those, who want to have total control over the Trinity. If you are amongst those who are not afraid to take complete control of your camera, have a lot of misses and very few hits initially, learn to read the photo histograms, understand the range finder and then take a shot…then switch to the Manual mode, “M” on the Nikon bodies. As an afterthought, sooner or later, you will have to shift to the Manual mode to grow…so I ll suggest, get friendly with the Manual mode early on, but do know the quick settings that might be handy in a jiffy.

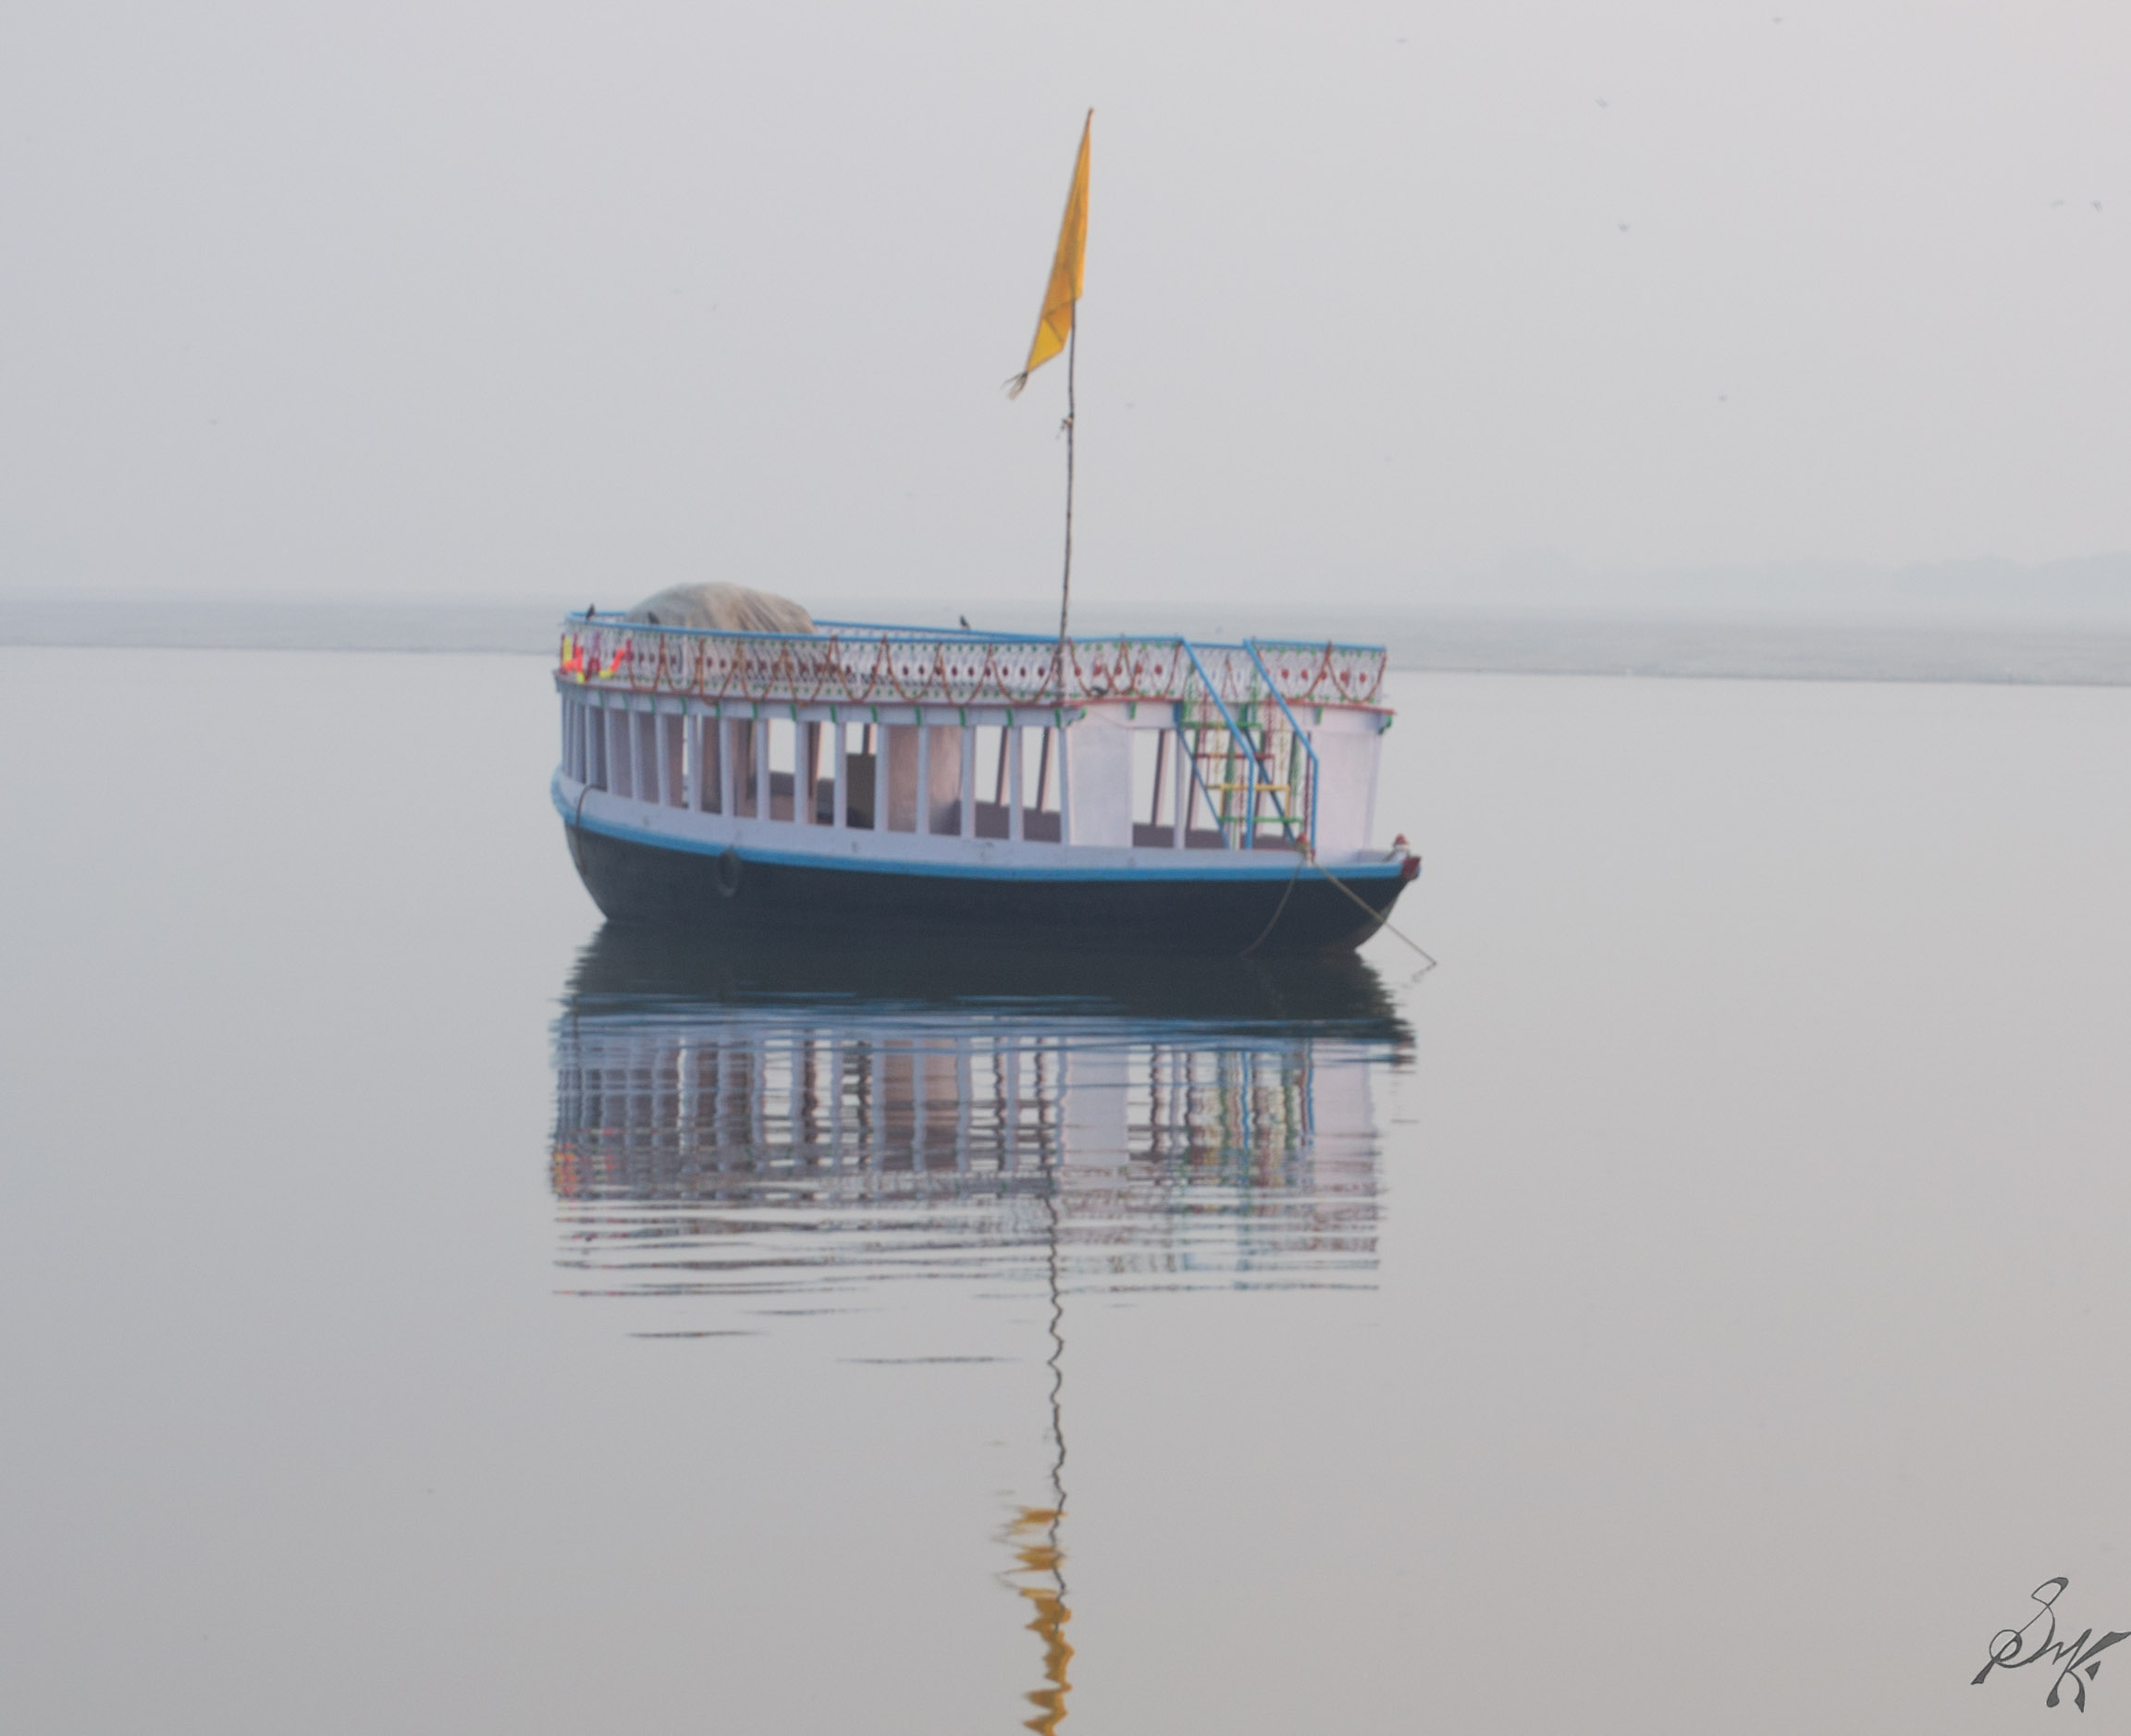
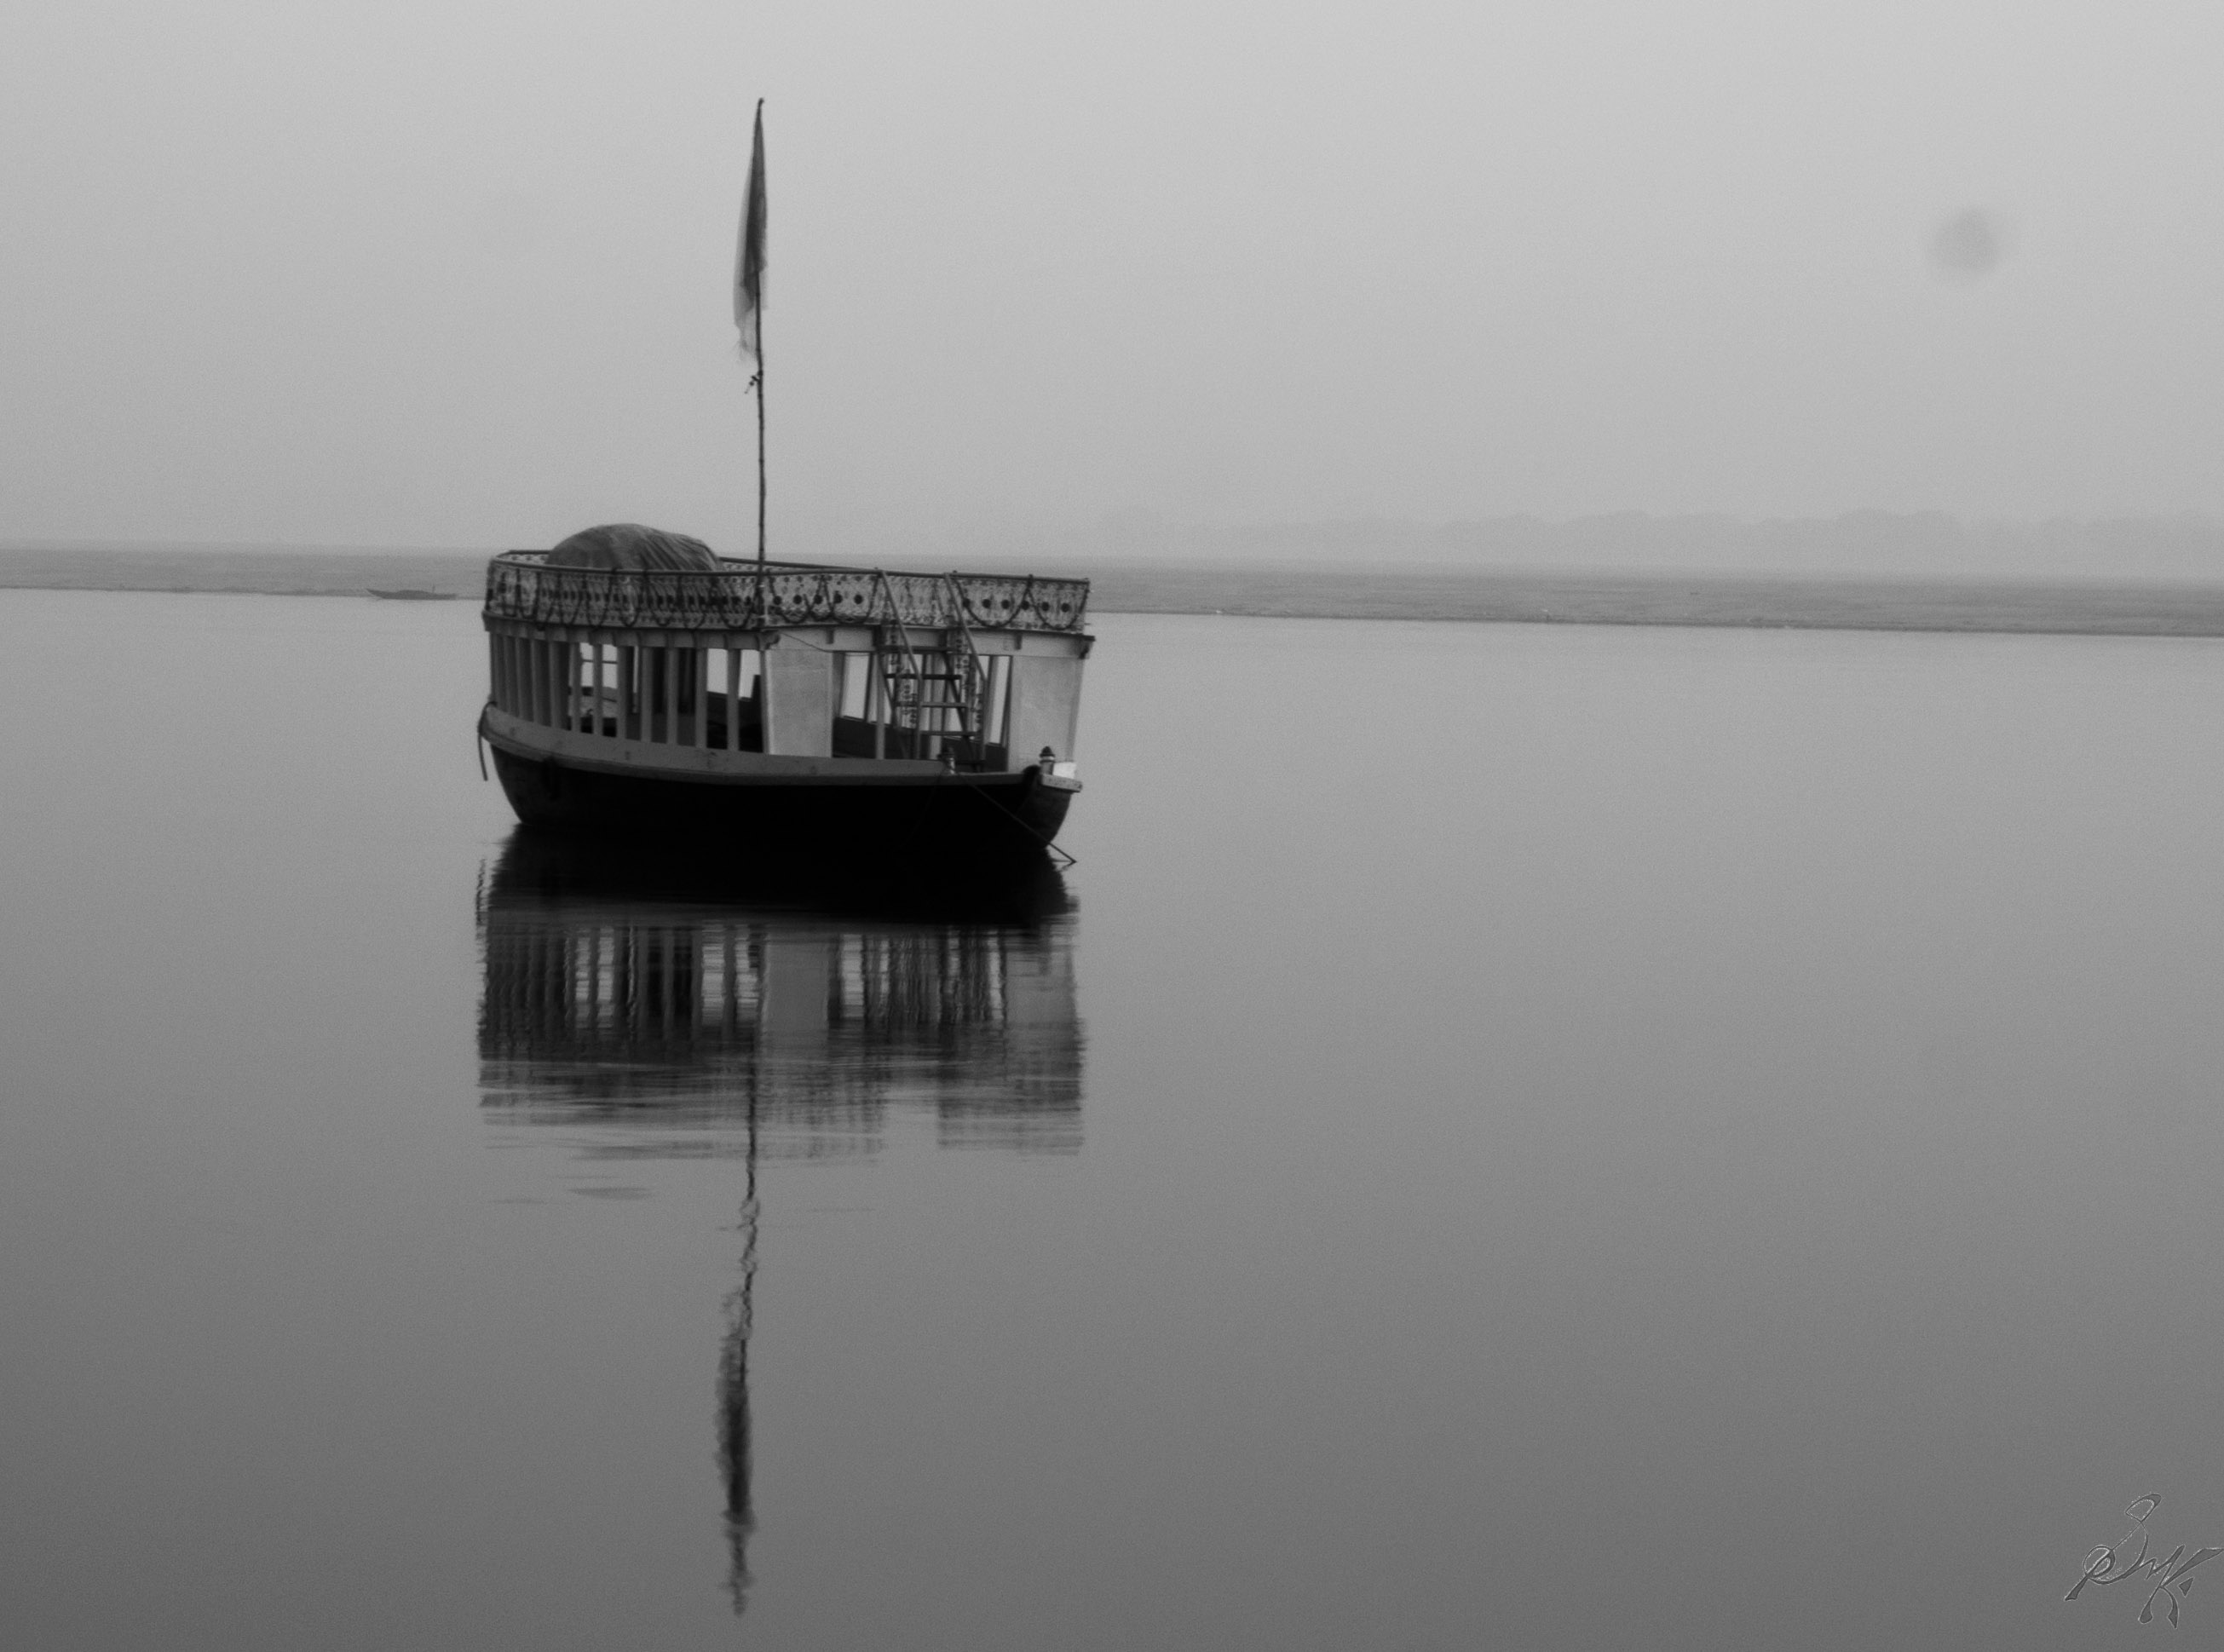
Once you get cool with the modes, shots like these, are going to be easy.

  15s  1/250

1/200

Next up, the first photo effect and some shots of a very common and very beautiful, Bokkeh!

Cheers!