The Elephant Parade : Mumbai 2018

With the novel objective of raising awareness for elephant corridors across the country, The Elephant Parade India arrived at Mumbai this month.
Along came exquisitely designed and painted elephant replicas, each having an interesting story to its own. Apart from being an awareness raising tool, it is also an amazing means to showcase the artist’s expertise and talent. I met with the following elephants at the Phoenix Marketcity at Lower Parel. The elephants shall be on display in various locations within the city and details can be found here.

Iridescent Elephant from Elephant Parade, Mumbai

Black Elephant from Elephant Parade, Mumbai

Blue Elephant from Elephant Parade, Mumbai

Black Shiny Elephant from Elephant Parade, Mumbai

Brown Exotic Elephant from Elephant Parade, Mumbai

Green Elephant from Elephant Parade, Mumbai

Black Elephant from Elephant Parade, Mumbai

Forest Elephant from Elephant Parade, Mumbai

These beautiful elephants are also available for sale using the website mentioned earlier. It is my recommendation that you go and have a look at these elephants as and when possible.

As a note to my readers who may be in Mumbai from 14-18 March, a set of these exquisite elephants shall be at the Bandra Fort during the above mentioned days. The opportunity to capture stunning photos is quite an unique one.

A trick to reduce the influence of crowds on the photo is to have a long exposure. The elephants being stable are sharp while the crowd fades away due to them moving swiftly. In case there are posey people in front of the elephants, they shall show up.  There shall be ghosting, for sure. This is the minimum hassle method to obtain a clear picture. Drawback being it can be used only when you can shoot a long exposure, meaning, day time shots are not possible. For the daytime shots, you can set your tripod and take a series of shots and then use the “Median” command in Photoshop to eliminate the crowd. Ghosting shall be minimal.

Go have fun, use a different technique and share your results in the comments below.

Cheers!!


Long Exposure : Demystified

Time and again, I have had requests and queries on how to take the amazing “trails” photos, today, I shall try to demystify them.

Long Exposure, Trails, Diwali Night, Marine Drive
The technique is called Long Exposure. As the name suggests, we make the photo’s exposure long. In doing so, any light source, or lit up object, that is incident on the sensor, shall be registered by it. In technical terms, we extend the time the shutter stays open, by decreasing the shutter speed. This causes the exposure to be “long”.

Here’s an example:

Long Exposure, Queens Necklace, Marine Drive, Mumbai

Now, to achieve this, we need to have a shutter speed that is low enough to form the light trails, while the aperture has to be such that the photo does not wash out, all the while maintaining the ISO at a level where there is not a lot of noise.
We can get to this unique combination by fiddling in the Manual mode:

Nikon D7200, Manual Mode setting

Or, by setting the camera in the Aperture Priority mode (AV mode in Canon).

Nikon D7200, Aperture Priority Mode setting

The objective should be to have an optimal exposure, despite the slow shutter speed.

Nikon D7200, Aperture Priority Mode setting

With enough practice, taking stunning photos shall not be difficult at all.
Long Exposure is amazing for smoothening out ripples in water, or giving the water a milky flowy look. Do try them out.

Long Exposure, Smootheing of Lake, Bangla Sahib, New Delhi

Slowing down water flow, Elephant Falls, Meghalaya

It is also useful to take photos in low light environments such as this dimly lit monument at the Lodhi Gardens, New Delhi.

Long Exposure, Lodhi Gardens, New Delhi

I shall conclude by stating that unless you practice, you shall not be perfect. Go out there, and explore the amazing world of long exposure.

Cheers!!

A to Z Challenge: X – X Speed

X- Speed

Also known as the shutter sync speed, is the maximum speed at which you can take a photo so that the frame is exposed correctly. You can shoot at speeds slower than the sync speed, but what happens if you shoot faster, I ll show you here.

The following photo is the auto exposed photo, no flash.

Scene exposed. No flash.

The one below is at 1/200 shutter speed. The max sync speed is 1/320.

Scene exposed by flash, Sync speed 1/320, shutter speed 1/200

The one below is at 1/320. Notice that there is a subtle difference in the light level, though not very noticeable.

Scene exposed by flash, Sync speed 1/320, shutter speed 1/320

The one below is at 1/400th of a second. Do you see a very thin line of black fringe beginning to show up in the photo?

Scene exposed by flash, Sync speed 1/320, shutter speed 1/400

Next, we go 1/500. The band is more visible now.

Scene exposed by flash, Sync speed 1/320, shutter speed 1/500

Here we go with 1/640. The band takes up about 1/3rd of the frame.

Scene exposed by flash, Sync speed 1/320, shutter speed 1/640

At 1/800th of a second, half of the frame is gone. The flash fires at the first curtain. So, by the time the flash is able to fire and light up the scene, the second curtain has already covered half the sensor.

Scene exposed by flash, Sync speed 1/320, shutter speed 1/800

At 1/1000th of a second, there is no effect of the flash and it as if the shot has been taken at 1/1000 speed without the flash on.

Scene exposed by flash, Sync speed 1/320, shutter speed 1/1000

Now, if you are using only the onboard flash, chances are that the camera will not let you go past your sync speed as long as the flash is active. Same with the use of proprietary flashes from Nikon, Canon etc. But sync speed is an issue that must be tackled if using third party non sync flashes (the cheaper variety ones). To ensure that your photos don’t have the two-face kind of a situation, pay due heed to the flash sync speed of your camera.

Last time, X was for X Process.

As the last post of the year, I take this opportunity to thank all my readers and followers who have come here maybe to clear some doubts, learn something new or just enjoy the photos, thank you, thank you all. I wish for all of you to have a wonderful time, be closer to achieving your dreams and making them real, and to having a superb year ahead! Happy New Year!

Cheers!!

AtoZ Challenge: N – Normal Lens

A normal lens is one which produces images corresponding to the normal viewing span of a human eye. Generally this focal length is taken as 35-50mm. So, photos taken at focal lengths beyond the range are termed to be wide or telephoto and hence the wide and telephoto lenses.

The 18-55 mm kit lens, despite popular disregard, is one the most versatile lenses out there and can be used for shooting landscapes to portraits with ease and still produce quite amazing results.

Bandra Worli Sealink, 18 mm

Bandra Worli Sealink, 55 mm

The photos above have been shot at 18mm and 55mm respectively from almost similar viewpoints.

Comparing the results against dedicated lenses for the same is not a fair game though. The dedicated lens, such as a 35mm or a 50mm F1.8/1.4 are meant to be high performance and have immense light gathering power, but they lack the versatility of a zoom.

The photo of Laxmi here shows why it is worth investing in a prime lens, despite whatever limitations it may have.

Portrait, 50mm

All said and done, a normal lens is not fit for shooting landscape while I would go about shooting portraits on a normal lens all day long happily! Tell me what do you think about the judgments in the comments.

Last time, N was for Noise Reduction.

Cheers!!

AtoZ Challenge: K – Keylight

Keylight

Often referred to as the most important light in the photo, it is the one which makes your photo come alive in terms of depth and dimensions. One needs to choose their primary source of light and its use or the lack of it can create varied effects, as intended by the photographer. While making a light map of the shoot, generally, the key lights are the first ones which are put into place.

The following shot was taken without a key light in place.

Bubbles in focus, no key light

Now, with the introduction of a key light into the scene, the results, I find, are quite adorable 😉

Key Light being used for lighting

It is easy to realize that having a key light can mean a lot of difference in the final photo.

Immense thanks to Tuhina for being my model over and over again.

Last time, for K, it was Kelvin.

Go ahead and shoot some stunning portraits.

Cheers!!

AtoZ Challenge: I – Infinity Focus

Infinity Focus

Often we hear the term “Infinity Focus” being used while shooting landscapes or during astro photography. What it actually means is, the focus plane to be such that maximum light rays which focus on the sensor shall be in parallel plane.

While shooting landscape photos, we focus at a plane, where the infinity of the lens is within the hyperfocal distance; but while shooting in astro photography, the focus is at infinity. This post elaborates more on the point.

In practice, sometimes, due to ambient conditions, the camera may not be able to focus correctly and give results of the following kind.

Hazy photo of a landscape

This is where the infinity focussing is useful. Since the object is far away from the lens, focussing in a manner where the subject is in the hyperfocal infinity, yields a better result.

Clear Photo of landscape

The infinity markings on the lens are found in the following ways

Infinity markings on lens

Go out there and shoot beautiful landscapes and amazing star trails and milky ways and never worry about soft focus any more.

Last time, I was for ISO.

Cheers!!


AtoZ Challenge: H – Hot Shoe

Hot Shoe

It is a mounting arrangement found on the top of the camera bodies for mounting external flashes, commander modules, GPS modules etc. The hot shoe is generally found in a standard form and the various compatibility issues arise due to the different firing voltages which trigger them.

Nikon D7200, Hot shoe, Black and White

One may not find daily use of the hot shoe but it sure is an indispensable bit of the camera.

Tell me in the comments what do you generally mount on the hotshoe!

Last time, it was Hyperfocal Distance.

Cheers!!

AtoZ Challenge: G – Ghosting

Ghosting

Ghosting is a phenomenon that is observed if there is strong light directly incident on the lens and it reflects off the various lens elements, the diaphragms and even the sensor, and causes multiple translucent artefacts to be created. This often causes the photo quality to degrade. One of the ways past this is to use a lens hood, or to use polarizer filters.

Ghosting, Marine Drive, Mumbai, Light Trails. Long Exposure

The above photo shows examples of ghosting.

Tell me, how do you deal with this?

Last time, it G was for Grain.

AtoZ Challenge: F – Forced Perspective

Forced Perspective

Take a good long look at the picture below.

Forced Perspective Example

Often we see photos of people holding the tip of Eiffel Tower or leaning against the Leaning Tower of Pisa or even gobbling up the sun. That is what forced perspective is all about. We use the camera settings in such a way that the difference between the foreground and the background is intentionally blurred.

Now look at the photo below.
Explaining Forced Perspective

You notice that all the objects are in different planes, yet in the first photo they seem to be kept side by side. That is the beauty of forced perspective.

Go have some fun with the optical illusion!

Last time, it was Focus Stacking.

Cheers!!

AtoZ Challenge: E – EXIF Data

EXIF Data

It is a condensed form of Exchange Image File format which is basically a standard format set to report the various parameters of a photograph. The data that are captured mostly include the make of the camera, shutter speed, focal length, the aperture, ISO. When suitably available, location coordinates are also available in the EXIF data. Extra information as to whether the flash fired or not, or the shutter count of a camera can also be found by studying the data.

Long Exposure photo, Fire works, Cars, Lighttrails, Mumbai

The EXIF Data for the above photo is shown here below as a screenshot from my phone.

Exif Data of the photo

This data is immensely useful if someone is trying to learn and take cues from other photographers as to what settings to be used in particular situations.

Do you check the exif data of other photogs?? Let me know!

Last time, it was Exposure Bracketing.

Cheers!!

AtoZ Challenge: D – Double Exposure

Double Exposure

The origin of this interesting bit of art probably occured when someone, while shooting film, forgot to forward the roll to the next empty slot. As they shot, the already exposed negative got re-exposed and the photos superimposed creating something interesting and Voila! double exposure is born.
Now a days, we dont need to fiddle with the films, maybe just a bit in the digital darkrooms to get ourselves a nice double exposure photo. Some cameras and apps on phones allow you to take amazing double exposure shots.

Bike, Open Roads, Double Exposure
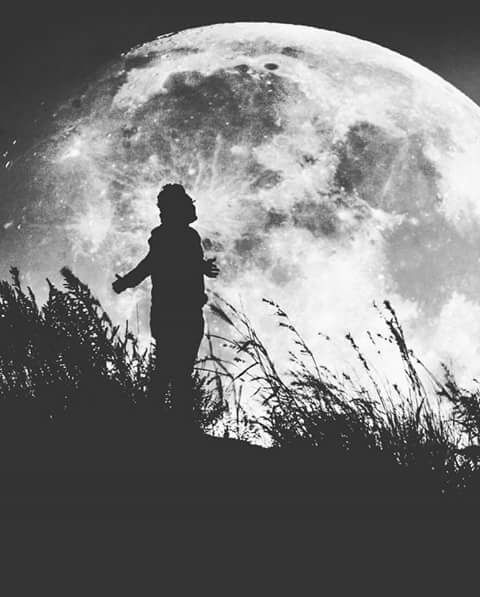
The shots here are proof of concept shots of double exposure.

Man, Moon, Double Exposure
The thing about double exposure is that one must be able to blend the photos and make some sense out of them.

Go ahead and make wonderful surreal photos and share them away!

Last time, D was for Depth of Field.

AtoZ Challenge: C – Colour Temperature

Colour Temperature

Hot objects emit radiation. If the radiation were visible, say visible light, what would be the temperature of the body emitting the radiation? For example, for soft white light, it is accepted that the body must be at about 3000K. This 3000K is the colour temperature.

The usefulness of this knowledge in photography? Immense, unless you want to spend hours in the darkrooms making the photos look natural. The two photos below shall explain better.

Pug, Yellow Light, Cute, Unrealistic Colour
This one is a no colour correction photo, while the one below is with proper colour temperature settings dialled in.

Pug, Colour corrected, Brown and Blue , Realistic colours
Notice how the colour is realistic now. Since the place was lit by dim yellow lights, everything had a yellow tone, which is not the natural colour.
The settings that need to be tweaked within the camera to get realistic colours is the white balance. Dial in the on which matches your setting best, and shoot away.

Last time, it was Composition.