To Vietnam: Hanoi

Apologies for being away for so long, the previous weeks had been hectic.
Anyway, we reached Hanoi on the noon of 5th of April, 2018. We met an amazing Portuguese couple in the airport and they suggested we take the bus to the Old Quarters. So, we boarded the bus number 17 (bus number 7 also takes a similar route) for a ride which dropped us close to our place, a lovely AirBnB located on the Hang Ma road in the Hoan Kiem district.

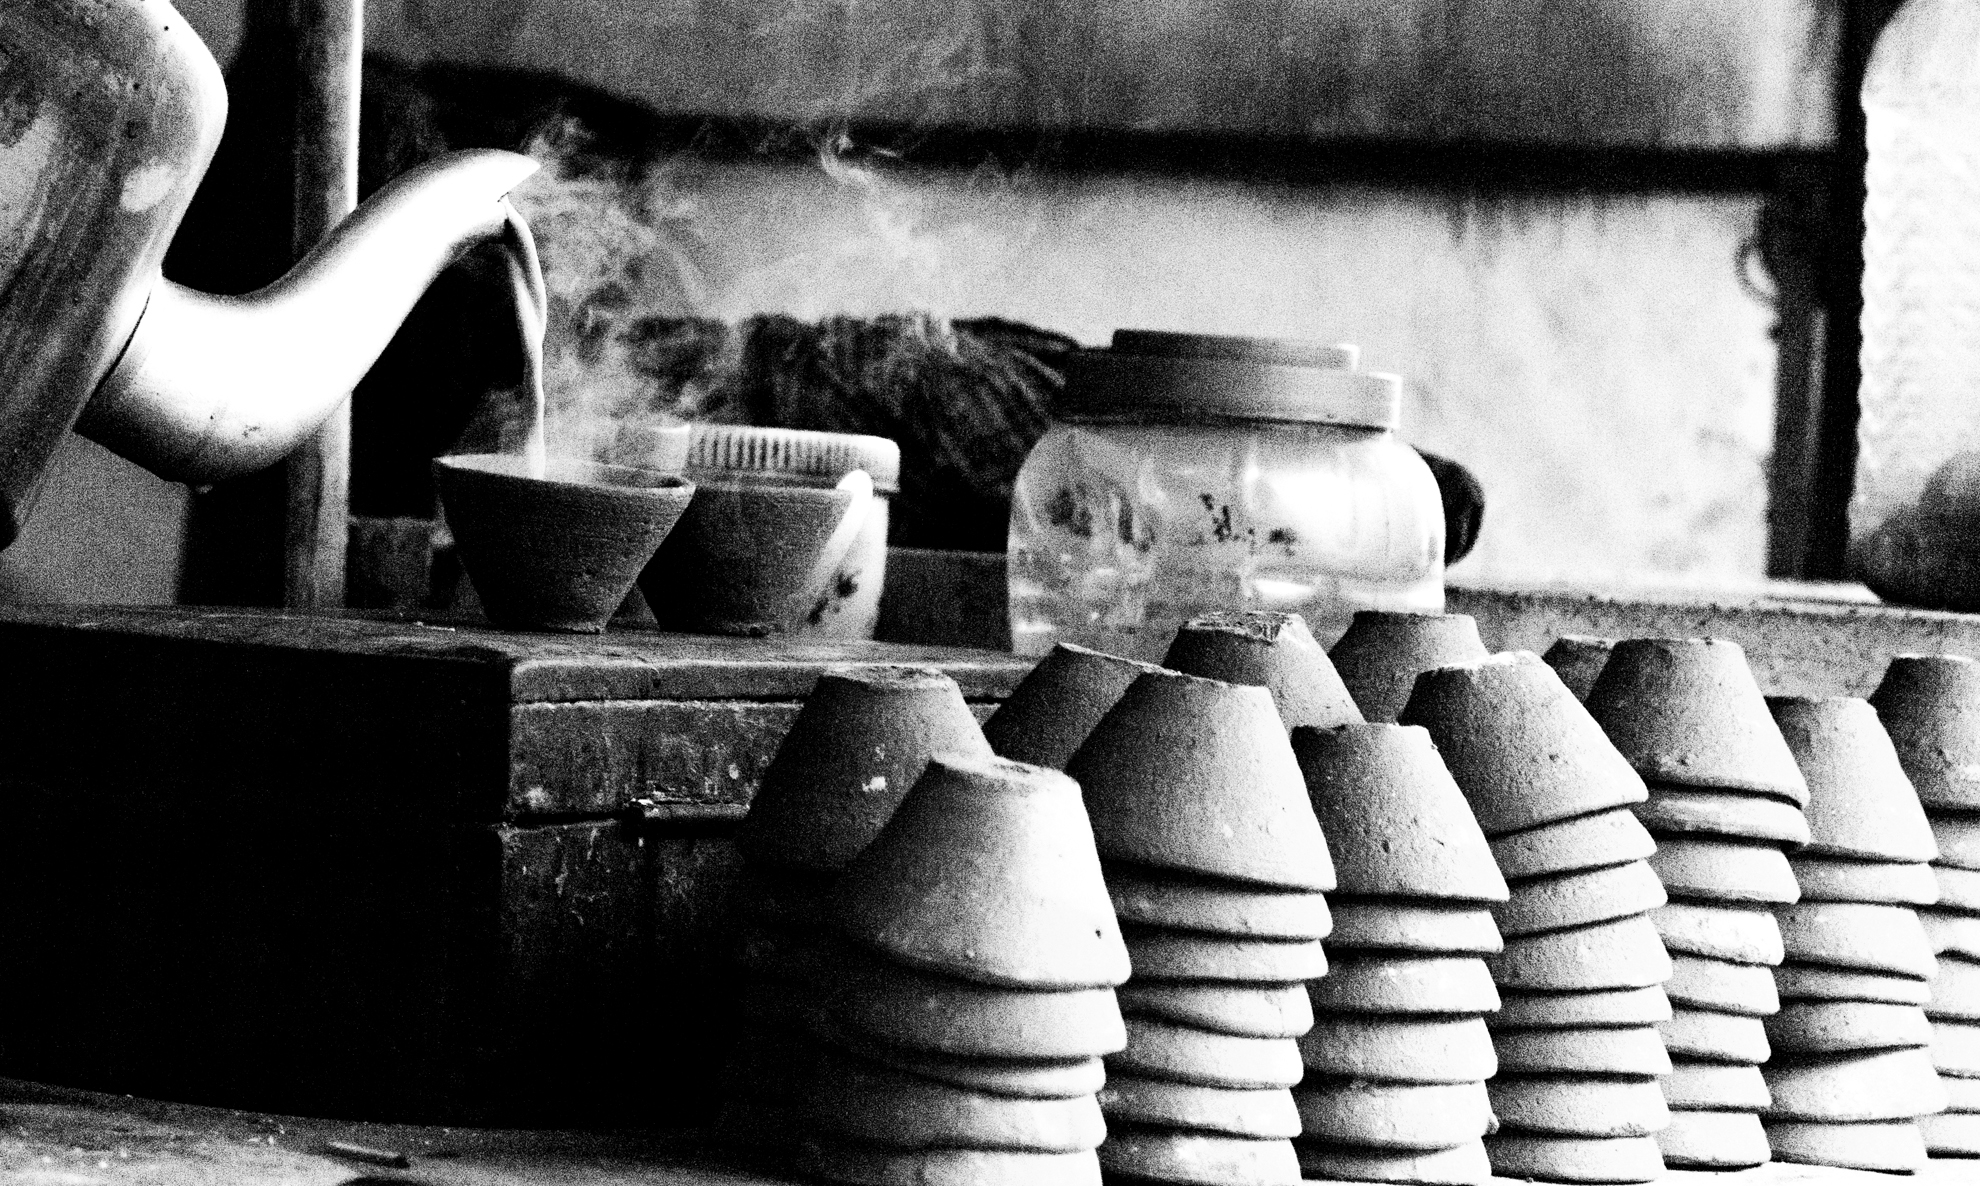
That evening, we just strolled around the place, enjoying an occasional Banh Mi with a Bia Ha Noi. The street 9 Ta Hien is a an amazing place to be. Foodie’s paradise and you shall be spoilt for variety.

The food street, Hanoi, Vietnam

We were excited about the next day, for we were scheduled to go the amazing Ha Long Bay.

Rain on window, Hanoi, Vietnam

The weather next day was gloomy as the tour bus came to pick us up. There were chances of rain, and by the time we made it to the halfway point between Hanoi and Halong, news arrived that it was too dangerous to go to sea. So, we turned back. Apparently, this happens quite often, and we blessed our lucky stars that we had planned the trip on the first day at Hanoi, we still had the next day to take a shot. If a situation like this happens with you, make it a point to talk to your booking agent so that an alternate may be arranged.

Once back in the city, we found no reason to waste any time by not sightseeing within the city. Leaving Ankita and Manas lounging back home, scheduled to join us in some time, I and Ritwik went out on foot.

There is a Train street in Hanoi, which is basically a train crossing right in the middle of the city, with houses very close to the track.

Train Street, Hanoi, Vietnam

We had our customary Banh mi, yet again, and were headed towards the Hoan Kiem lake.

Freshly baked banh mi buns, Hanoi, Vietnam

The Hoan Kiem Lake, Hanoi, Vietnam

Flowers on the banks of Hoan Kiem Lake, Hanoi, Vietnam

The lake sits in the middle of the crowded city, with buildings on the banks and people thronging all about. Despite the bustle, there is a sense of calm and peace near the lake. Within the lake, is the Turtle Tower.

The Turtle Tower, Hanoi, Vietnam

The Turtle Tower against a modern background, Hanoi, Vietnam

Next up we made our way to the famous Opera House. This is a grand French opera house in the city centre, which was commissioned in the early 1900s and is still in operation.

The Opera House, Hanoi, Vietnam

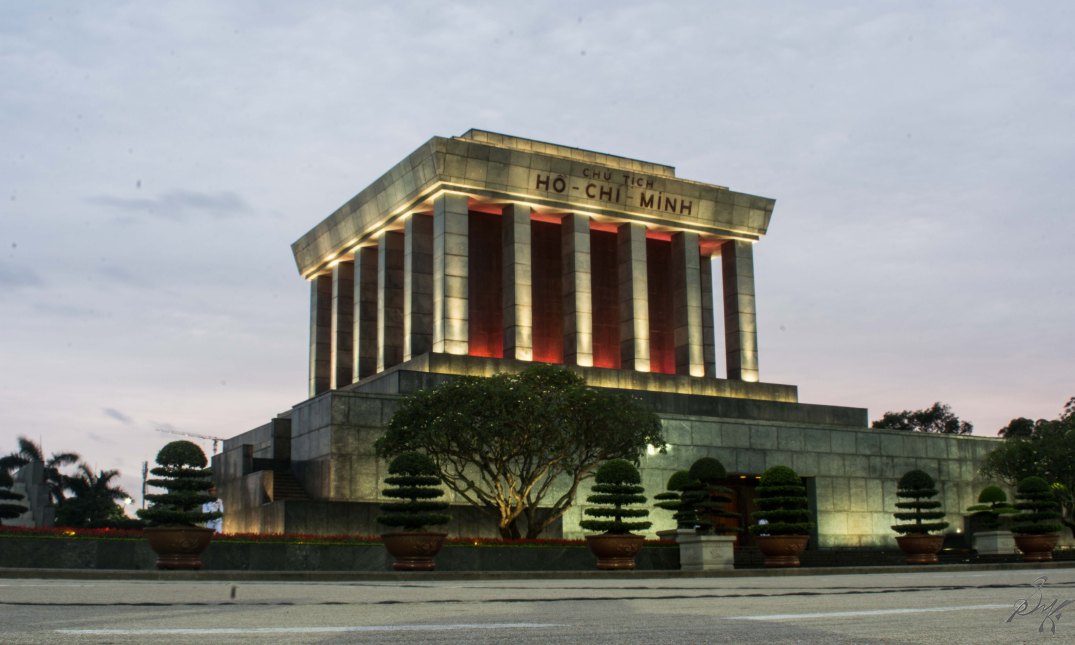
A short walk ahead, took us to the Ho Chi Minh Mausoleum, a grand building in memory of the country’s leader Ho Chi Minh. Right beside the mausoleum is the museum, which we could not go in to.

The Ho Chi Minh Mausoleum, Hanoi, Vietnam

We did go to the One Pillar Pagoda situated behind the mausoleum.

A paper cutout pop up of One Pillar Pagoda, Hanoi, Vietnam

Somehow, I am not getting the actual photo of the pagoda, so, making do with a paper cut-out pop-up model’s photo of the same. These pop-up models were available in plenty in the night market street.

Now, it was getting dark, so we decided to meet up near the lake. We took an Uber to the night market on the way, which turned out to be a long street, where almost everything is up for sale, from apparels to jewellery to food and the market culminated at the lake.

Various pop up cards in the night market, Hanoi, Vietnam

Soon, we met up and were trying to find a decent place to have dinner, when we heard the unmistakable music of the song Despacito. We followed the music, and found this.

A street performer near Hoan Kiem Lake, Hanoi, Vietnam

He had a small team on a synthesizer and drums to back him up and he played around effortlessly to a crowd. Since we had nothing else to do, and were quite enjoying the music, we stayed there for more than an hour listening.

We found some banh mi yet again, and wrapped up for the day.

For the ones who want to explore the city, wandering around is a way to go. For the more structured ones, Hanoi Walking tour may be the easier way.

The next day, would be our shot at going to Ha Long bay.

Cheers!!

A to Z Challenge: Dec 2017

Hi there all,

Writing enough blog posts, after a 7 to 9 (pm that is) job is a tough thing, as I have come to know, and also you, my dear readers, by the meager number of posts. Now, I decided to pile up some more of the difficult stuff and do another A to Z Challenge. Check out the previous one here!

For the new joinees here, A to Z Challenge is a month long blogging marathon, where you blog letter by letter. Begin at A, finish at Z. Simple as that. Now, how you choose to blog and what you blog is entirely upto you.
I have friends who blog poem after poem, for 26 days straight and then there’s me, who picks up a word and expands on it.

Since I am a photographer, my challenge prompts shall be from the world of photography, pretty much like the last time. I shall try to keep the topics as varied as possible and avoid repetitions. I will backlink the same lettered posts from the previous stint in the upcoming ones.

Do follow the series as it unfolds, and let me know of your views and takes in the comments 🙂

Cheers!! Lets Begin!

En route Lavasa

The plan was made on an impulse, so the three of us, Mahajan, Jobin and I, we grabbed helmets, managed a couple of bullets and we were on our way to Lavasa.
Lavasa is a cool place to be, nice lake town, planned and built nestled within the ghats. True! The flip side is, they charge ₹200 per person as an entry fee to the town, and somehow, the minute they see a DSLR, they assume the owner to be on a professional shoot, and they charge you ₹5000 for a day’s pass (unless it has changed recently).
Now, our agenda was clear, to get some cool photos of us, on bikes. So, again, why Lavasa?
For, the road to Lavasa, offers amazing curves, and is not very crowded. Here are what we shot 🙂

Mahajan came charging round the corner, I turned back on the bike, and click and click!

Man on Royal Enfield Bullet taking a turn

We stopped to shoot 🙂

Man on Royal Enfield Bullet taking a turn

Man posing with a Royal Enfield Bullet

Two men on Royal Enfield Bullet taking a turn

Man on Royal Enfield Bullet taking a turn

Two men posing with Royal Enfield Bullet

Three friends posing with their bikes

Even I got a shot of mine. Loads of thanks to Mahajan for the shot 🙂

Man on Royal Enfield Bullet taking a turn

Spotted this yet to be launched Tata Nexon test driving around.

Tata Nexon car test driving

With mission accomplished, we turned back. Since all three had been to Lavasa earlier, we didn’t miss it at all. The trip was fun, the ride was awesome.

Man on a bike in an empty road

Till the next post…

Cheers!!

Winter Delights!

Hi there..

For someone who stays in a mostly tropical country, winter is a fun season! I personally enjoy the chilly weather, the breath coming out as smoke, the smokes lingering near you, hot tea, dried leaves, color riot all around…and puppies!! I find winter to be kinda romantic too!! :p

Check the pics, lemme know if you liked them!

DSC_8976

DSC_8983

DSC_9077

DSC_9083

Cheers!!

5. Flash Photogrpahy

Flash photography, is simply put using the flash during taking the photo. We all know what a flash does, add light to the scene, thats the nutshell. Good use of flash allows the proper amount of light and also not washing off the colors in a photo. Most common use is during the night time photographs we take. These basic things, we are all aware off, and knowingly or not, we use them every other day.
But what do we do, when our subject is backlit, most commonly by sunlight? We take a photo without flash, and we end up having silhouette photos. I, personally, love the silhouette shots, but sometimes, you would like that the subject’s features, expressions too be captured. This is when the flash becomes indispensable. This technique of using the flash is known as “Fill Flash”.
Now, in a DSLR, you will have options of how strong you want the flash to be. With use and experience, you shall be able to judge the amount of light your scene needs and other than practice and trial and error, there is no short cut to it.

When you go through the options within the flash menu, generally, you ll come across the following options.
1. Normal Flash: This one is the standard issue flash setting. The shutter and the flash are synced and they normally fire simultaneously.

2. Slow sync Flash: This option comes up if you want to depict both motion and also freeze your subject. On the point and shoots, the party mode gives you this option. Here, the flash fires with combination of a slow shutter speed. The slow shutter speed gives the option to depict motion, while the flash freezes the subject in sharply.

Slow sync has two options, which come up in the Manual mode in the DSLR…
a. Front Curtain: Here, the flash is fired at the beginning of the exposure. Practically speaking, suppose you take the picture of a car moving from left to right using this method, then, the photo will have the car being sharp on the left side of your shot and then the trail of light leading it as the car exits from right. Here I show it with a coin toss! Notice how the falling coin is also captured in the shot.

Front Curtain
Front Curtain

 
b. Rear curtain: Similarly, here the flash is fired just before closing the shutter. It also does the same job, just from a different perspective. Same car, same direction, same shot, but this time, the car will be sharp in the right side of the photo with a trail of lights in the back. Similar coin toss, but here, you can see it spinning and in the moment the flash was fired, the coin’s motion has been frozen.

Rear Curtain
Rear Curtain

Flash photography can be used very creatively from making weird blurred backgrounds to eliminating shadow to freezing motion and so on…Go on take the shots and have fun creating stunning effects in the photos right in the camera.
Cheers!


Bokeh!!

Often, we come come across photos which have a sharp subject and a dreamy smooth defocussed background! That effect is called, Bokeh! Its a japanese word for blur, or basically, the out-of-focus areas in a photo. This is an inherent effect, so nothing special needs to be done. Having a few lights on the background, makes the bokeh beautiful, and more evident.

So, open up those apertures, and shoot awesome bokeh!!

Go Bokeh!! 🙂

Bokeh lights
Bokeh lights
Blue lights bokeh!
Blue lights bokeh!

2. ISO

Hi all…today, the first basic concept of the image…ISO
Some of you might know and remember ISO stands for International Organization for Standardization and they set some standards, namely, ISO12232:2006, for determining sensitivity of a camera sensor, hence the name ISO. Not going into all the technicalities, long story cut short….ISO lets you change the sensitivity of the sensor.
Lower the ISO number (say ISO 100/200, even up to 400 on some cameras) better will be the clarity of the picture, this is kind of a thumb rule. So, why would we want to rise from these numbers at all, set the camera to the lowest ISO and snap away…we always want the sharpest of pictures right? The argument is true, Yes, we do want the sharpest photos but every now and then, we are in situations where we do not have decent amount of light. Bumping up the ISO, lets us deal with this issue. When we are increasing the ISO number, we are increasing the light sensitivity of the digital sensor. The ISO system today, in digital cameras is equivalent to what film speeds were in the film cameras. Remember the numbers written on the film rolls, and how a 400 or a 800 speed film would be pretty costly and hardly be given to us, when we were younger, while the 100 or 80 speed ones were cheaper and more dispensable. Back then, the film speeds reflected how sensitive the film were to low light conditions, more sensitive, more pricey.
But, the sensitivity comes with a trade off too…noise, digital noise. Digital noise is what causes tiny grains to appear on the photos. Sometimes we do put on a film-grain effect on the photo to make it look different, but if they come up in the original photo, it is undesirable. Now, with increase in the sensitivity, the noise also increases. To counter this, the cameras generally have a noise reduction system in them. These systems, take care of the noise till ISO 800 with ease, some take handle it up to ISO 6400 too, but beyond that, the noise overwhelms the anti-noise system and they appear in the photos.
Below are a few photos, which are almost 200% crops of bigger photos, taken of a pillow cover at various ISO to show the difference. Notice that in ISO 100, 400, and also in 800, the strands are pretty much visible separately but once beyond that, they start getting smudged in the photo…this is being caused by noise and in ISO6400 and ISO12800, the details are almost non existent.

The high end DSLRs provide with ranges near ISO204800. Agreed, at that high range, your picture will be noise and noise only, but the sensitivity will allow you to shoot at pitch darkness and your camera will see more than your eye can and give you some outputs, in theory at least…need to try this in practice someday..
Now, even in the entry level DSLRs, the noise reduction system is good enough that on a general viewing, the noise might not be a distraction to the great photo that you have taken. But as and when you start printing them, say at 100%, the noise will show up and believe me, you would want to avoid that.

To avoid the noise from creeping in and ruining your shot, you ll need to handle the aperture ( F stop) and the shutter speed….topics coming up on the next posts..

Cheers