Tonal Range
This can be defined as the range of tones, both coloured and black and white which span from the lightest to the darkest areas in the photo.
A photo with a wide tonal range shall have areas which exhibit dark areas and white areas while the ones with a narrow range shall have more of gray shades.

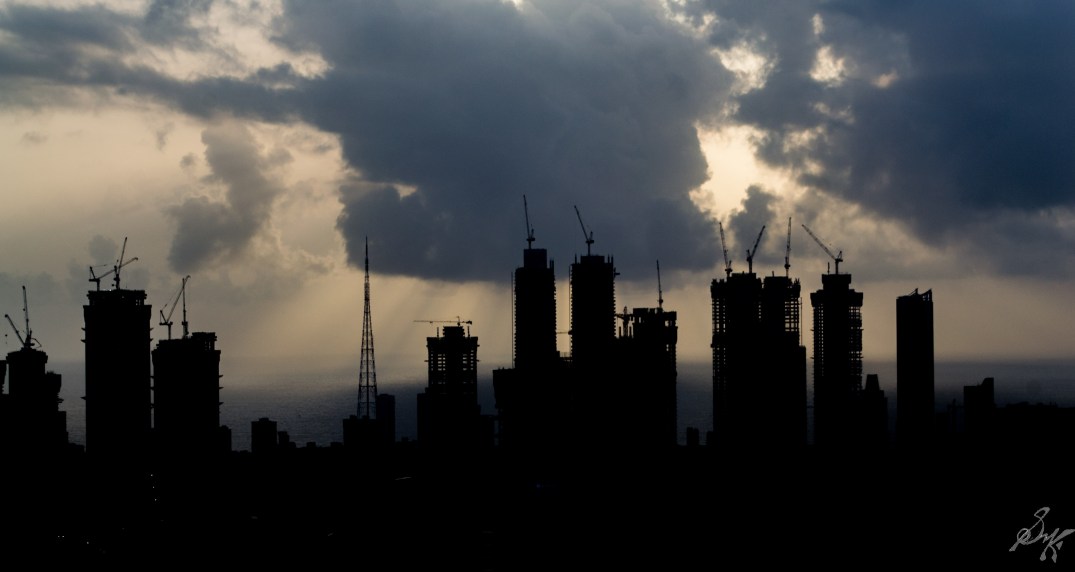
The photo above has a a majority of black areas while the tonal range extends to the other end of the spectrum too.
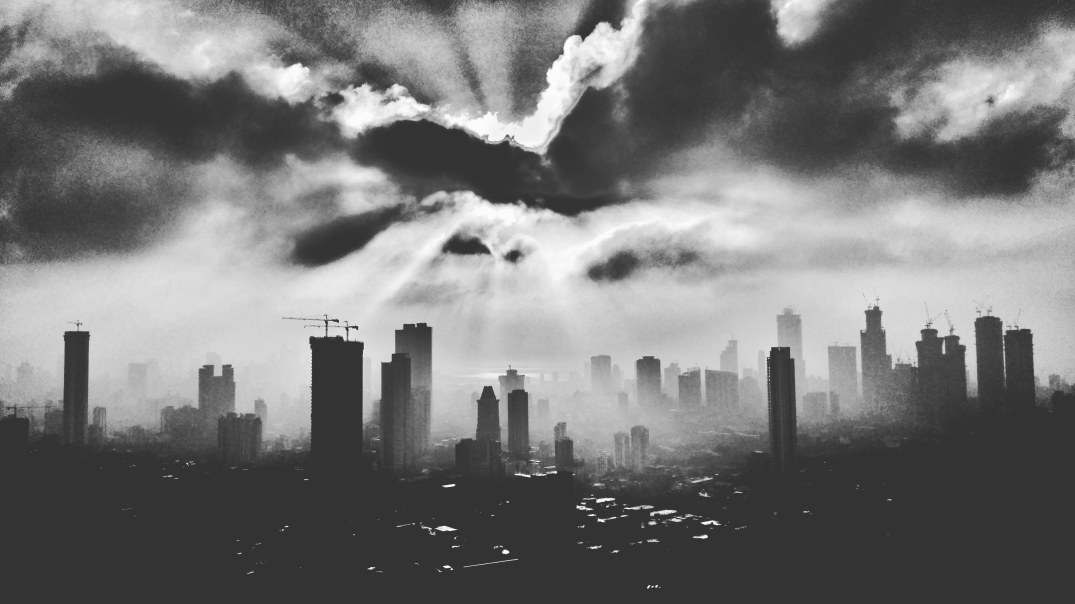
While, in the photo below, the range is more concentrated in the mid ranges and is hence overall grayish in colour.

The wider the tonal range, better shall be contrast in the photo. While striving to achieve a wide tonal range, one must also keep in mind not to overdo the exposure and exceed into the clipping regions.
Tell me about your ideas on this topic in the comments.
In the earlier series, T was for TTL Metering.
Cheers!!